Defining Your Answers with Term Lists
To go to a particular topic, click on that link.
- Introduction
- Basic Interactions
- Searching for Terms
- Reviewing Found Terms
- Selecting Terms, Branches, or Ontologies
- Searching for Ontologies and Value Sets
- Adding Your Own Terms
- About Provisional Terms
- Adding your Own Single Term(s)
- Adding a New List of Terms
- Customizing What You Have
- Rejecting Terms
- Putting Favorites First
Introduction
Now we will show you exactly how to create questions that have very precise answers, using CEDAR's semantic tools. You don't have to know semantics to use these tools— we'll give you some tips (in Choosing Controlled Terms that help you find good answers for your questions, and know they are good enough for your needs.
For you semantic experts, we provide advanced details elsewhere in this User Manual: * Tips for Template Creation: Term Discovery/Selection * Advanced Template Topics: More Semantics
In this section we outline the mechanical steps to find, select, and even create terms. The next section will tell how to figure out which terms are good ones to use.
This section (except the Customization subsection at the end) walks you through CEDAR interfaces that work hand-in-hand with the BioPortal ontology repository. This repository contains over 800 public terminologies that offer precise semantic content you can use for your metadata collection process. But if BioPortal does not contain a terminology that you want to use, you can add it! See the subsection called "Adding Content to BioPortal" in the More Semantics section for more information on this process.
All the following sub-sections assume you have created a basic text field, clicked on the Values tab for your field, and clicked on the Add button to bring up the term search dialog box, as described in Adding Fields.
Basic Interactions
You may want to add individual terms or whole collections of them. First we will work at the level of individual terms, and progress to finding and adding collections of terms.
Searching for Terms
In the Template Designer, as soon as you hit the Add button in the Values tab of a CEDAR field, CEDAR opens a new search window, pre-configured with the name in your field, and the search for terms begins immediately. In this case, the name is "Study Type", and a set of results has been returned. You can see each term in the scrollable list—the most likely terms are listed first.
You can change the search terms by typing in the search field. If you search doesn't begin immediately, click on the magnifying glass to start it. The results list updates as more results are found, and higher-value results may be inserted in front of results you are looking at. Usually all the results are obtained quite quickly. (A maximum of 500 results may be obtained.)
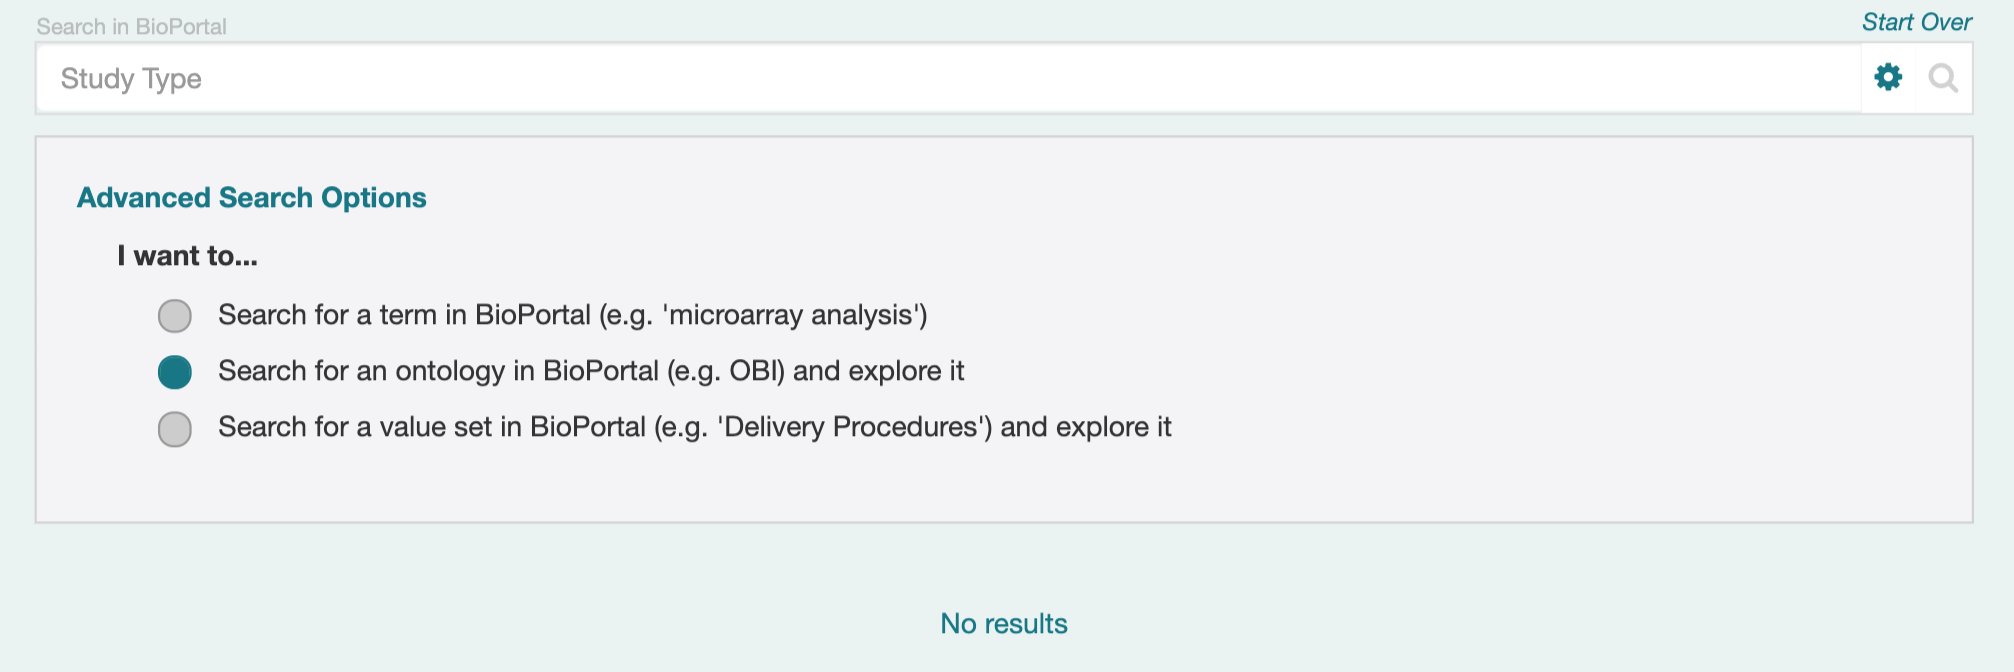
You may want to refine the search to meet particular needs. By clicking on the settings gear at the right of the search field, you will see a set of Advanced Search Options. The first option, to search for a term anywhere in BioPortal, is pre-selected. (We will discuss the other 'I want to…" options in later subsections.)
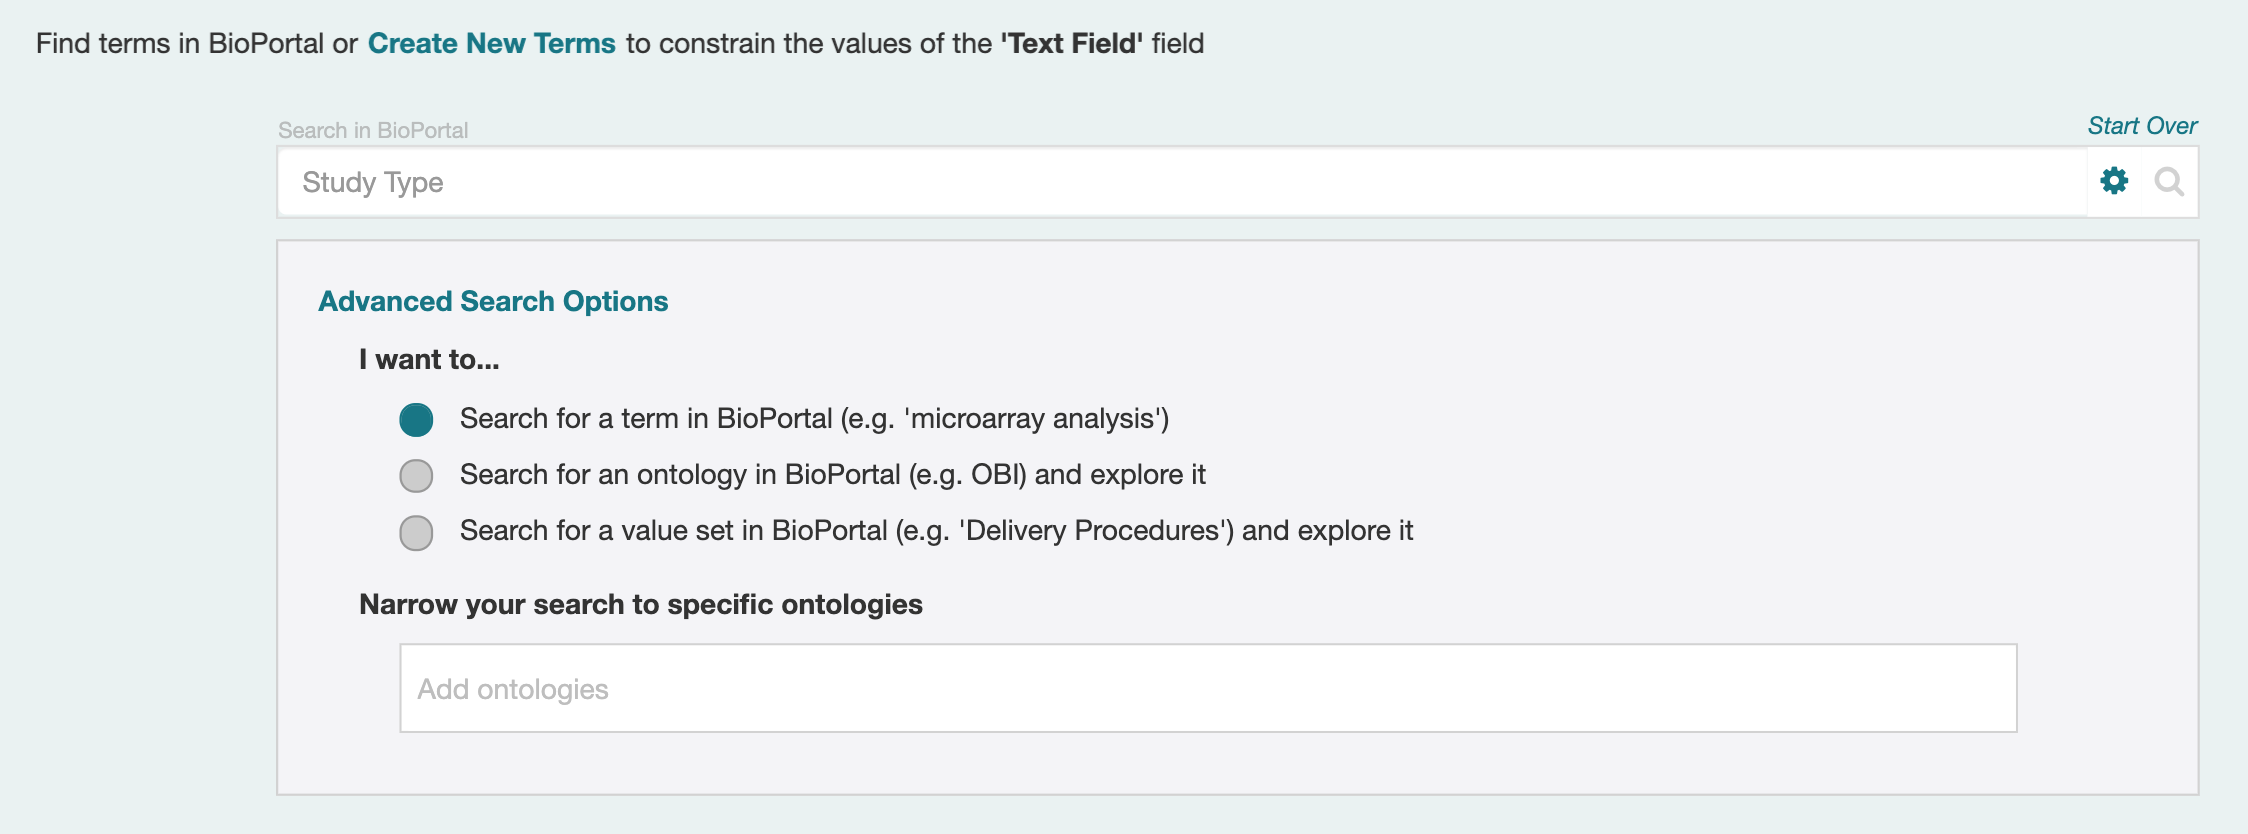
For now, we want to focus on the "Narrow your search to specific ontologies" field. If you know the ontologies in BioPortal that you want to use for your terms, you can enter them into this field. Start typing either the ontology acronym or its full name, and CEDAR will offer a list of the matching ontologies. Click on the one that you want to include as a restriction, and its acronym will appear in the field.
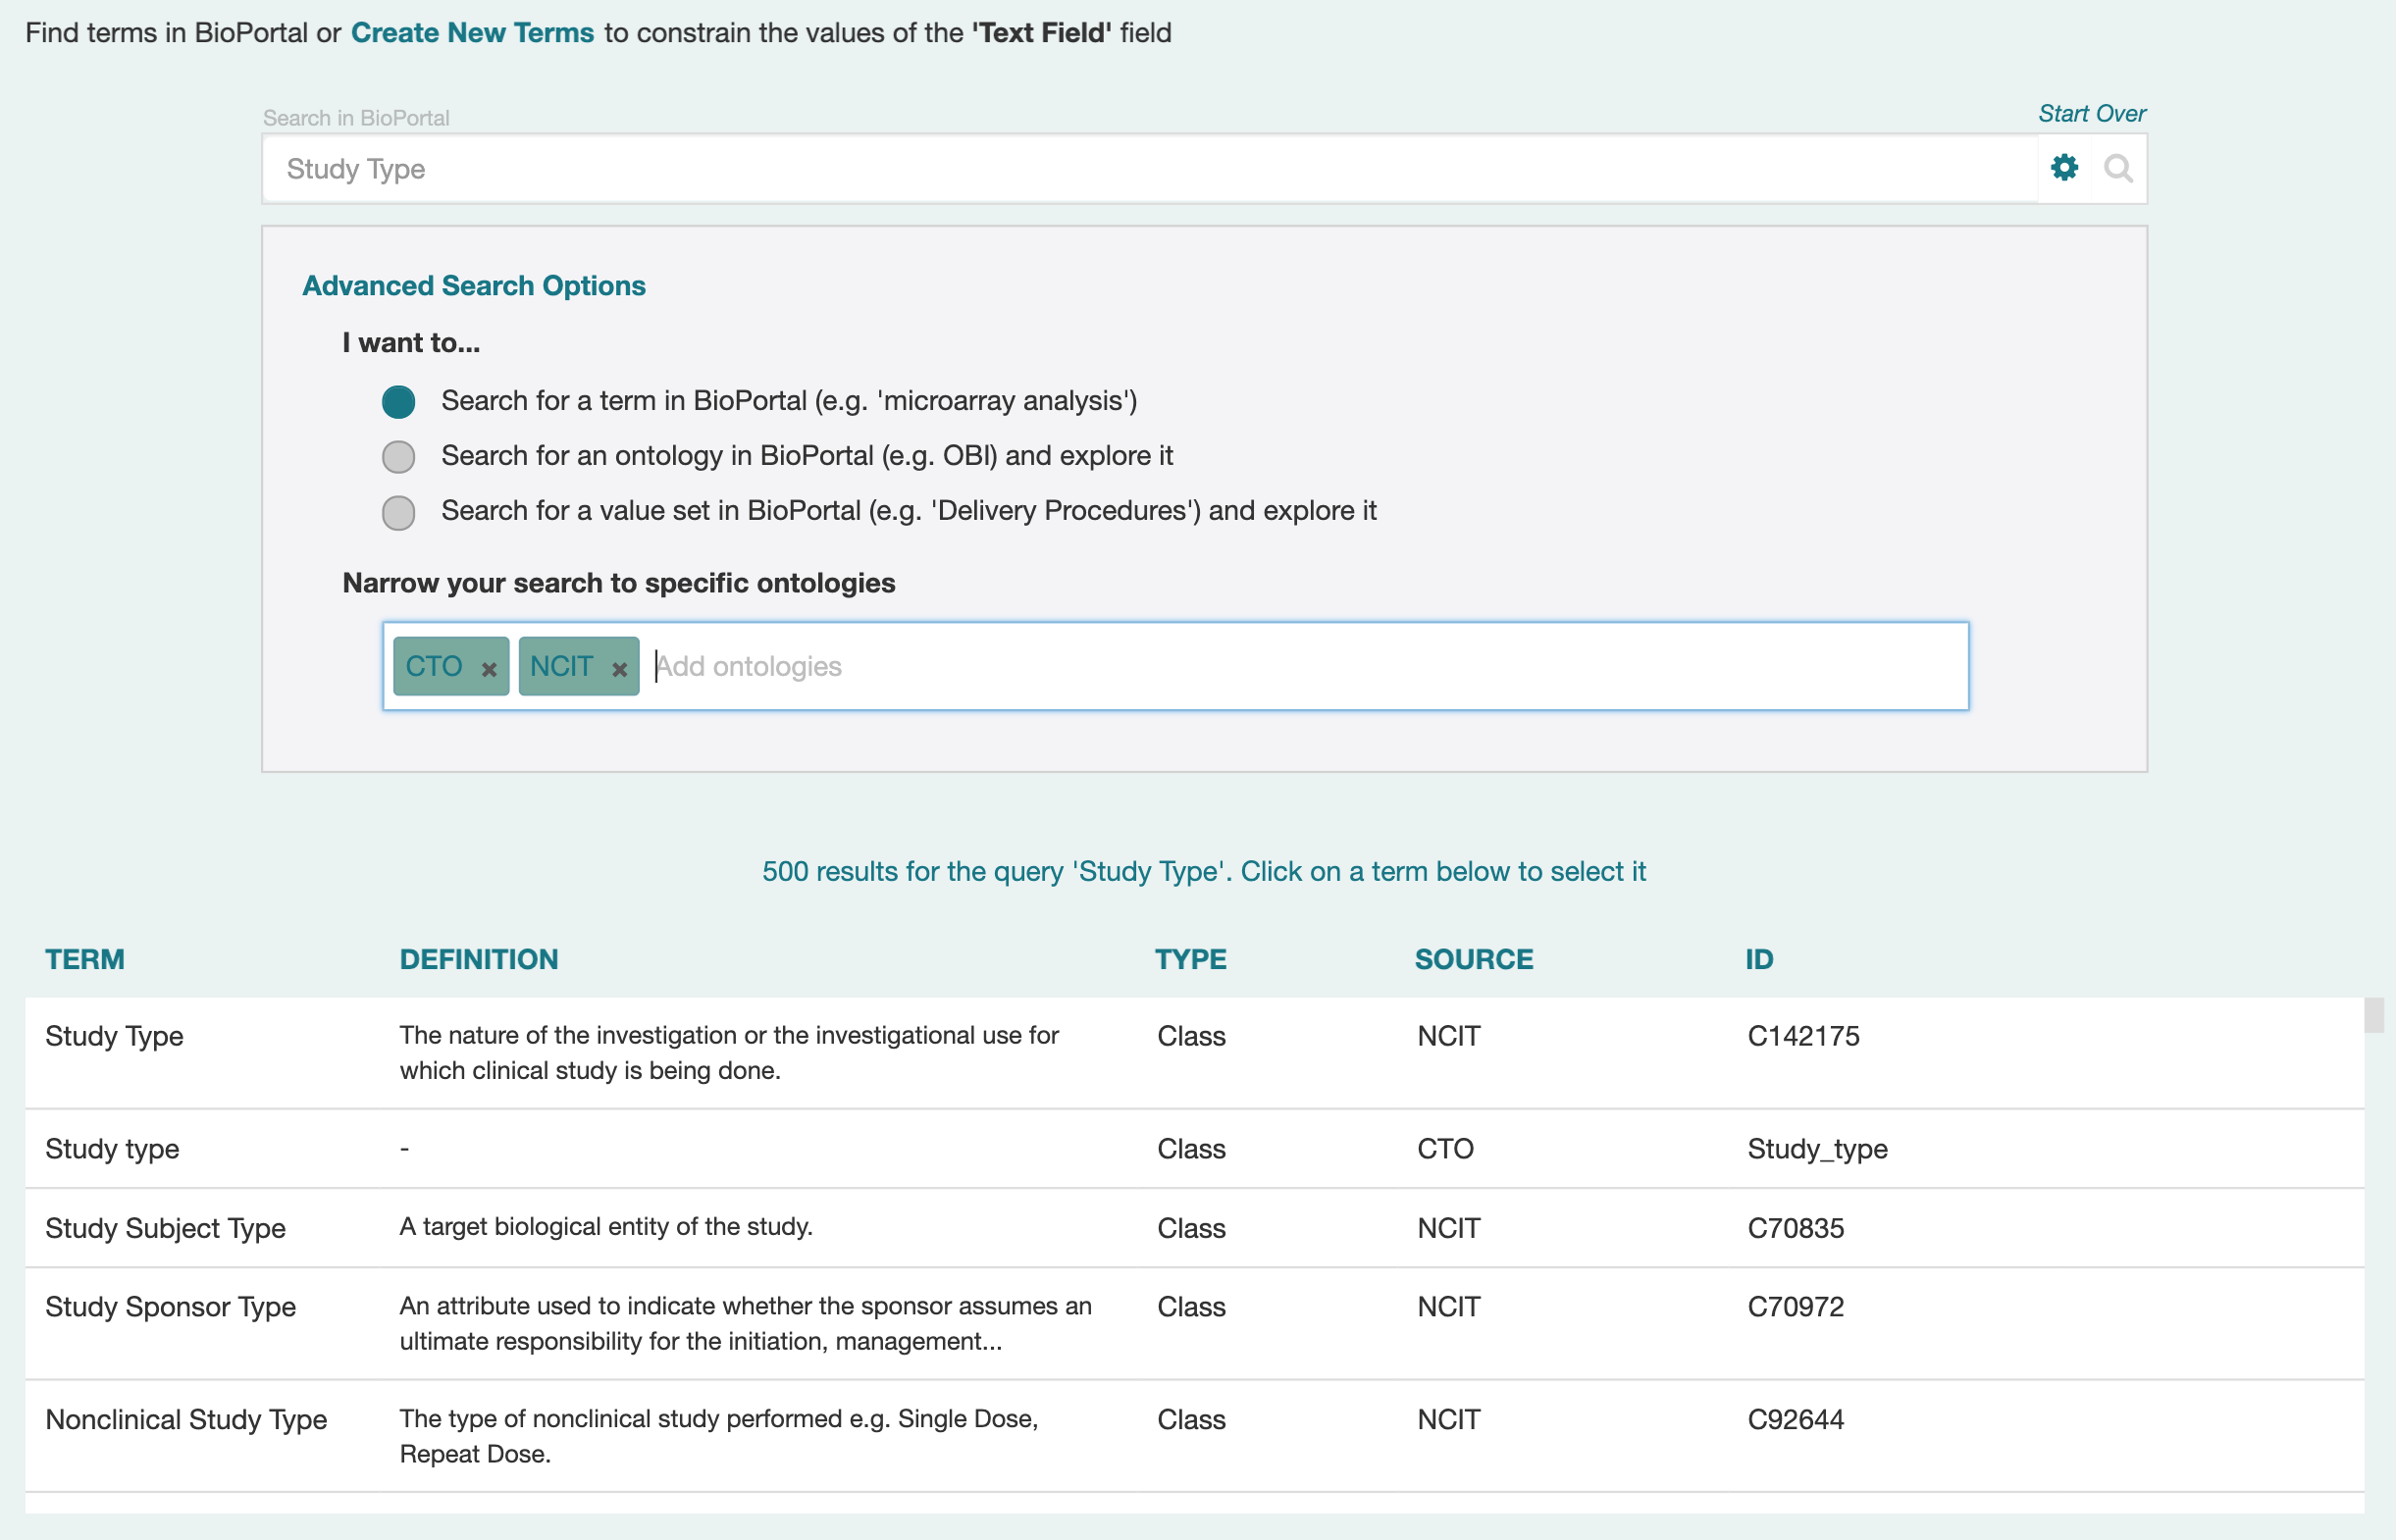
You can begin typing again in the field, and select another ontology, until you have found all the ontologies you want in your restriction list. In this case, we have selected the ontologies with the acronyms CTO and NCIT. This technique can be used to see more terms in the given ontologies, or to exclude any other ontologies from being considered.
Reviewing Found Terms
Now that you have some terms, you may want to examine some terms more closely, to see if they are really what you want. The first thing you may notice is that earlier terms in your list are exact matches of your string, while later terms do not match as closely. This is the first test used to order the terms presented to you.
Clicking on Show Details for a given term (at the right of that term's row) will unfold a new display underneath the list of terms, which allows you to inspect the term more closely. At the left side of this new display is a list of terms in the ontology, in most cases scrolled to the specific term identified. (Sometimes the term appears multiple places in the ontology, and you will need to explore to find it.)
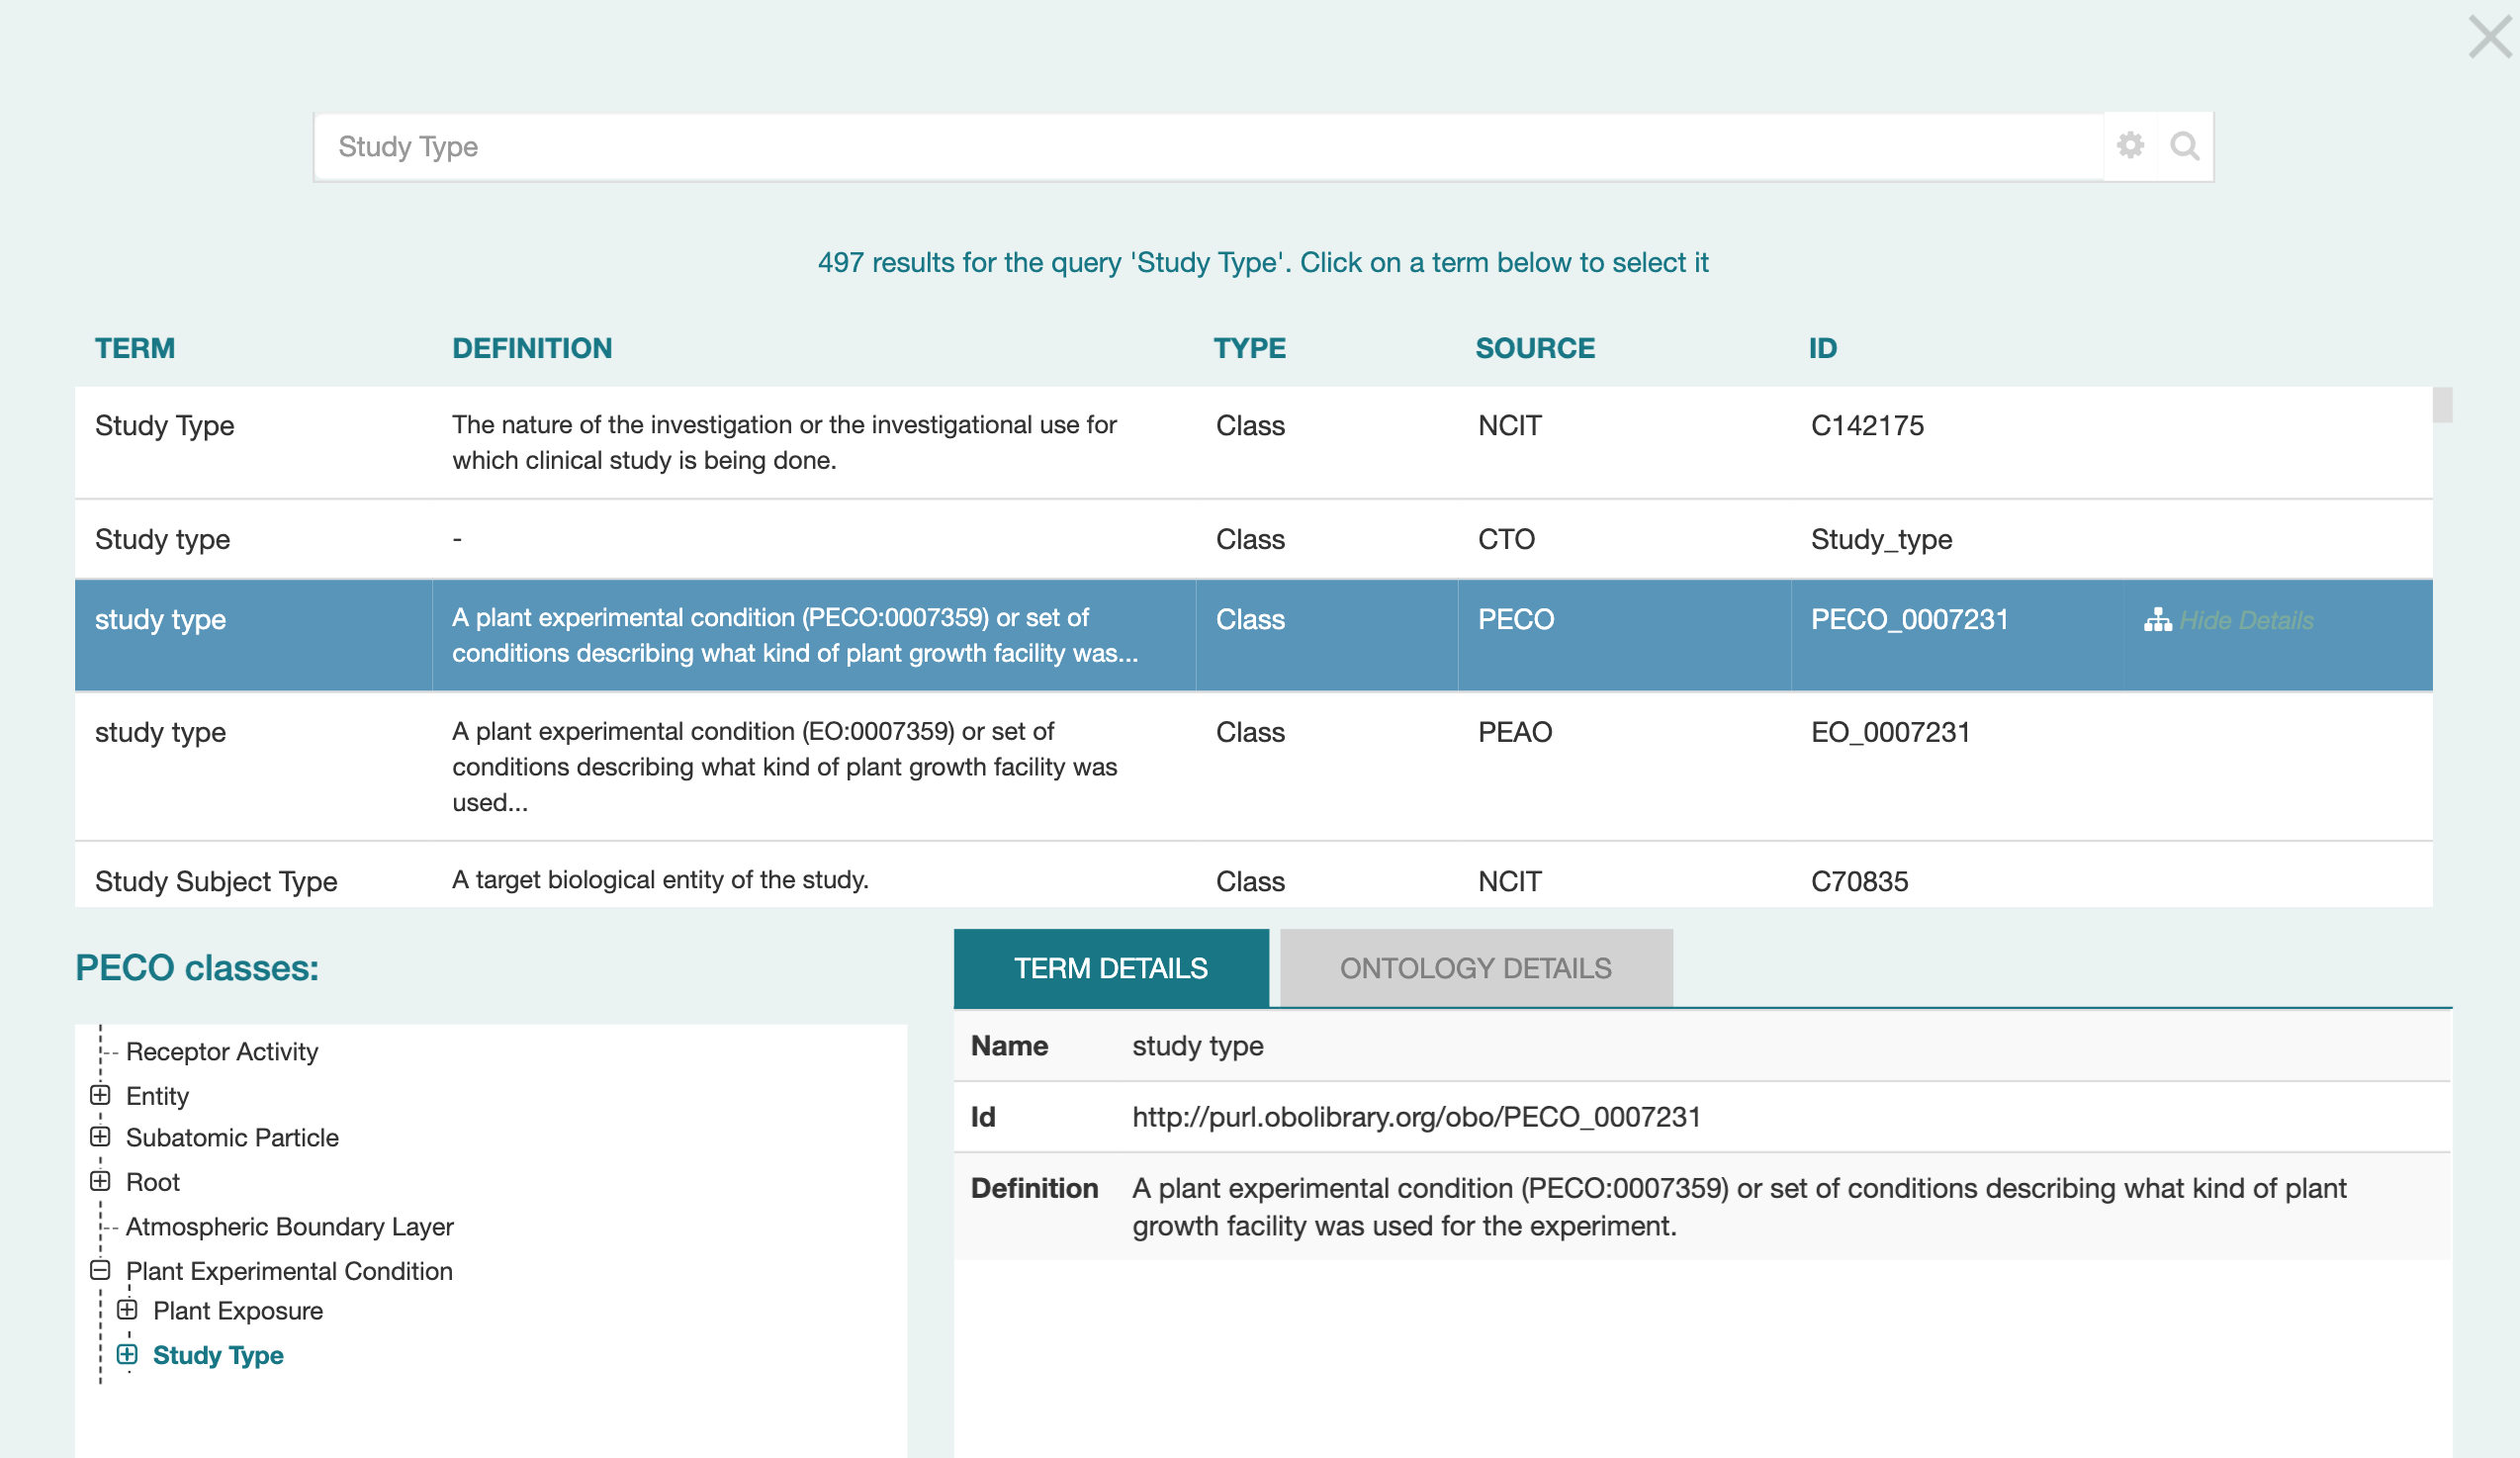
Whenever you click on a term, its detailed information appears in the Term Details tab on the right. (Click on the Ontology Details tab to see information about the whole ontology.)
You can navigate the tree by using your mouse to scroll up and down, and open and close its branches by clicking on the + and - boxes on the left side. Below we see the details of classes that were hidden under the Study Type branch in the screenshot above.
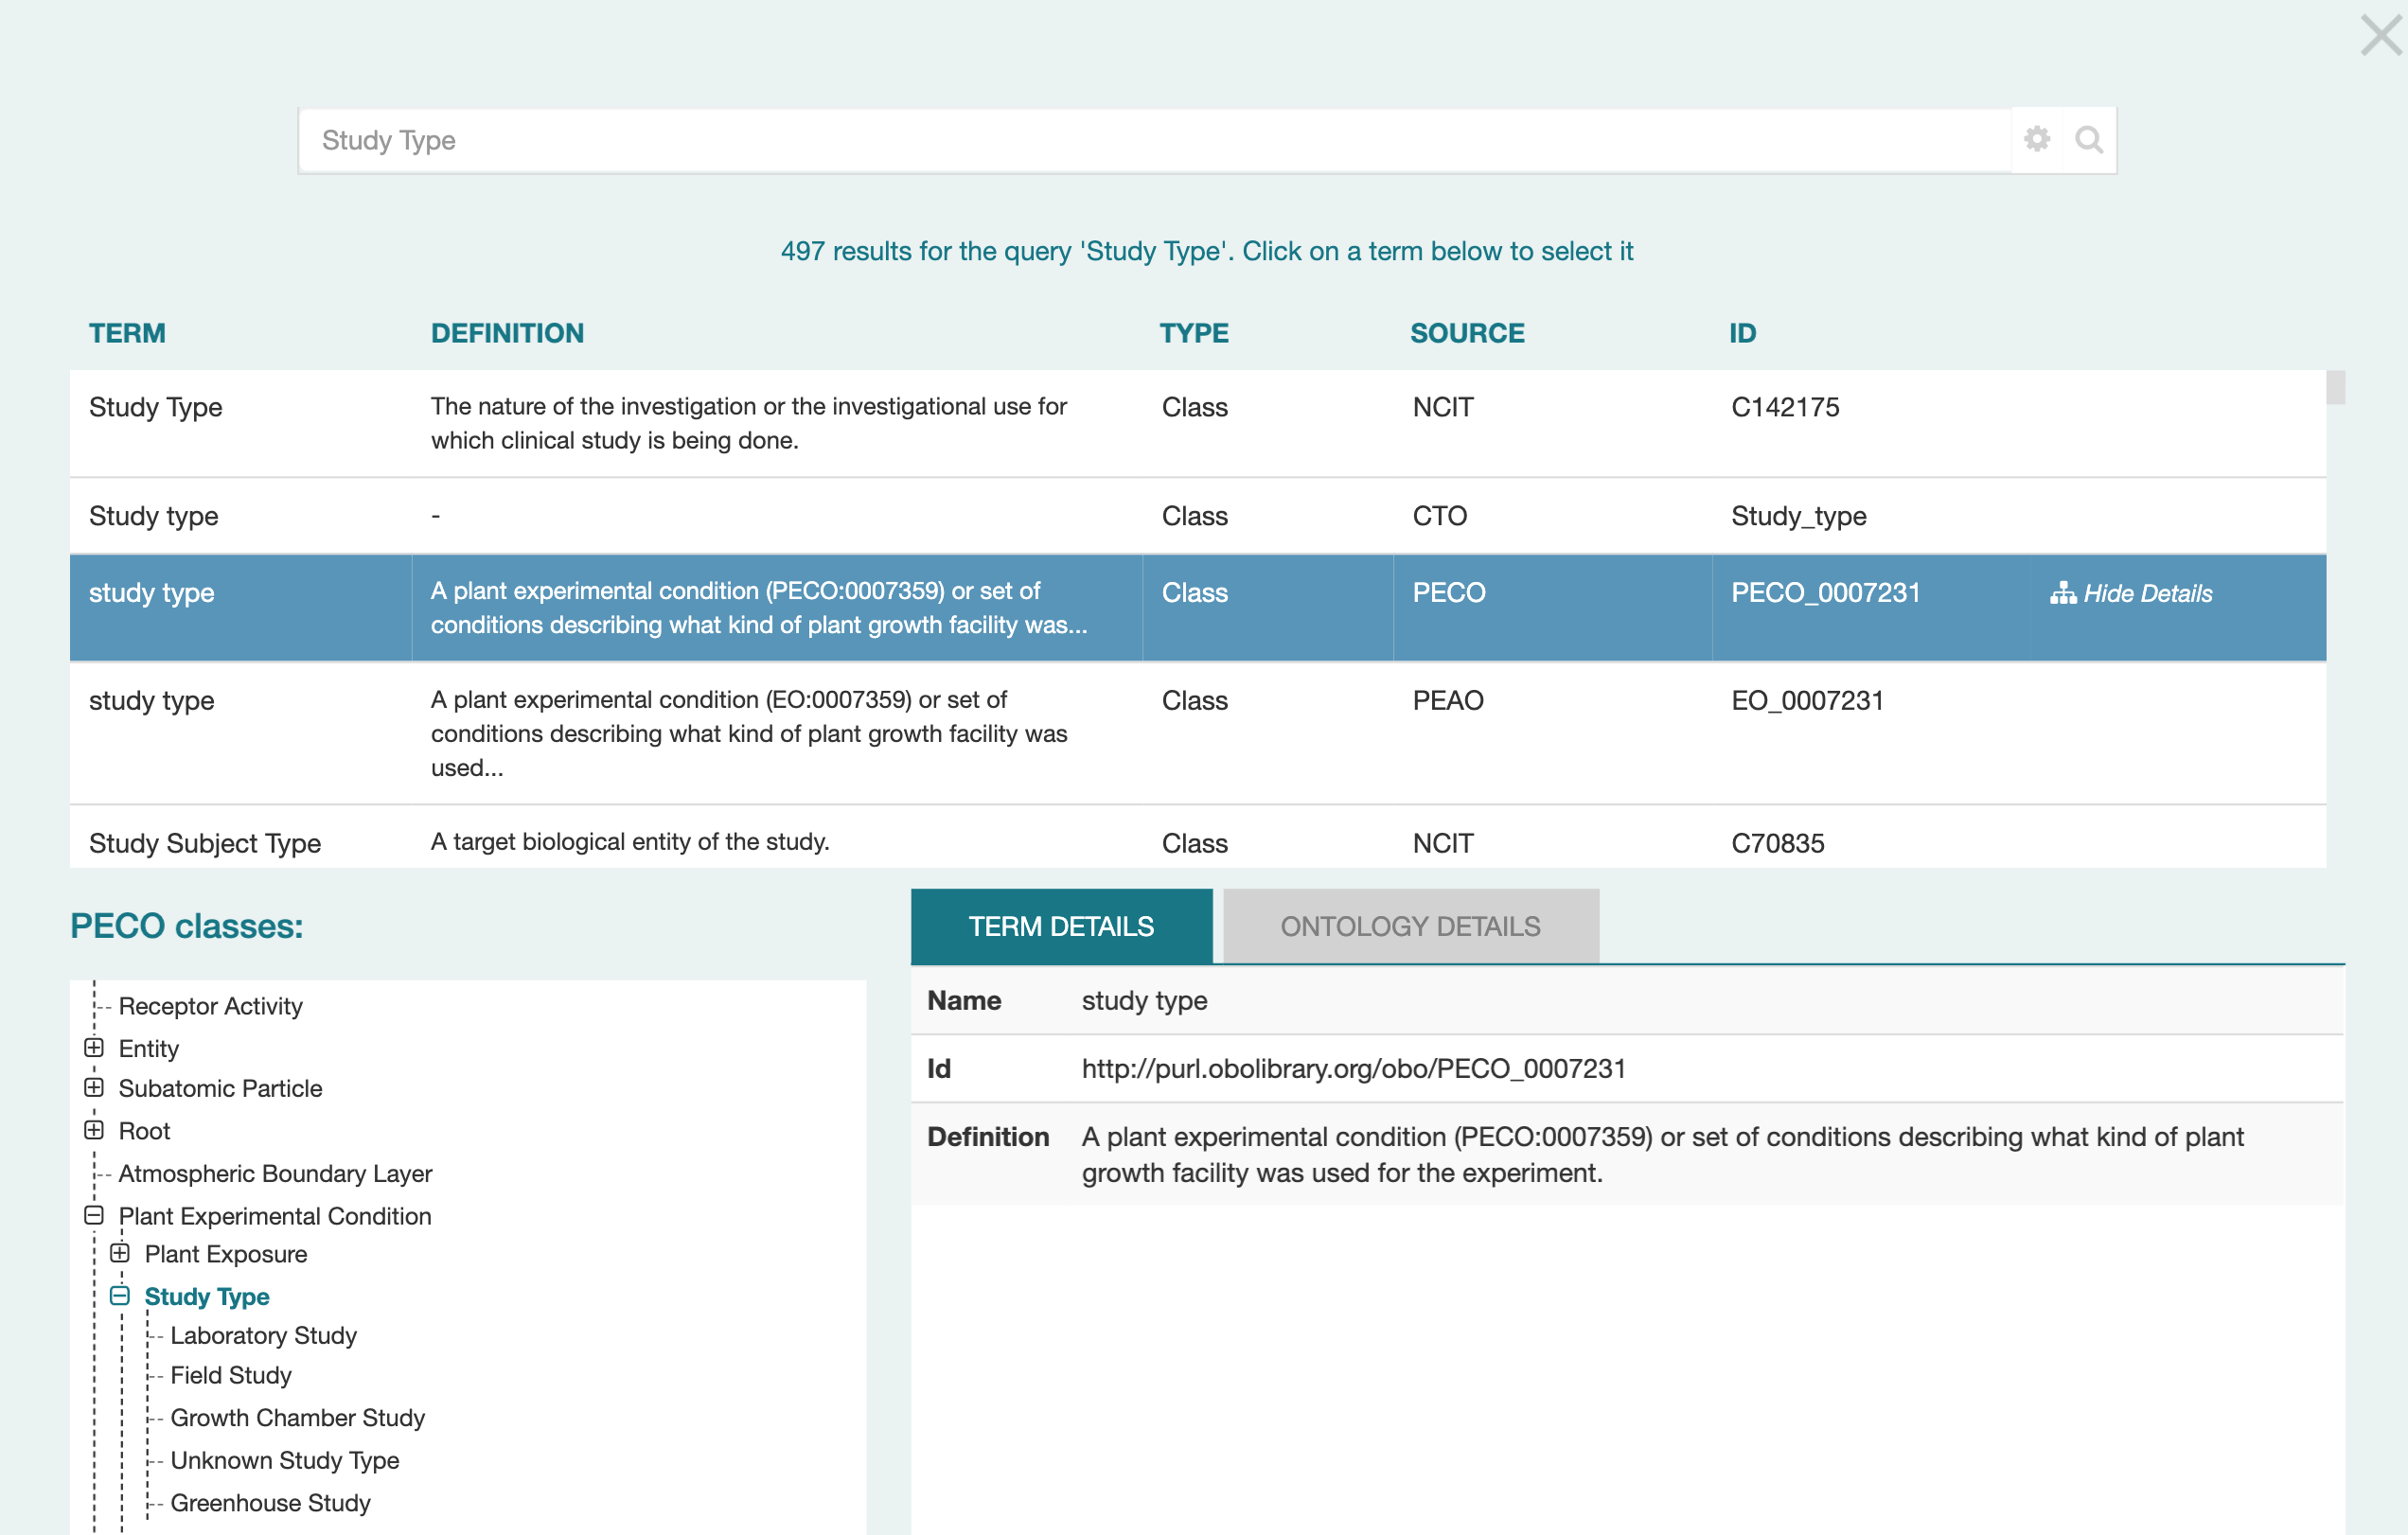
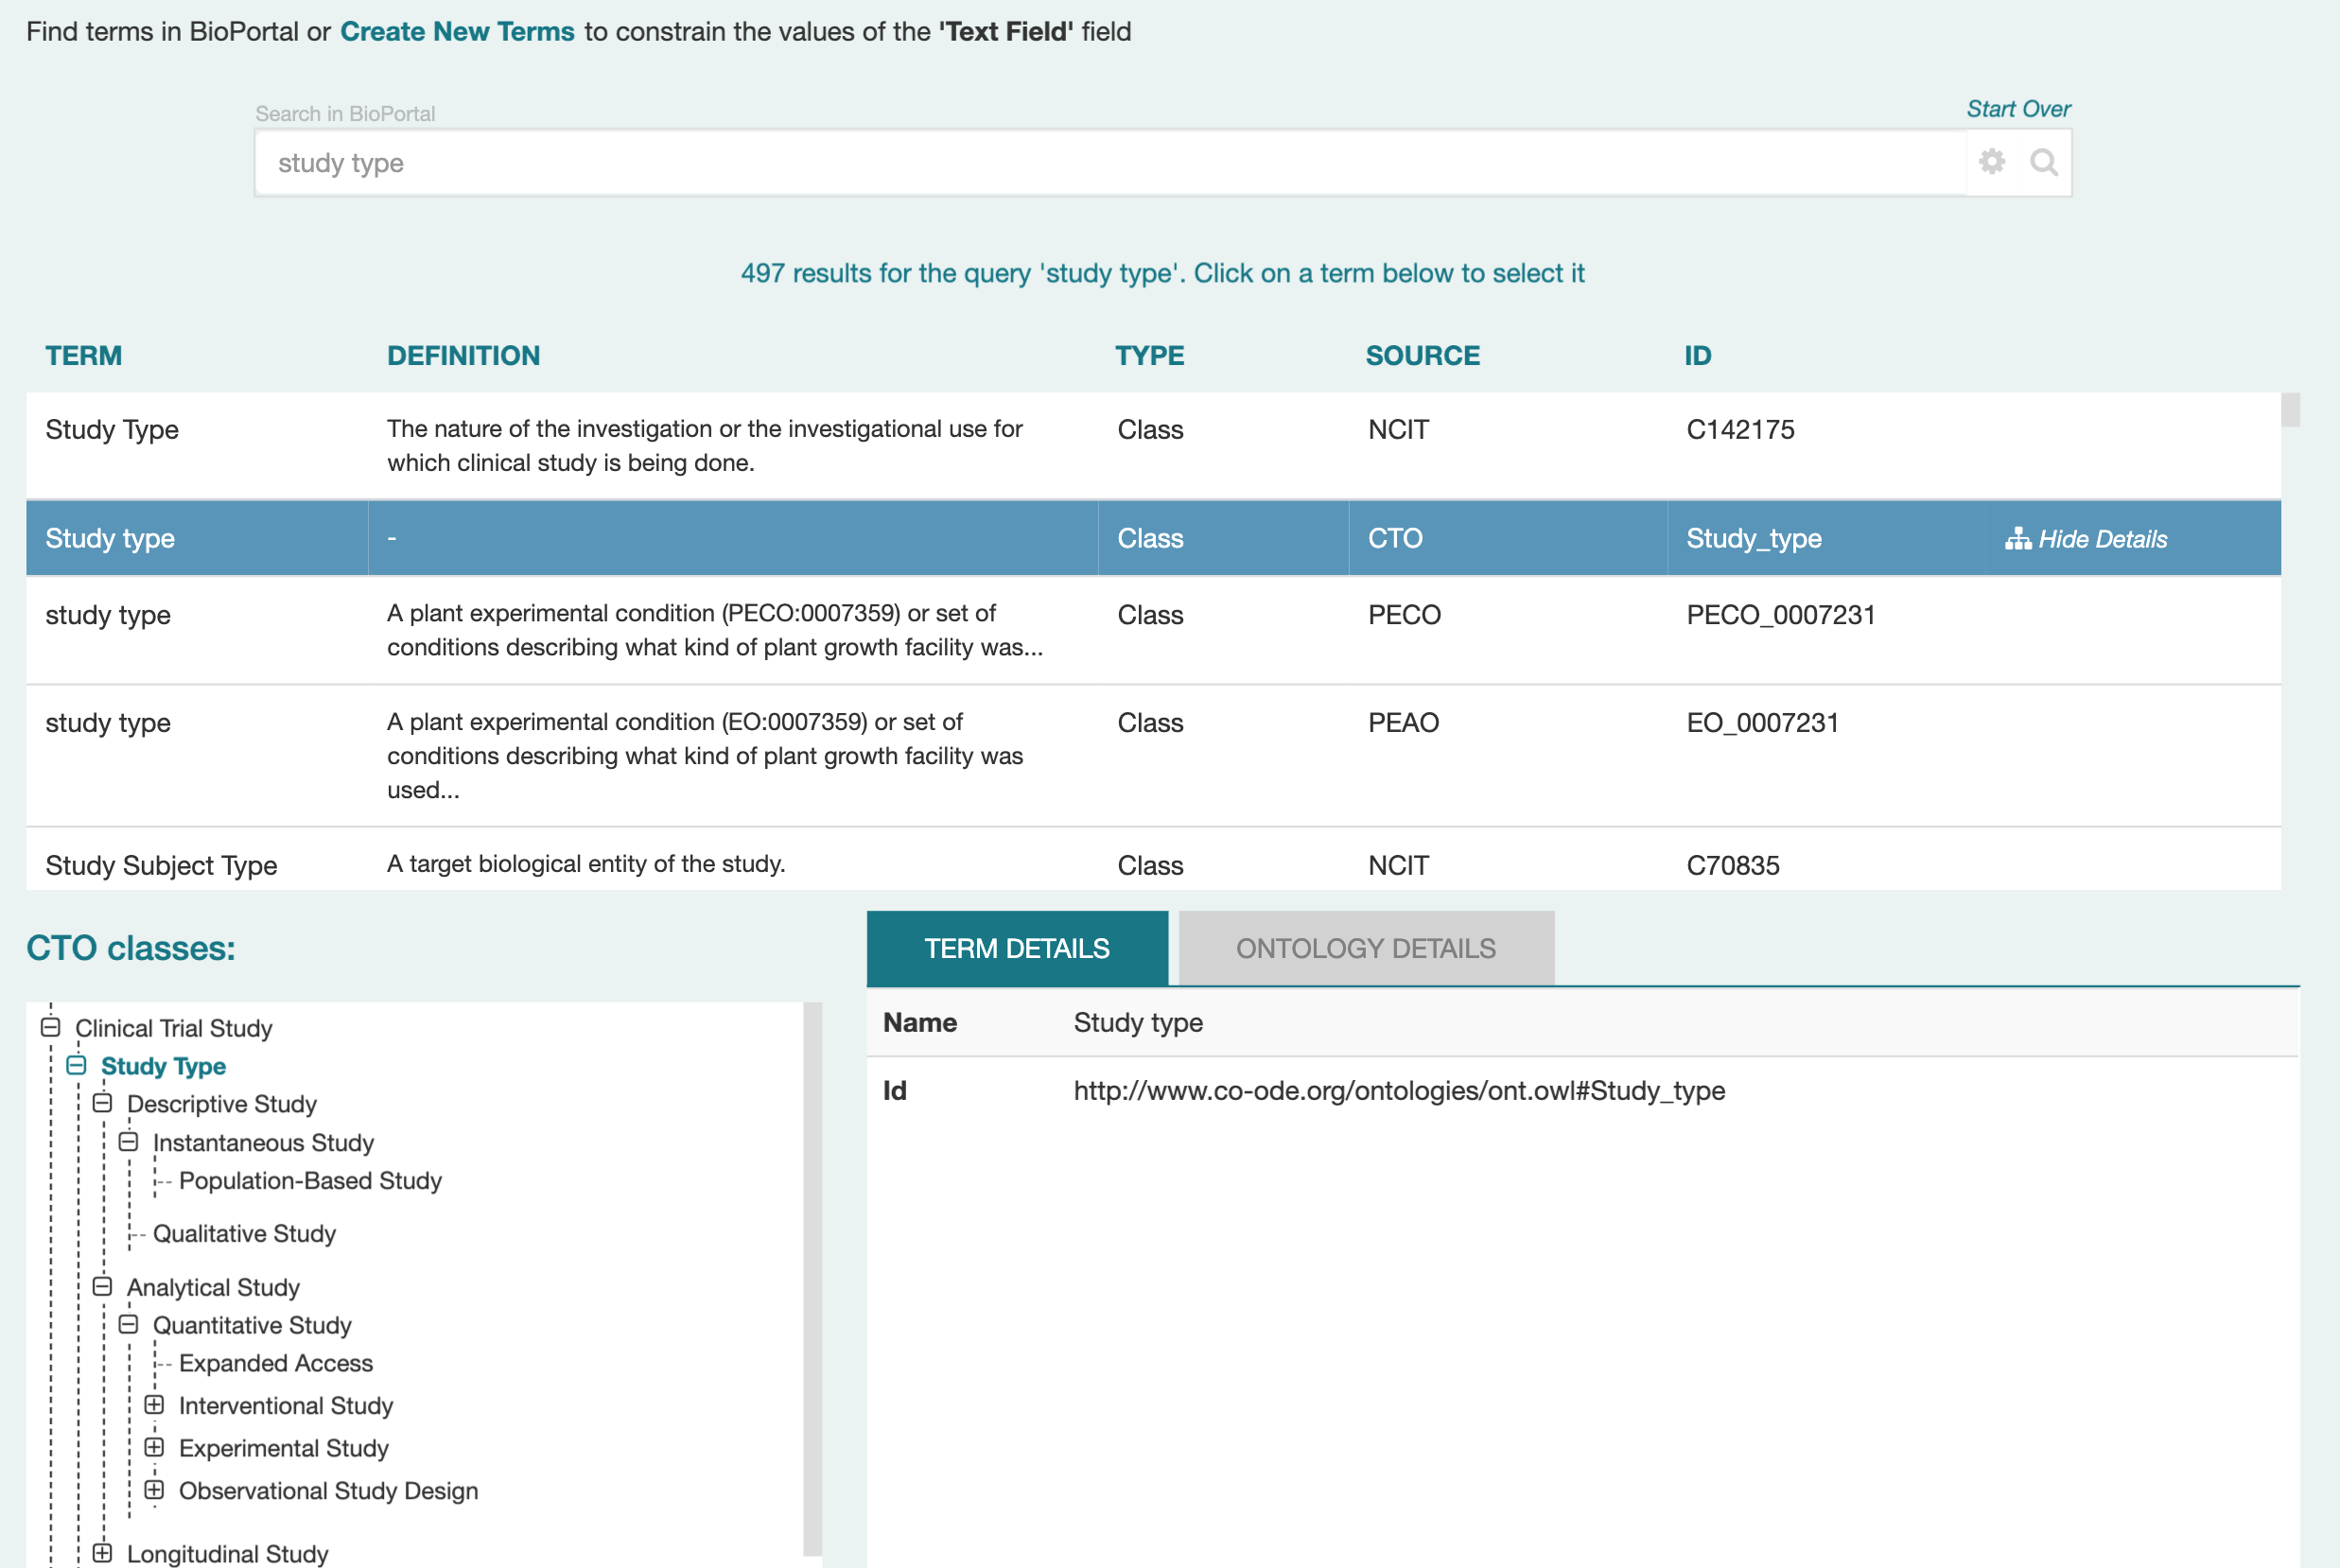
In this case, we may decide this class is not appropriate, as it contains many Study Types that are particular to plant science. By clicking on the Study type term in the CTO ontology, we can see from examining its branch contents (in the left-hand display under 'CTO classes') that it is a much more generic description of study types.
In the next section we'll discuss how you can choose what you want to include in your list of responses.
Selecting Terms, Branches, or Ontologies
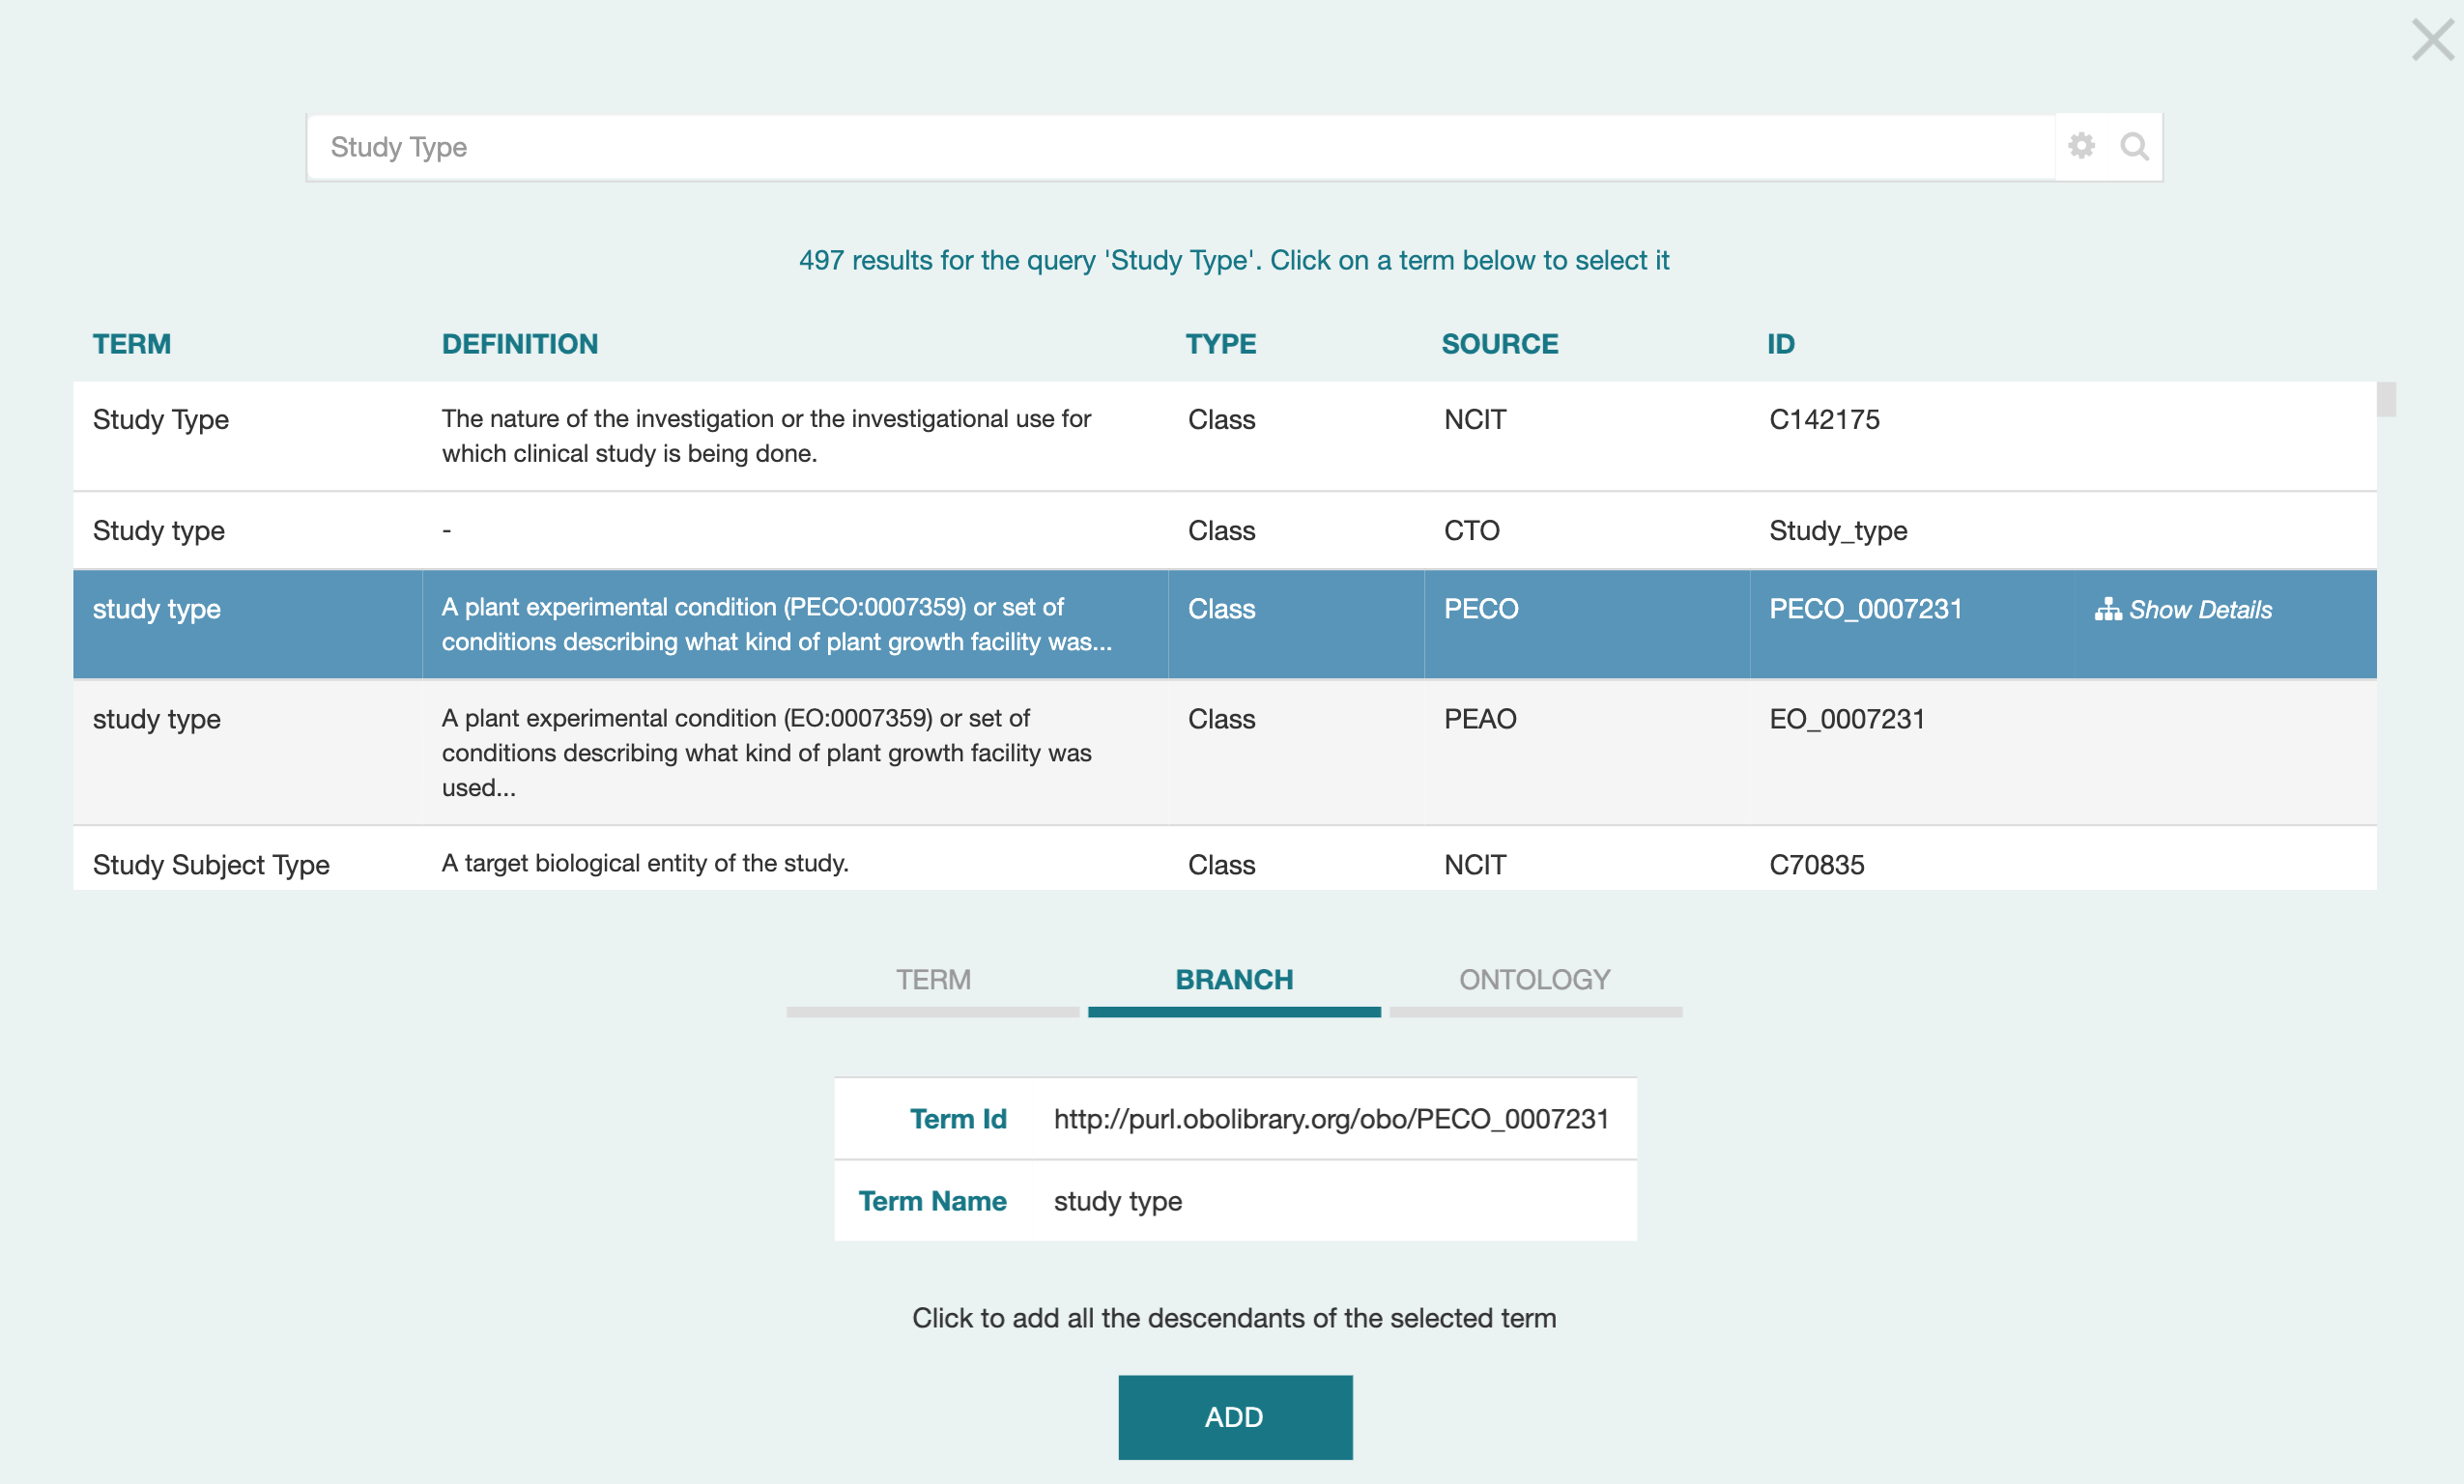
By scrolling down in the Term Finder window, you can see additional controls (below).
In particular, note the three tabs TERM, BRANCH, and ONTOLOGY.
These control what you can select for your field's values.
(If the term you have selected does not have any subclasses,
you will not see the Branch tab, only Term and Ontology.)
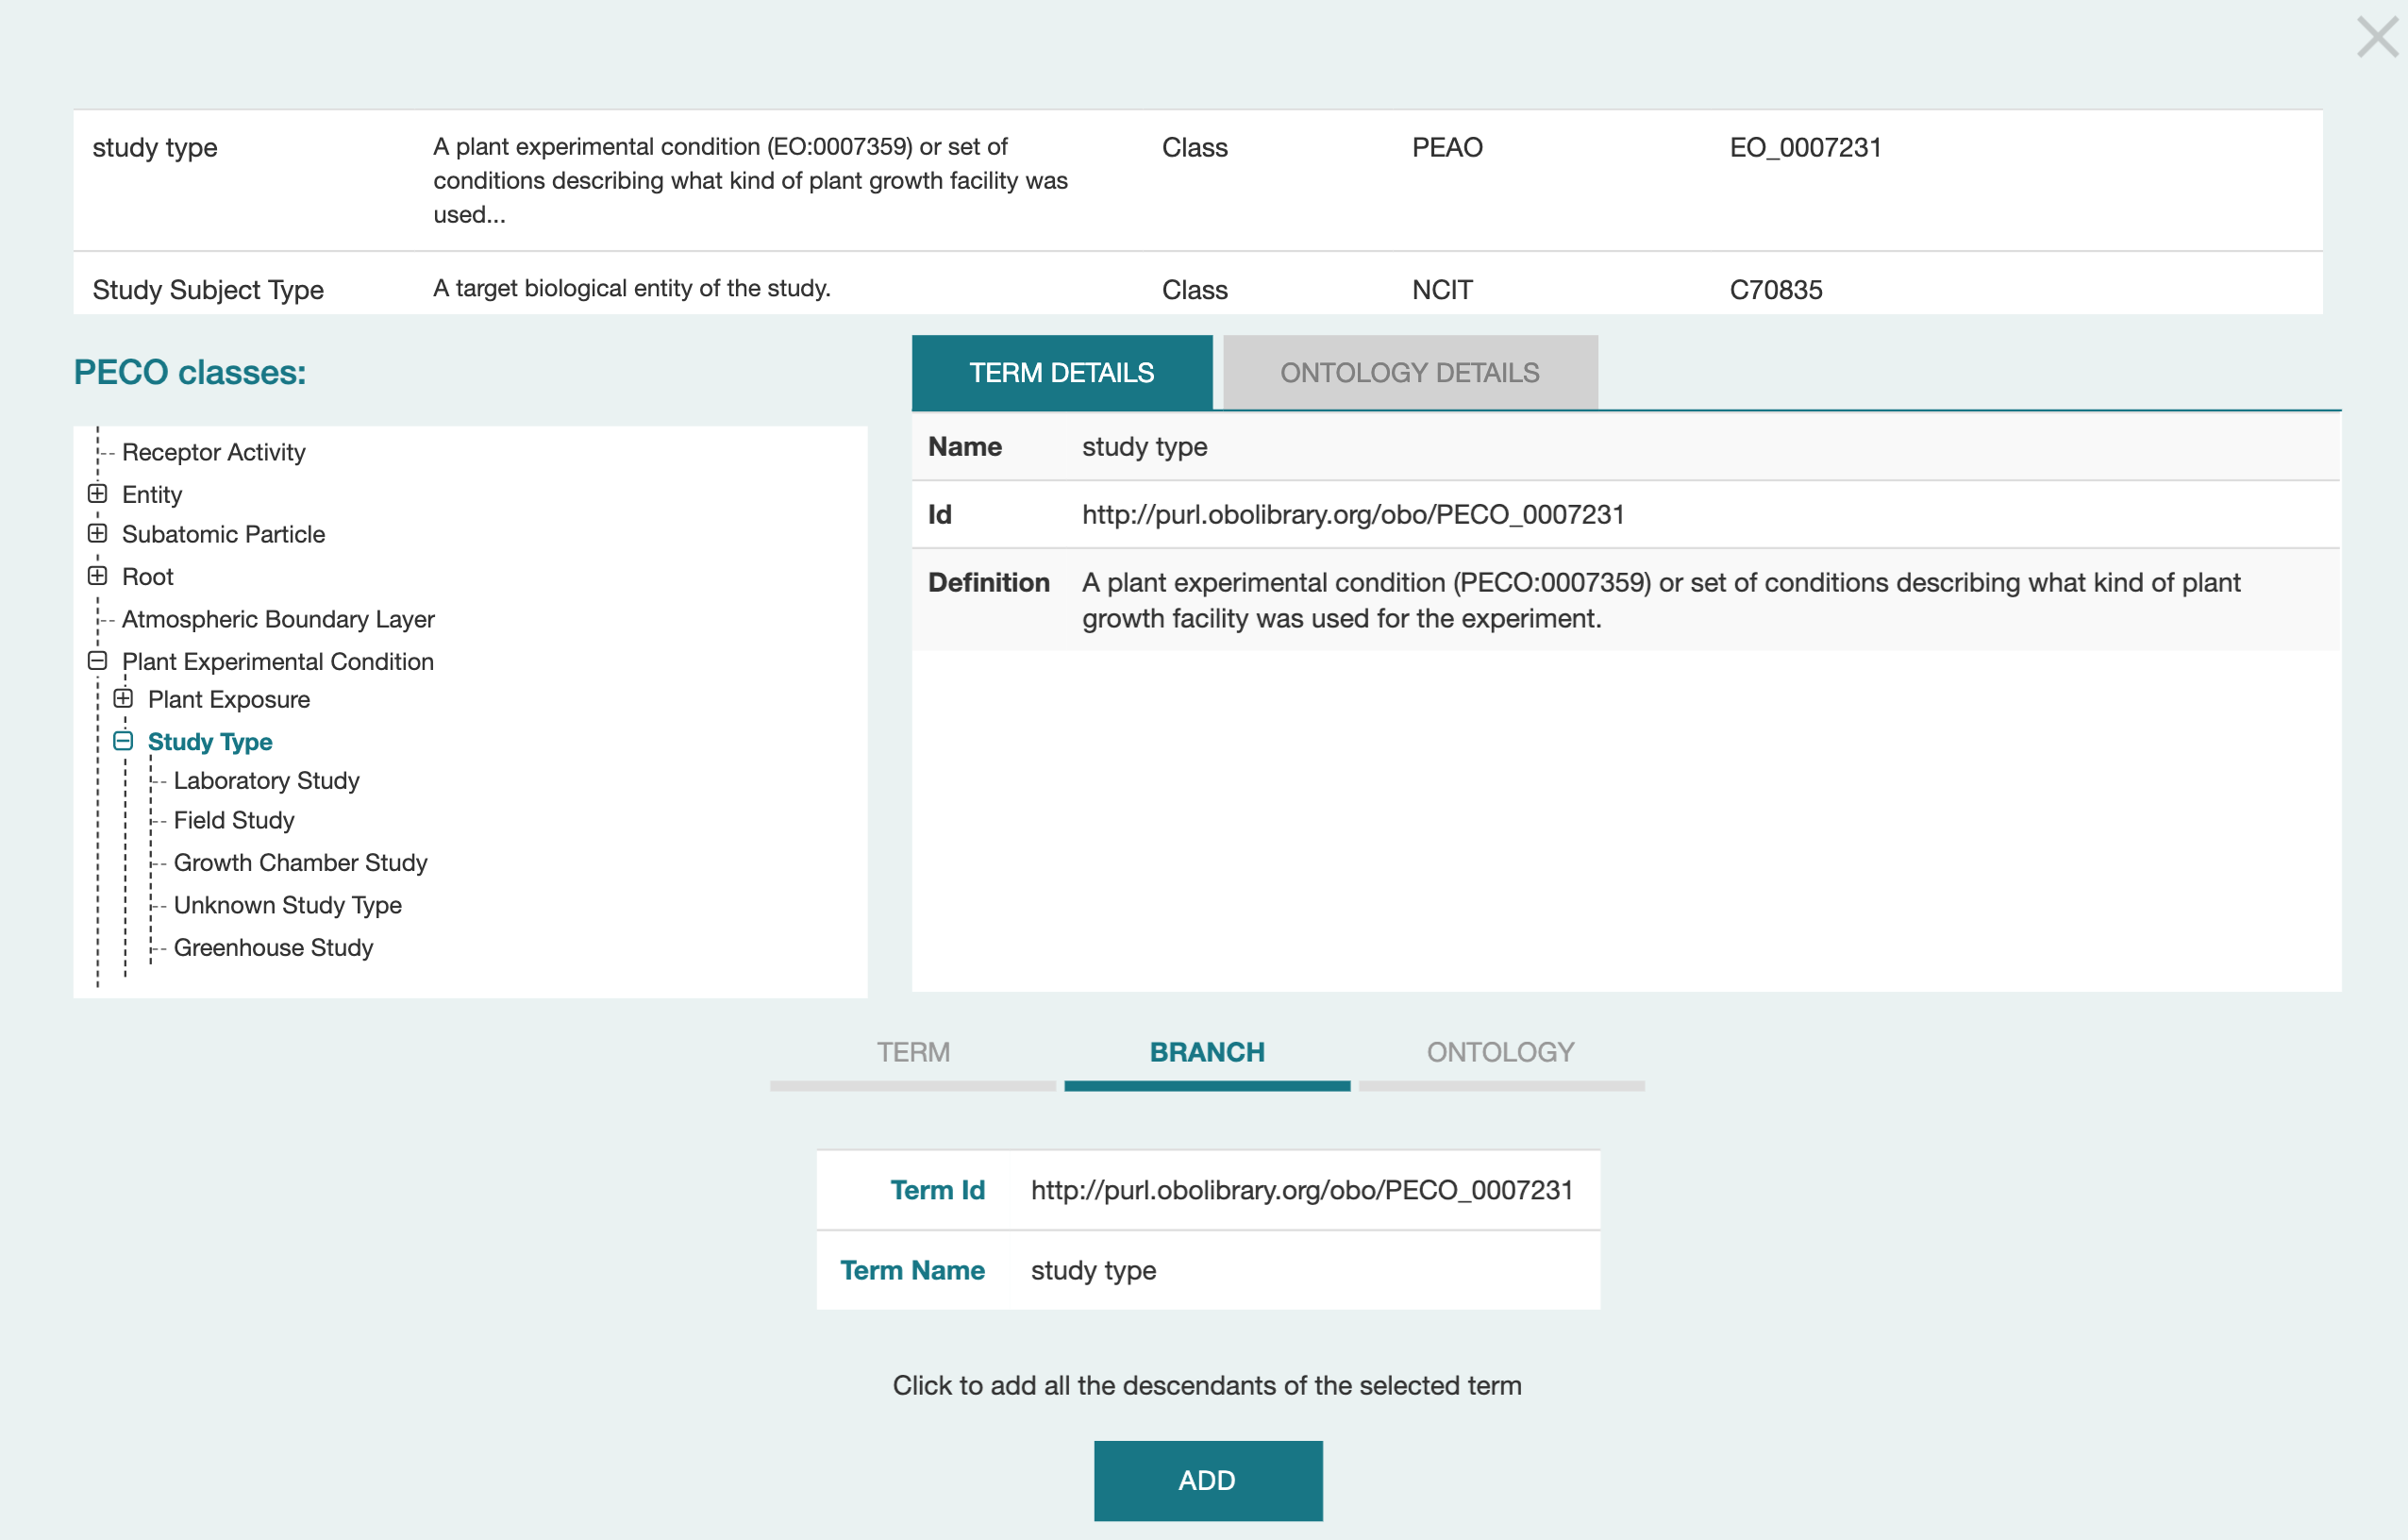
In the screen shot, the BRANCH tab is selected; the term identifier and name are shown; and the description says "Click to add all the descendants of the selected term." If you click on the ADD button, all the classes under "Study Type' (5 are visible) will be added as acceptable responses for your field.
If you had selected the TERM tab, and then clicked ADD, only the Study Type term itself would be added as an acceptable response. This is a less common choice, as usually you want users to select from a collection of related terms in an ontology.
If you select the ONTOLOGY tab, all the terms in the ontology (PECO in this case) would be added as an accepted response. The only time you'd expect to select this tab is when the entire ontology is devoted to a single concept. For example, the Disease Ontology only contains disease terms, and is sometimes the perfect choice for selecting a disease.
Here we talked about starting a term search, then picking a whole ontology that contained the term. What if you just want to search for ontologies (or its simpler cousins, Value Sets) by name? This takes us back to the control gear in the search box, and is described in the next subsection.
Searching for Ontologies and Value Sets
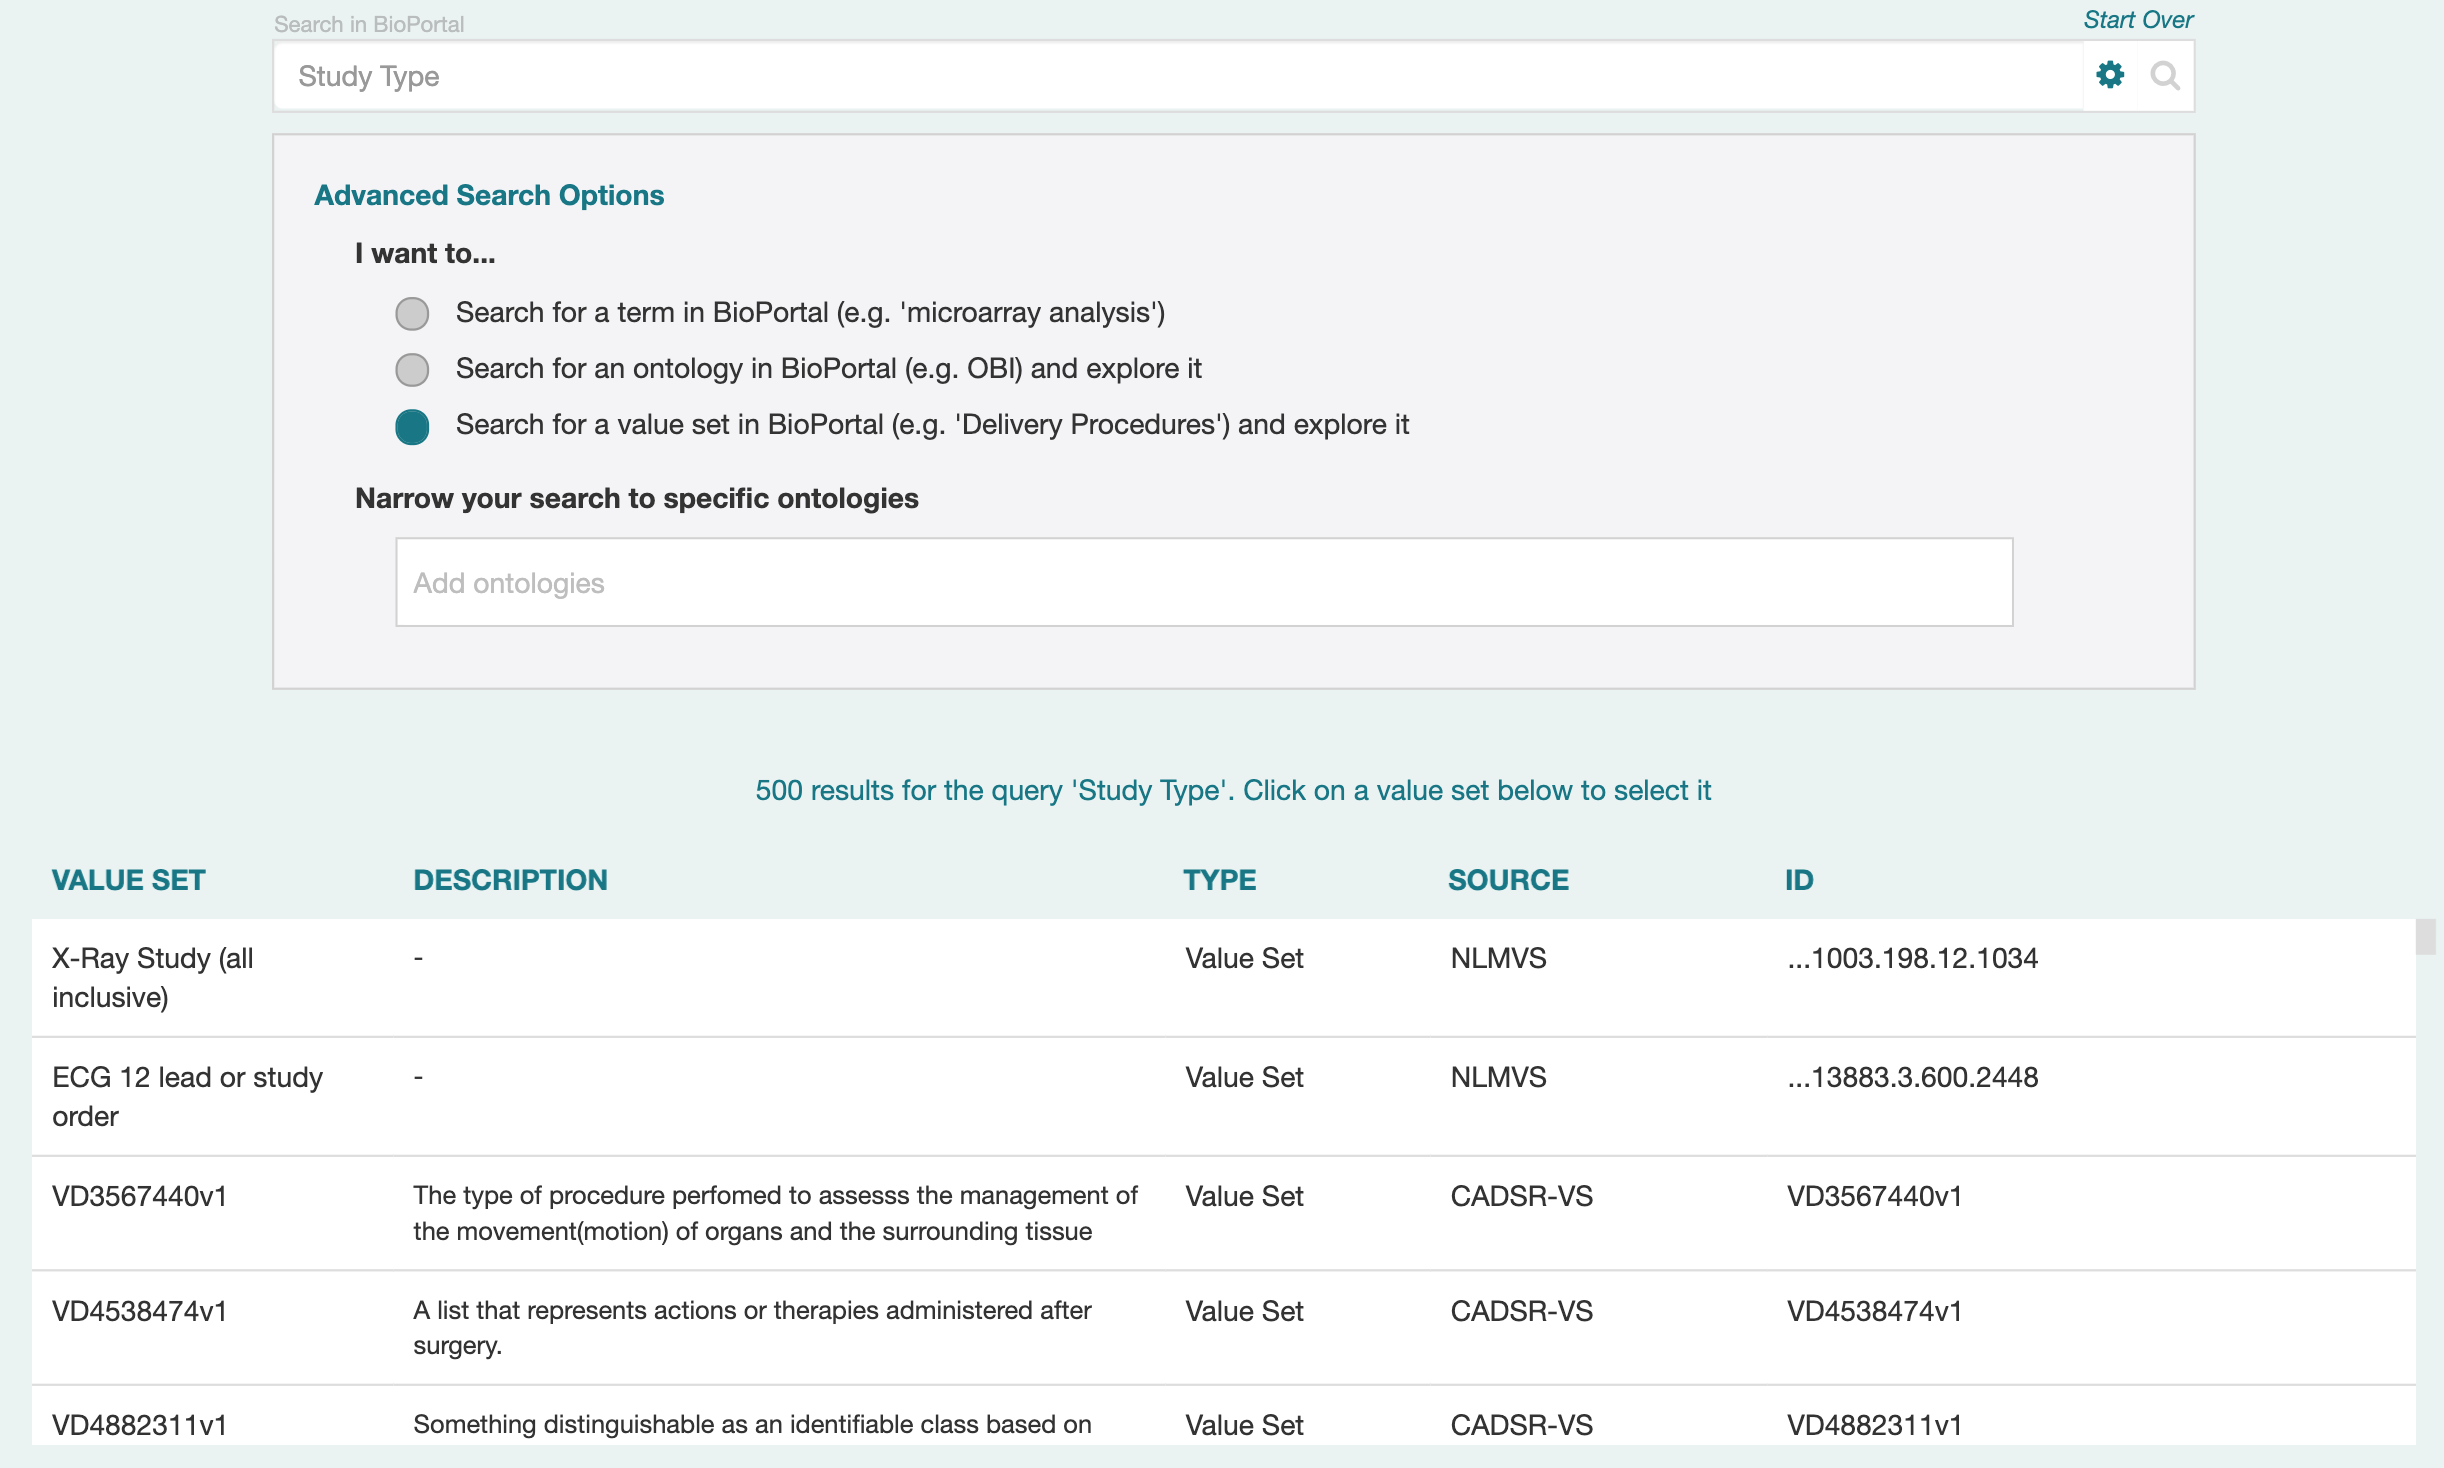
The two other buttons in the "I want to…" section of the Advanced Search Options let you search explicitly for ontologies or value sets. When you click on one of these buttons, the text in the top search field is used to find the results (by acronym or name). In the following example, a search for a Study Type ontology is being conducted; this will not find any results, since no Study Type ontologies exist in BioPortal.
A Value Set in CEDAR is like a very simple ontology; it consists only of a set of terms that have identifiers and labels. Value Sets tend to be smaller than ontologies as well, and organized around a single topic. (In fact, they are often created to make lists of terms for filling out forms.) In the following screenshot, you can see that there are a number of Value Sets that deal with Study Type. The Source column is the name of the ontology containing the Value Set; in BioPortal Value Sets are typically grouped into organizational ontologies for easier management.
Adding Your Own Terms
You may not be able to find every term you want, or a list of terms that you think makes sense. CEDAR can help you manage the process of adding such terms to use in your fields.
About Provisional Terms
Provisional terms are terms that the user is proposing to be added to an existing resource, or perhaps independently as a stopgap measure. In principal, they are meant to be used only for the time it takes to take action on the proposal: either to accept it and add the term to the existing resource (in which case the provisional term is deprecated in favor of the new term), or to reject it for that purpose or simply declare it is no longer needed (in which case the provisional term is simply deprecated). The provisional term should not be deleted, so that any existing and archived used of it might still need to reference it.
CEDAR lets you create provisional terms, and link them to the resource(s) and even the existing classes that are related. However, it does not provide any mechanism yet for taking action on those terms, like notifying owners of related resources of the proposed term, or annotating deprecations of provisional terms and referencing terms to replace them (if any). These features can not be implemented until there is support in BioPortal for managing provision terms. (Such support has been proposed in an award to be evaluted in 2021.)
Adding your Own Single Term(s)
These screenshots show the process of adding your own individual terms for use in CEDAR. The new terms are created as provisional classes in BioPortal, and can not be modified once they are defined (per above paragraph).
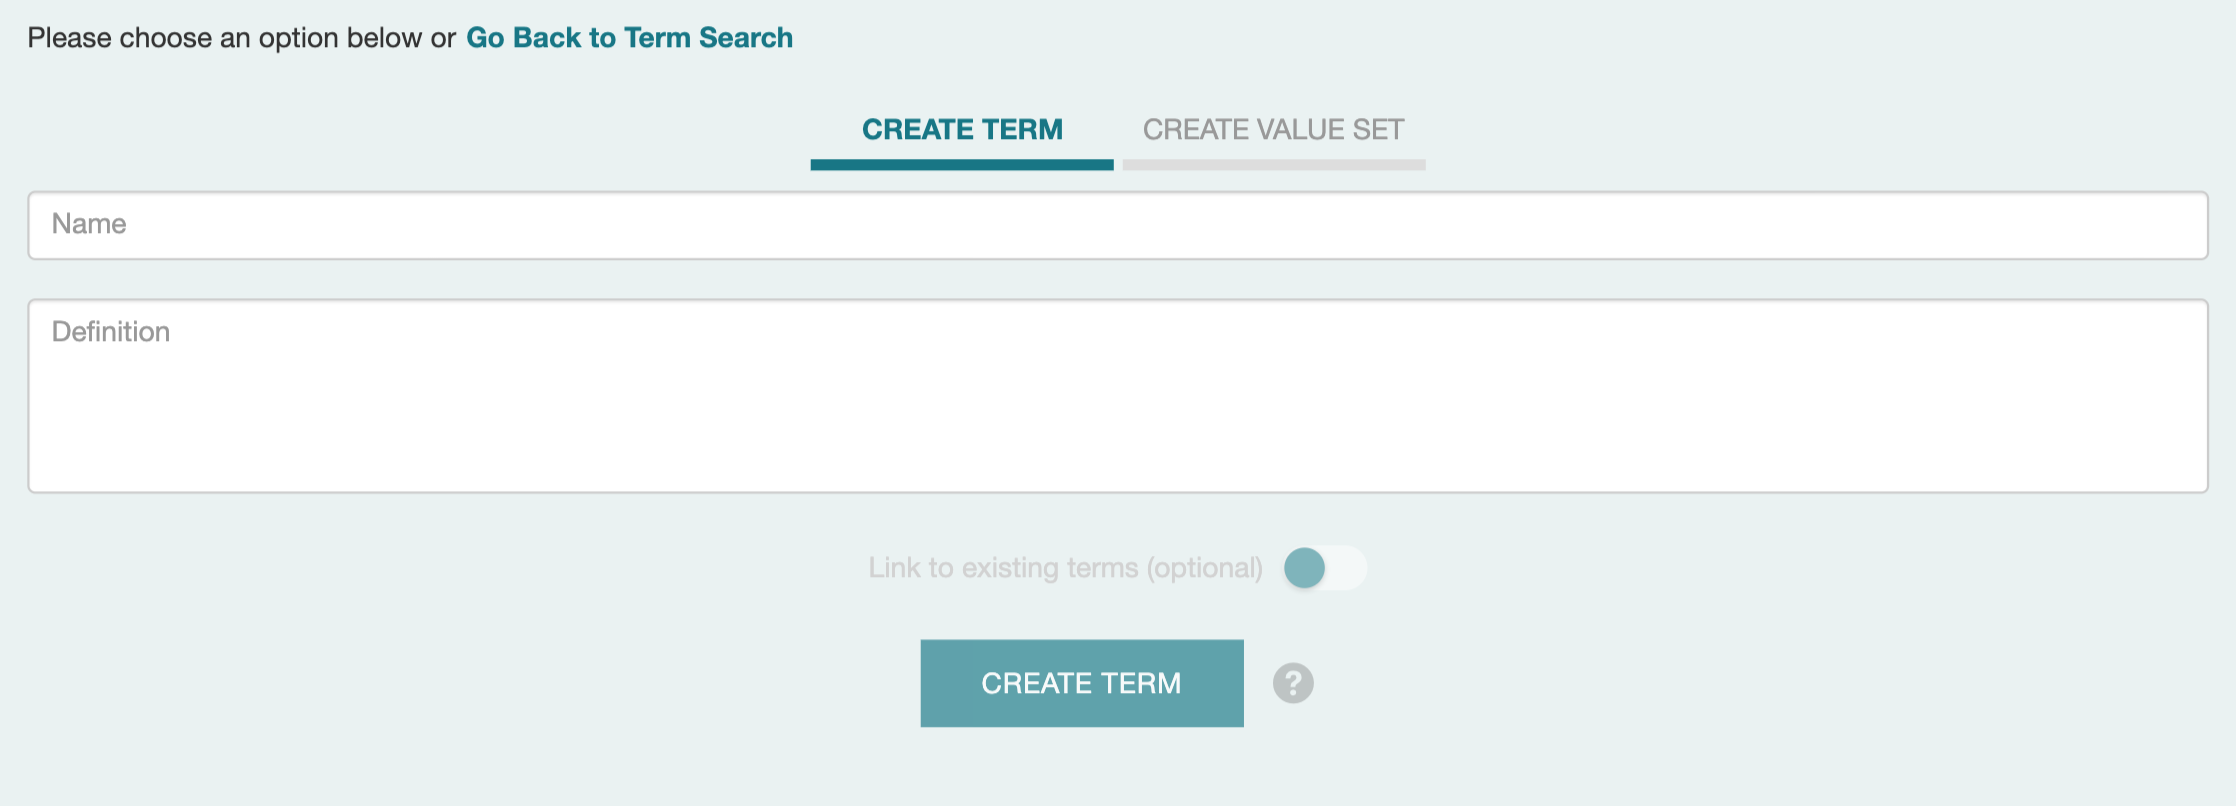
To begin the process of adding a new term, click on the Add New Terms link at the top of the term selection dialog box. The link is highlighted in the image below.

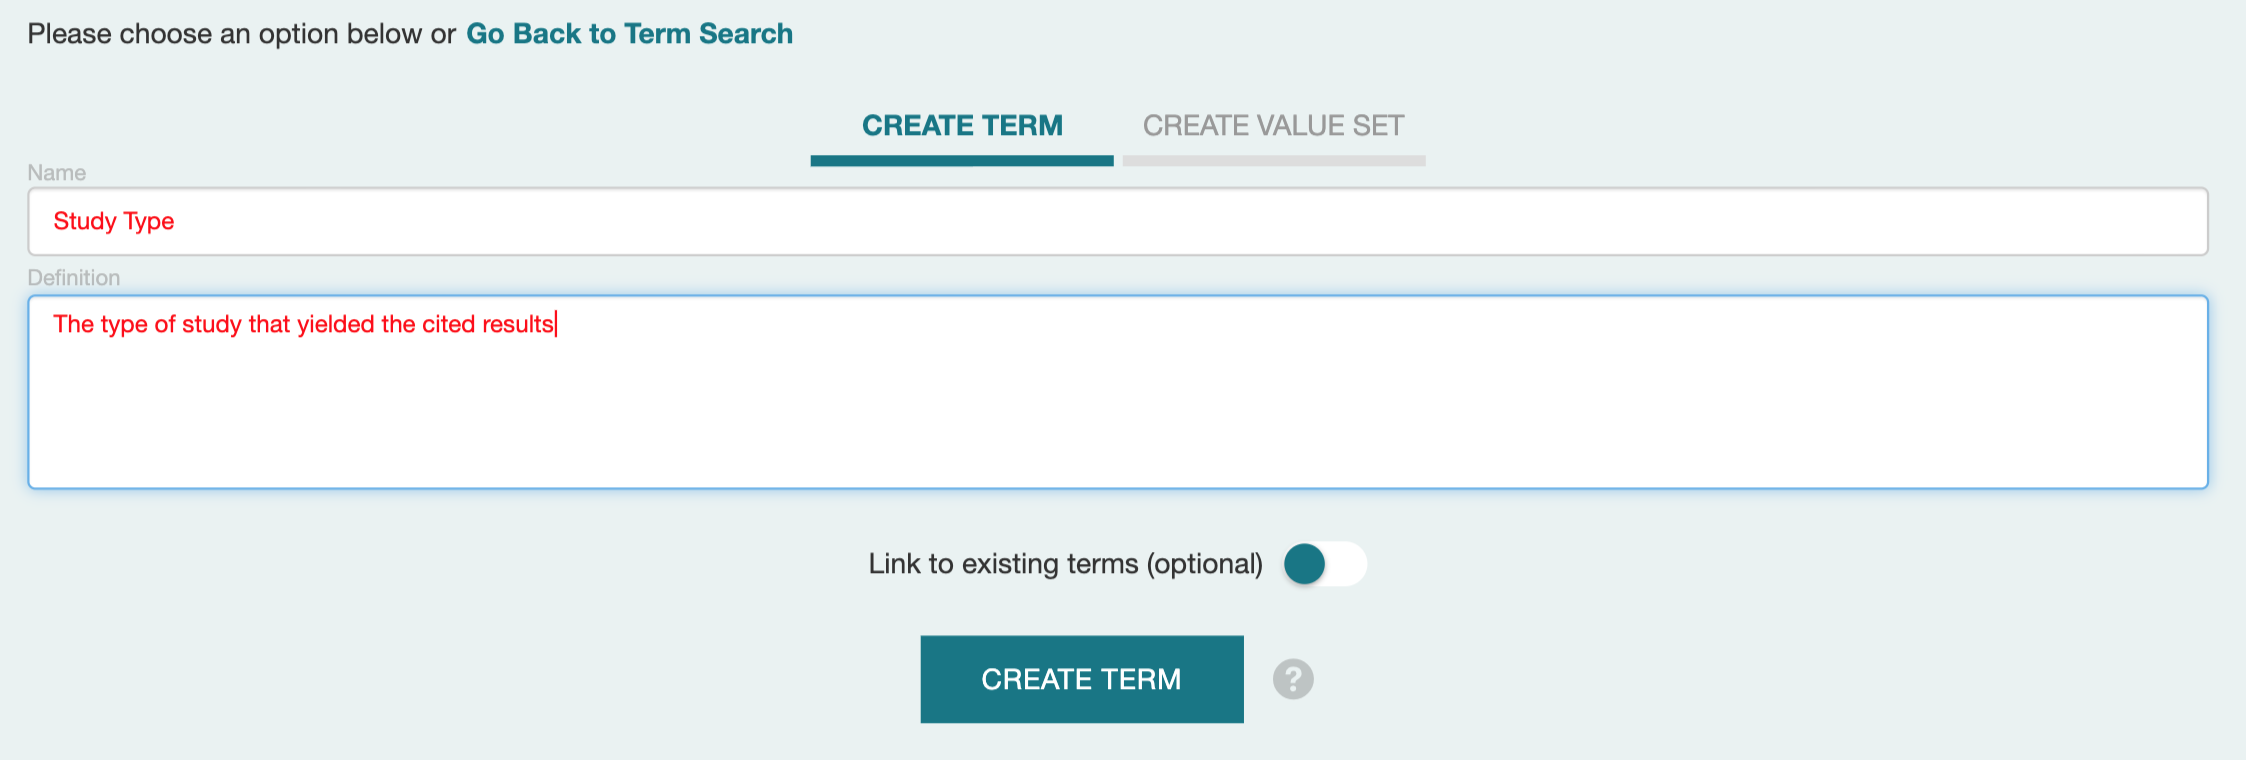
The next two screenshots show the resulting dialog box, and the entry of appropriate text into the fields.
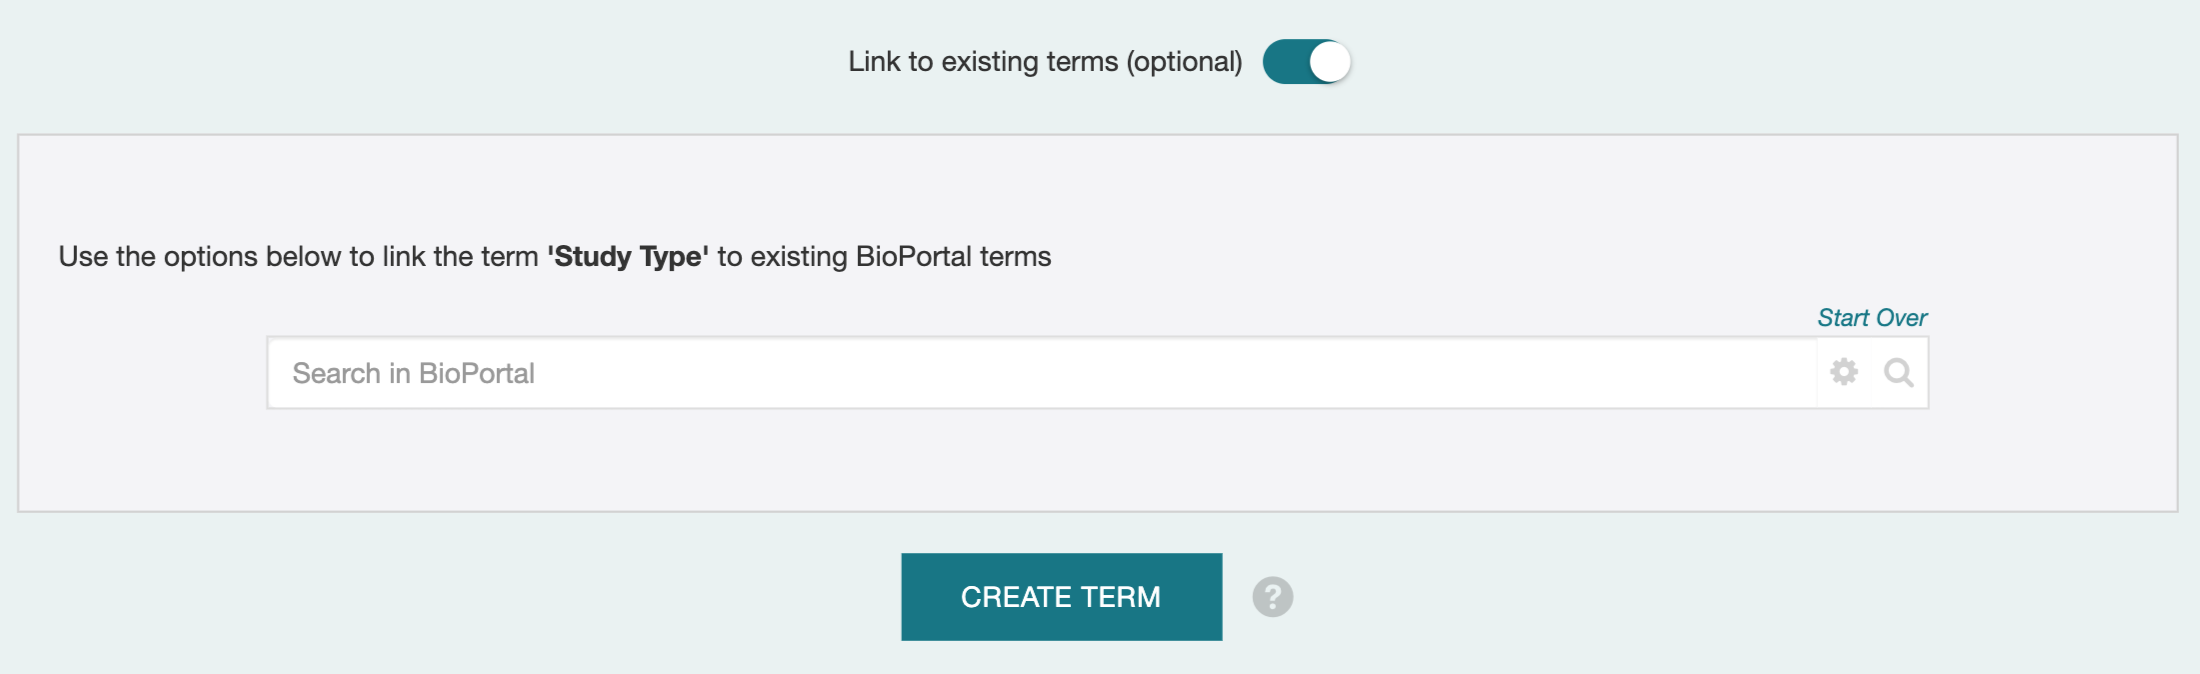
If you click on the "Link to existing terms (optional)" rocker switch, you will be taken through additional dialogs (first one shown) that let you add relationships from your term to existing terms in existing ontologies. In the future, this information may support informing ontology resource authors of your proposed addition to their ontology.
Adding a New List of Terms
The feature to add a new list of terms is not available within CEDAR. To perform this action, you must create or modify an ontology in BioPortal to add your list of terms.
This is particularly straightforward to do as a SKOS vocabulary, if you follow the appropriate BioPortal practices for a SKOS vocabulary . collaborators from our Metadata Center and the FAIR Data Collective have created a tutorial describing a simple way to create such a SKOS vocabulary that can make SKOS vocabularies easy to build, register in BioPortal, and maintain in GitHub.
Customizing What You Have
When you are done adding terms, you may want to eliminate certain terms, or put some terms ahead of others. CEDAR supports these capabilities. Both use the Arrange button on the Values tab of the field in the Template Designer, which brings up the following dialog.
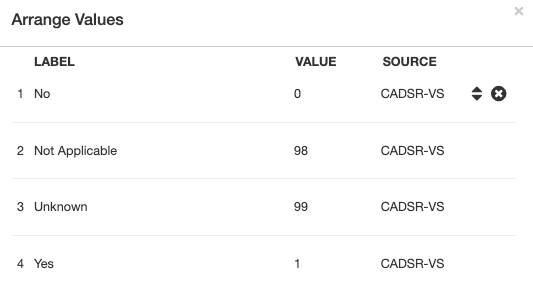
Rejecting Terms
To eliminate a term, move your mouse pointer over the term. Click on the X icon that appears and the term will not be shown to users.
Putting Favorites First
To move a term, click on the up-down arrow icon. You will be shown a dialog box that lets you move the term to the top of the list, or to any particular place in the list. The locations of other terms are adjusted automatically.