Use Case: Building resusable groups of CDEs
This page covers the basics of building elements in the CEDAR Workbench, with a special focus on CDEs.
- Introduction
- Step-by-step guide: build an element
- Step 1 - Navigate to your workspace
- Step 2 - Create a new element
- Step 3 - Add CDEs to your element
- Step 4 - Configure CDE options
- Arranging CDEs in elements
- Deleteing CDEs from elements
- Nesting elements
- Adding elements to templates
Introduction
Modules in the NCI Form Builder act as containers for one or more questions, allowing end users to create reusable groupings of questions for placement on forms. Equivalent functionality is available in the CEDAR Workbench, i.e., users can create elements with one or more fields and add them to templates.
Refer to the following graphical representations for terminology comparison:
Form Builder
|-- Module
|   |-- Question/CDE
|   |-- Question/CDE
|   |-- Question/CDE
CEDAR Workbench
|-- Element
|   |-- Field/CDE
|   |-- Field/CDE
|   |-- Field/CDE
Step-by-step guide: build an element
This section of the documentation will walk you through the mechanical steps of creating elements in the CEDAR Workbench.
Step 1 - Go to your Workspace
Navigate to the CEDAR Workbench and make sure you're logged in. If you need help creating an account and logging in, see the Accounts and Logging In section of this guide.
Click the Workspace link in the upper-left portion of the window to start out in your personal workspace.
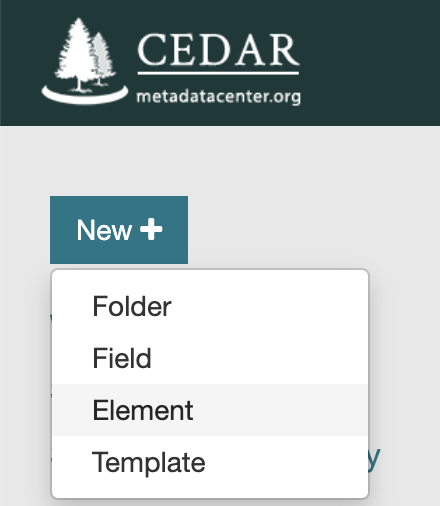
Step 2 - Create a new element
Click on the "New +" button in the upper-left portion of the window, and select "Element" from the resulting dropdown menu:
This will create a new element and open the element designer view.
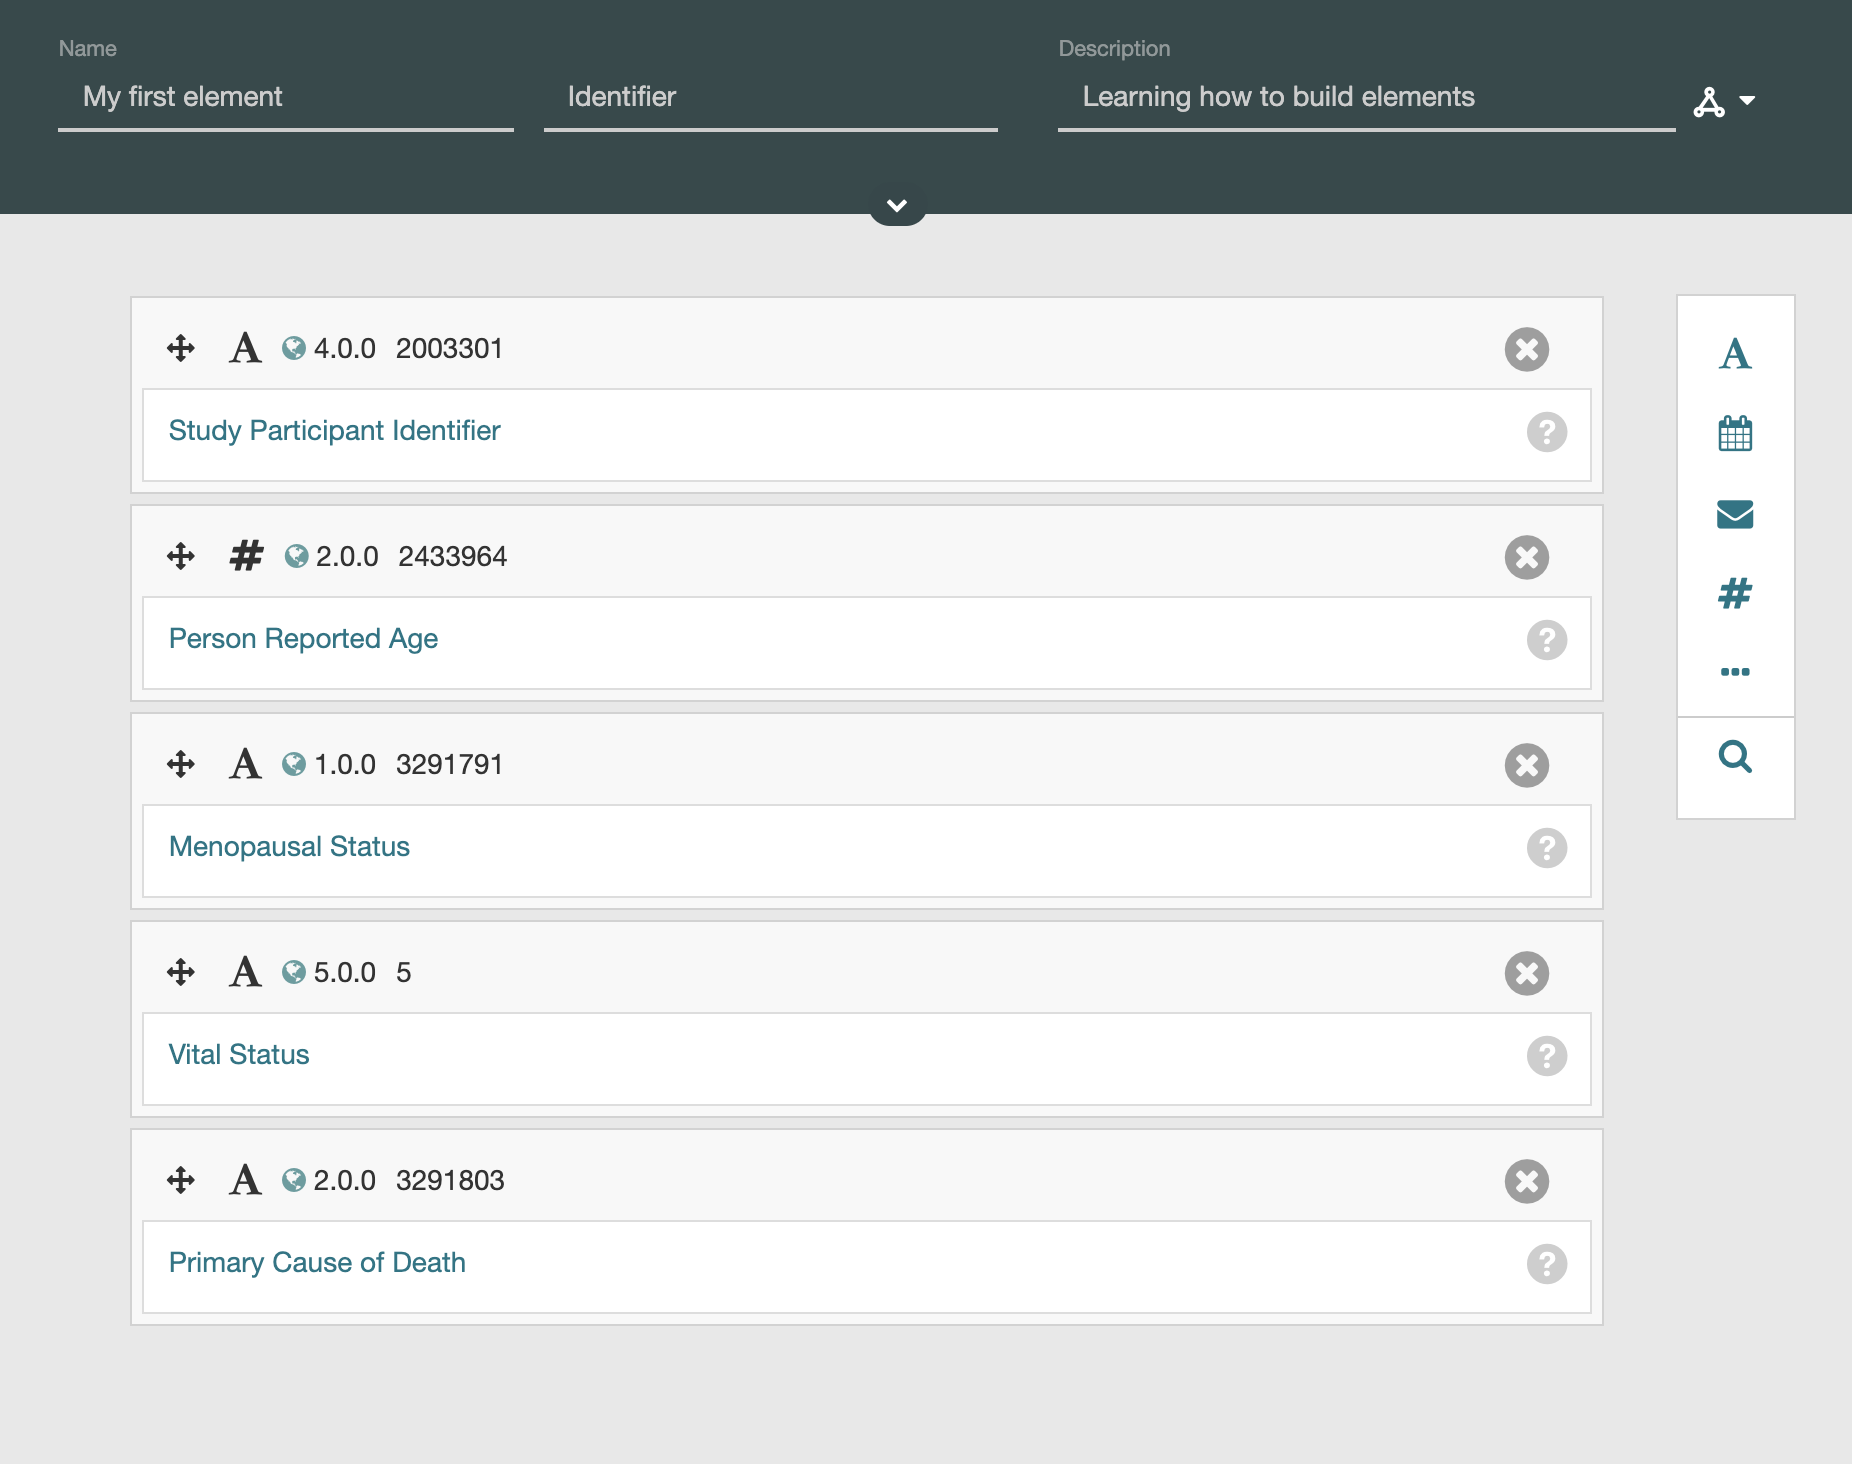
In the dark gray header at the top of the page, enter a name and description for your element, leaving the Identifier field blank:
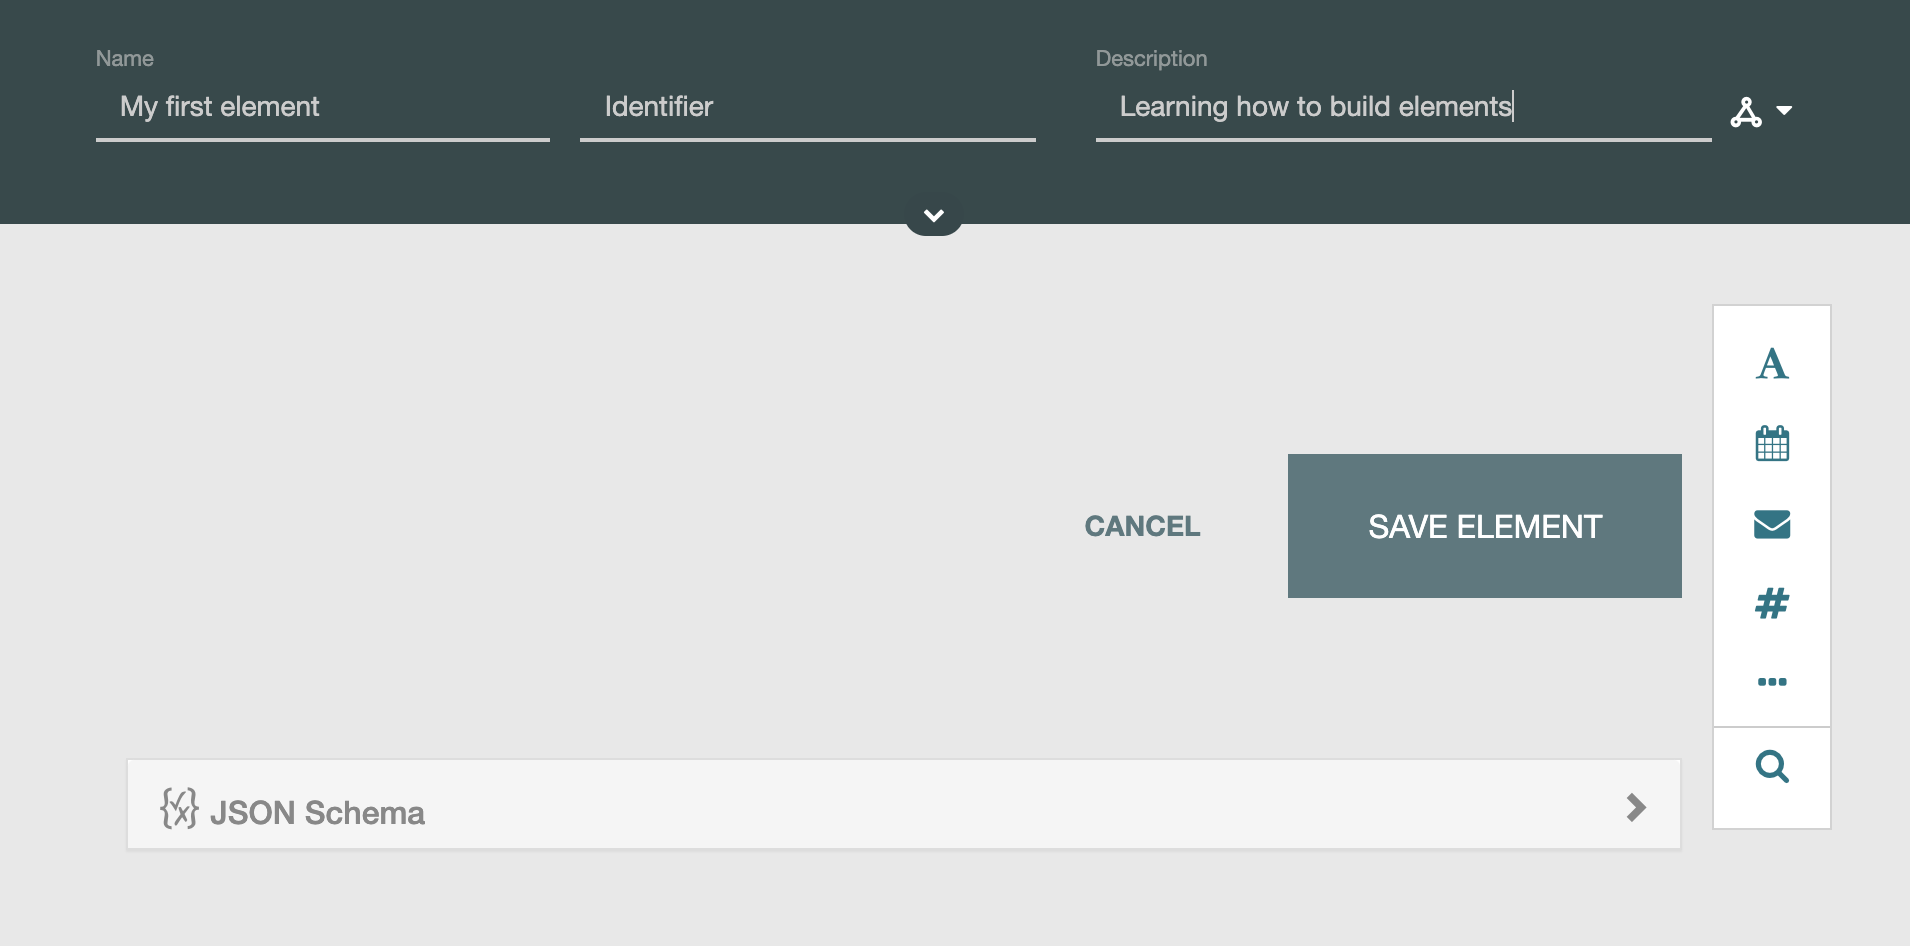
Click the "SAVE ELEMENT" button. This will ensure that your new element is saved in the CEDAR Workbench. If you need to exit your browser and return to this tutorial at a later time, your new element will appear in your workspace, and you can double-click on it to reopen the element designer.
Step 3 - Add some CDEs
Locate the vertical toolbar on the right-hand side of the element designer and click the "Search for fields and elements" button (depicted with a magnifying glass icon):
![]()
This will launch a modal dialog where you can use the search bar across the top to locate the desired CDE by entering, e.g., the Public ID or double quoted CDE title. Use the search icon or press the Enter key to perform a search and view the results:
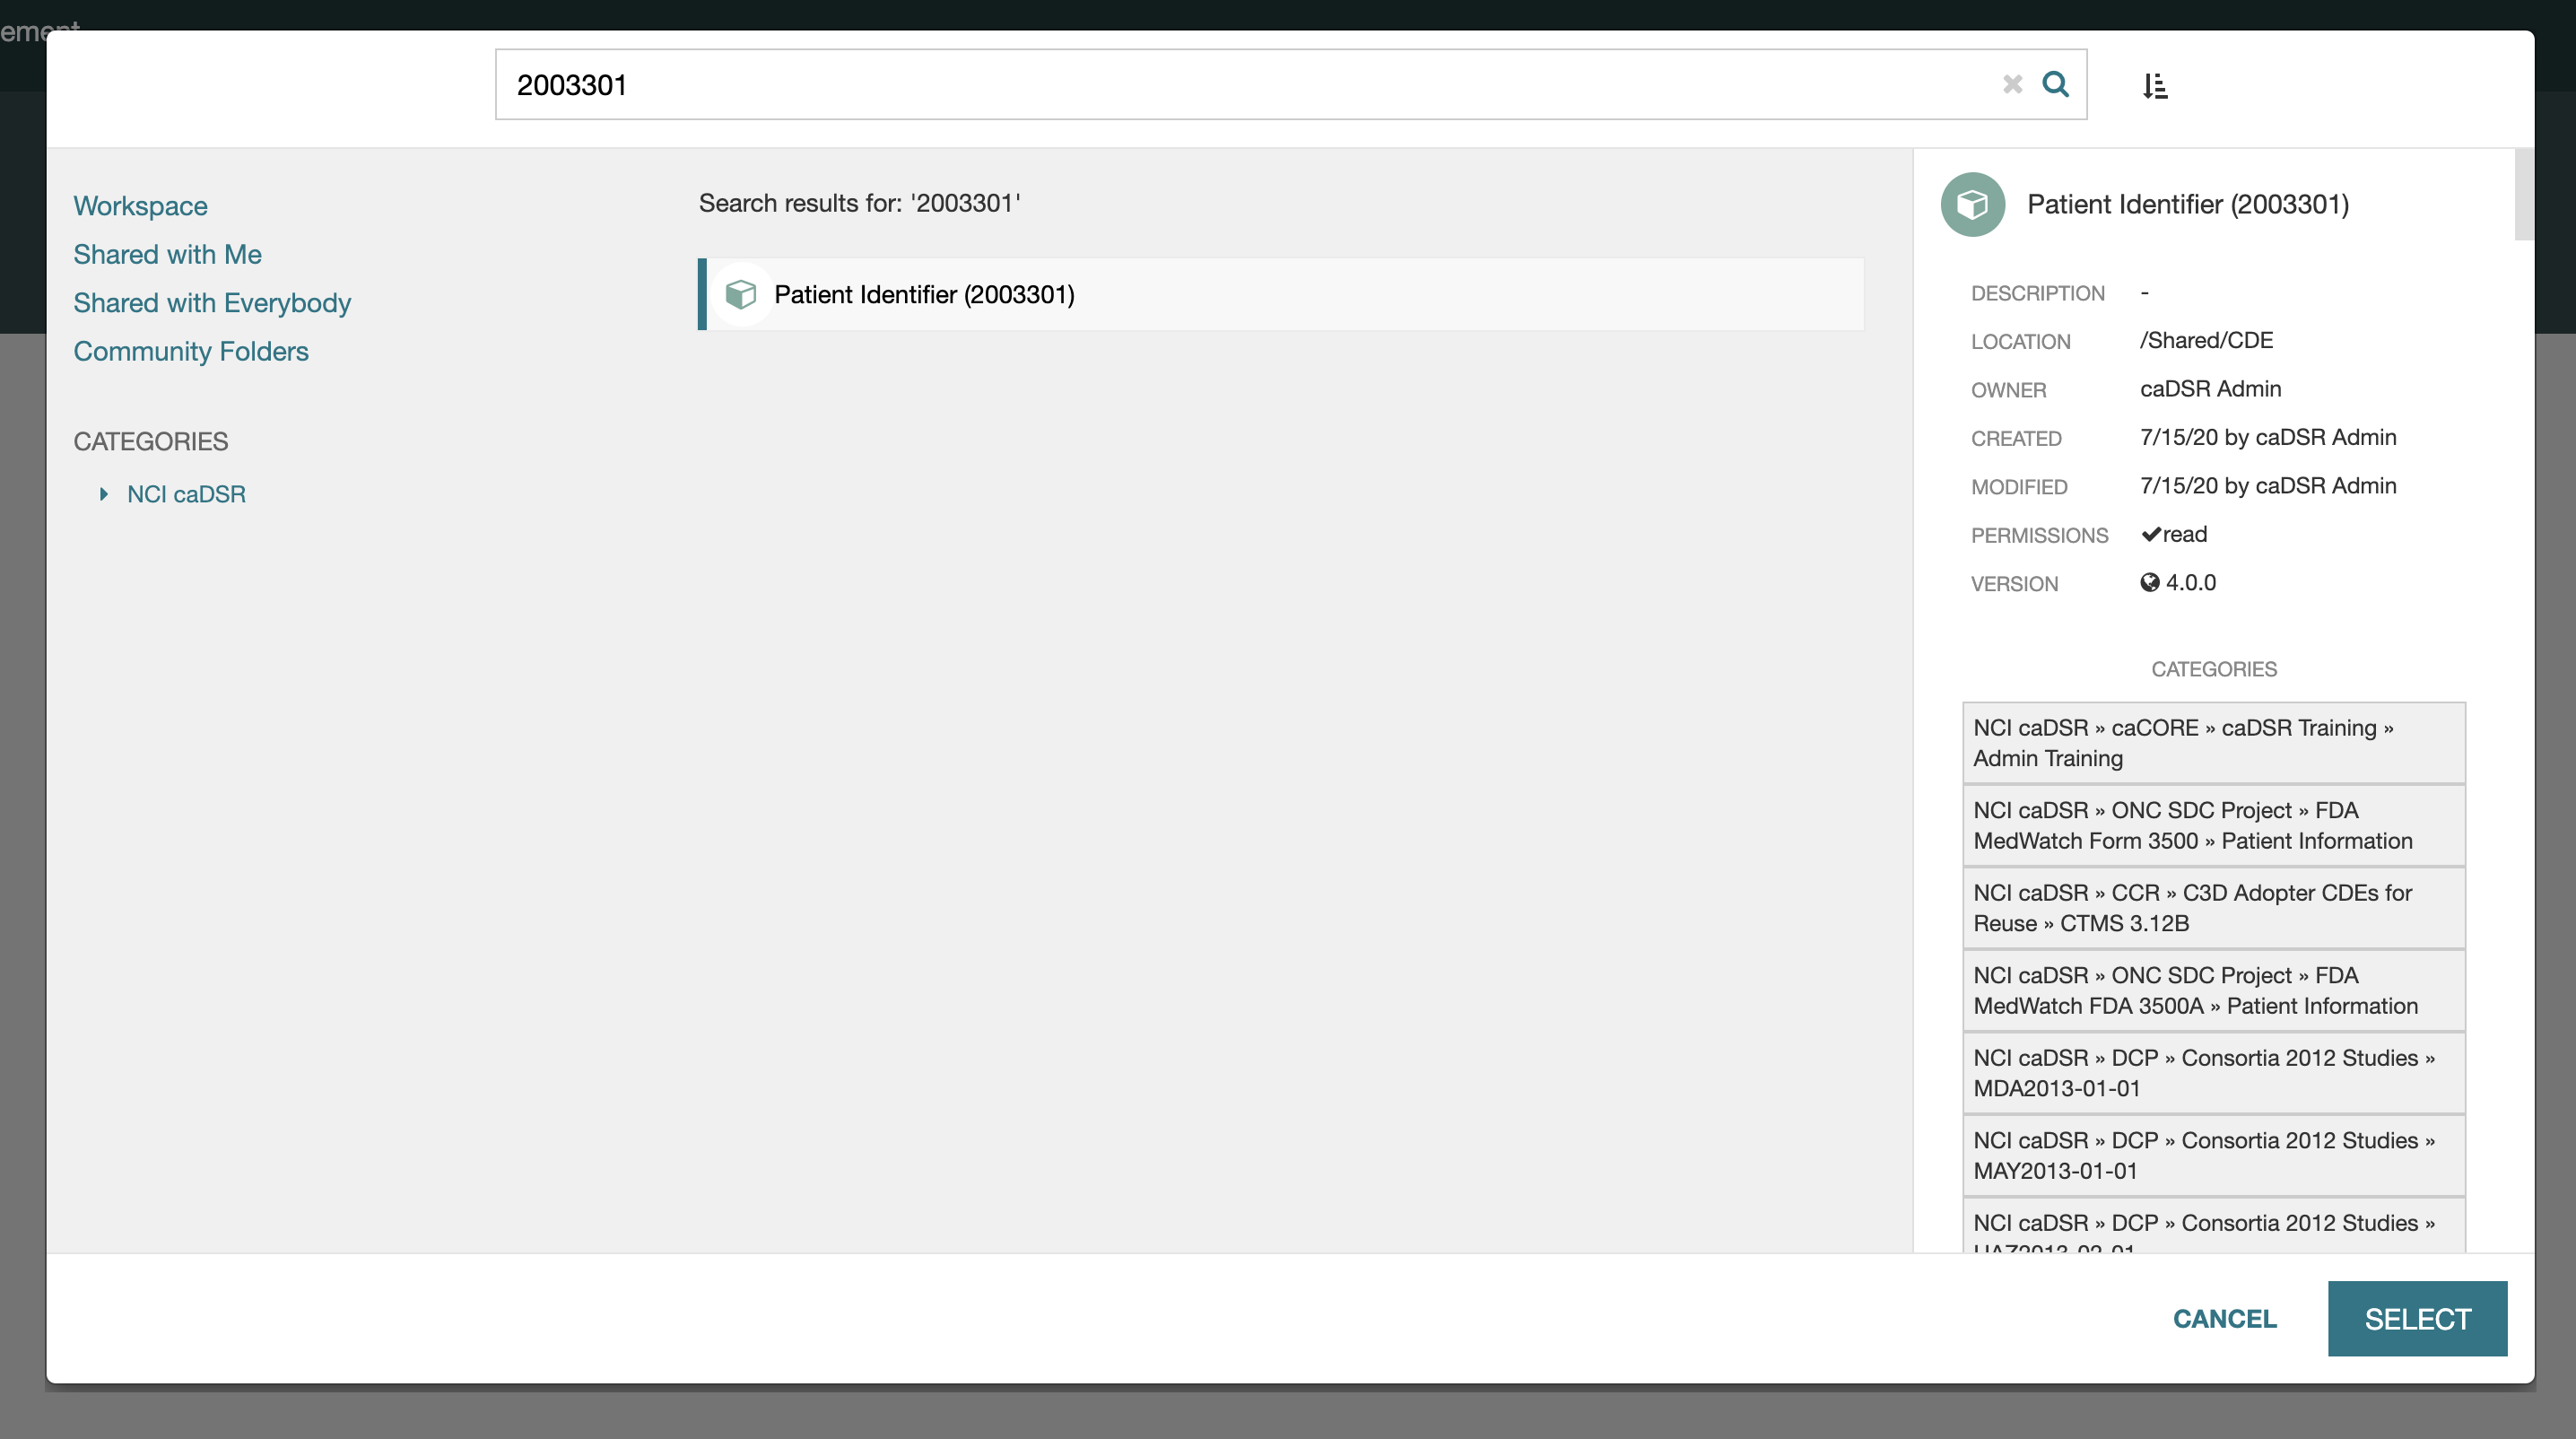
You can select items in the list of search results to display a details pane on the right hand side of the dialog for viewing informaton such as the CDE owner, storage location, version number, etc.
If you need more information about how to efficiently search for CDEs in the CEDAR Workbench, please refer to the "Finding CDEs" page.
Once you locate the desired CDE, select it in the middle pane of the search dialog and click the "SELECT" button. This will insert the CDE into your element and return to the element designer.
Feel free to practice by adding several more CDEs of your choice to your element:
Note that CDEs aren't the only type of fields you can add to elements. The CEDAR Workbench has a large variety of field types such as short or long text, links, images, section breaks, multiple choice, etc. All of these fields are accessible via the vertical toolbar on the right hand side of the element designer. For more detail on the various field types, you may find the Field Type Reference page in the Building Basic Templates portion of the user guide helpful.
Don't forget to periodically click the SAVE ELEMENT button to save your changes as you work your way through the documentation.
Step 4 - Configure CDE options
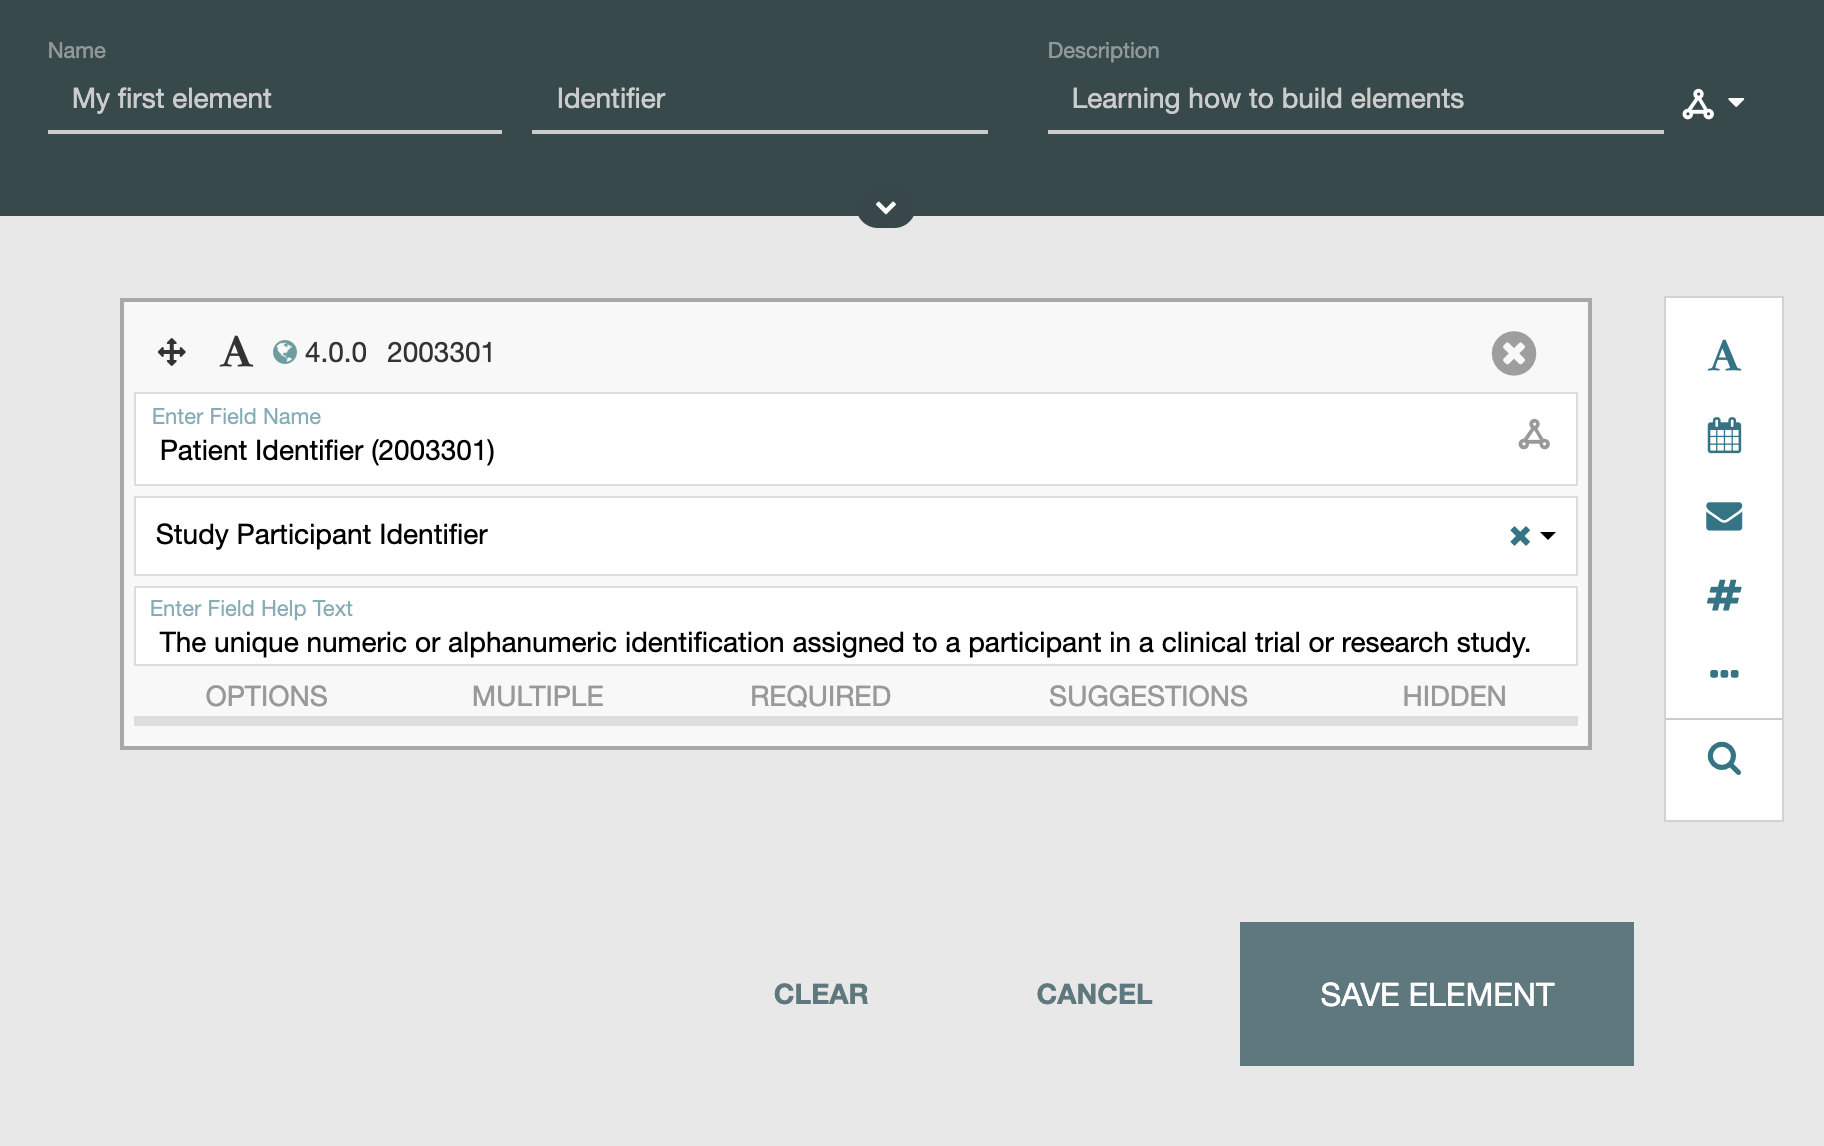
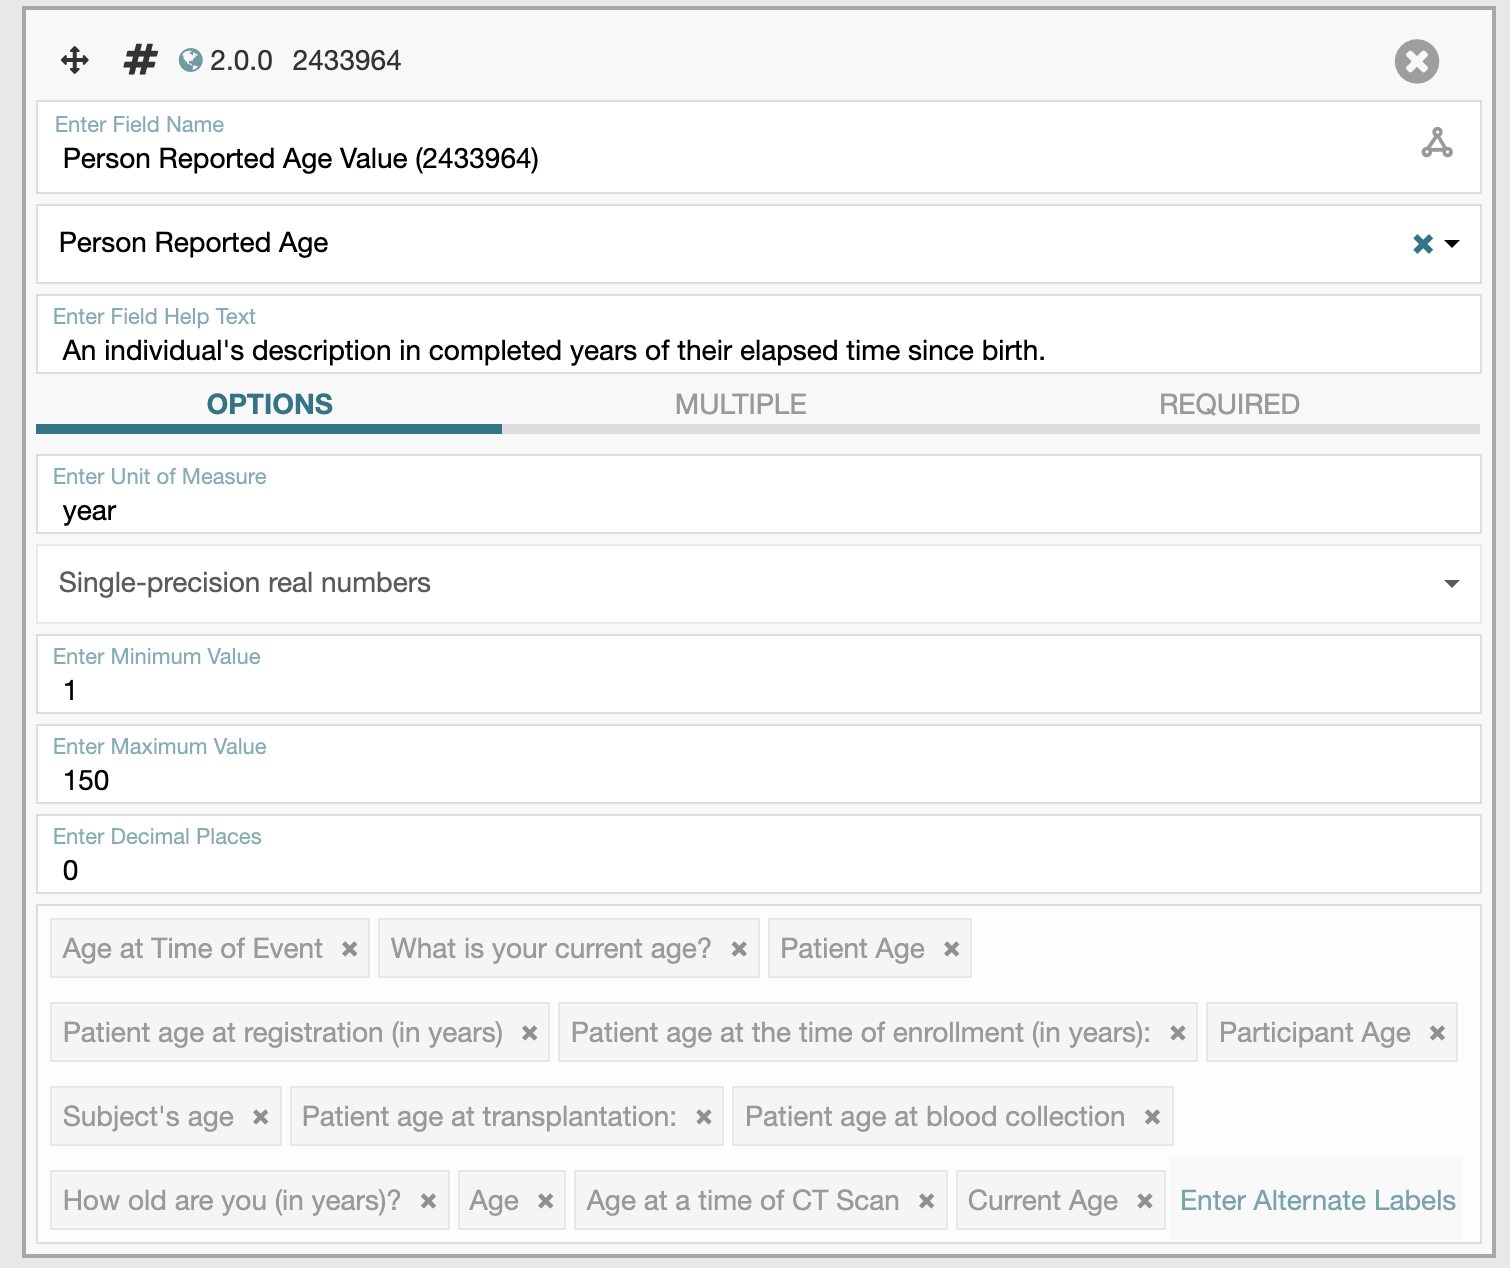
Click on the header bar (shows the field type and CDE's public identifier) of any of the CDEs you added to your element to show the expanded view of the CDE:

CDEs are imported into the CEDAR Workbench as trusted artifacts, which means that many of the options are write protected and unmodifiable, e.g., the CDE's name and help text. There are some common options however, that users are allowed to configure.
Preferred labels
To modify the preferred question text (aka "preferred label" in the CEDAR Workbench), click the second text box from the top to display a dropdown list of alternate preferred labels. You can also click the "OPTIONS" link at the bottom of the CDE to view a tag group depiction of all possible labels:
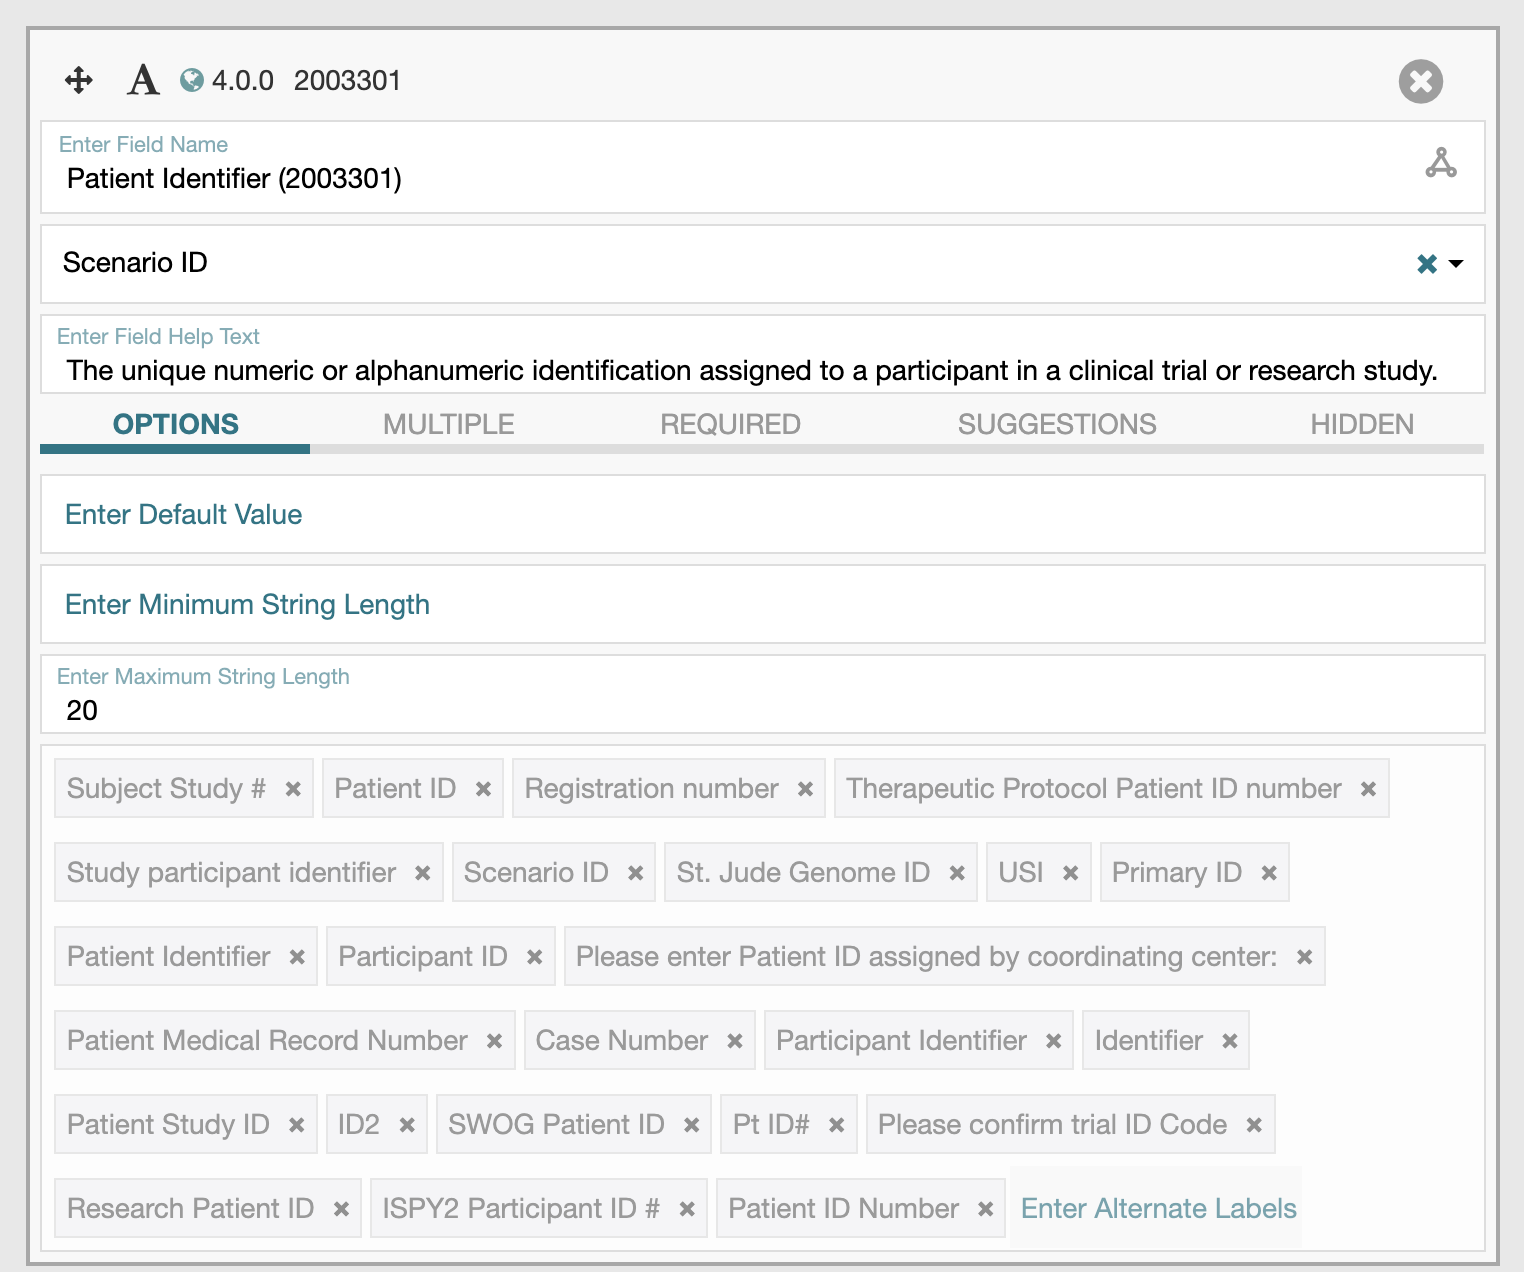
The other bits of information displayed under the OPTIONS link are unmodifiable, but still may be of interest because they allow you to see configurations specific to the CDE type. In the screen shot above, minimm and maximum string length options are displayed because the CDE is a text type field. If you open the options for a CDE that is a numeric type field, you see a different set of options, e.g., unit of measure, decimal places, etc.:
Cardinality
Use the MULTIPLE link at the bottom of any CDE to specify whether the CDE is allowed to appear multiple times (or not at all) in your element. Click the horizontal bar under YES, and use the MIN and MAX buttons to specify the number of allowed occurrences:
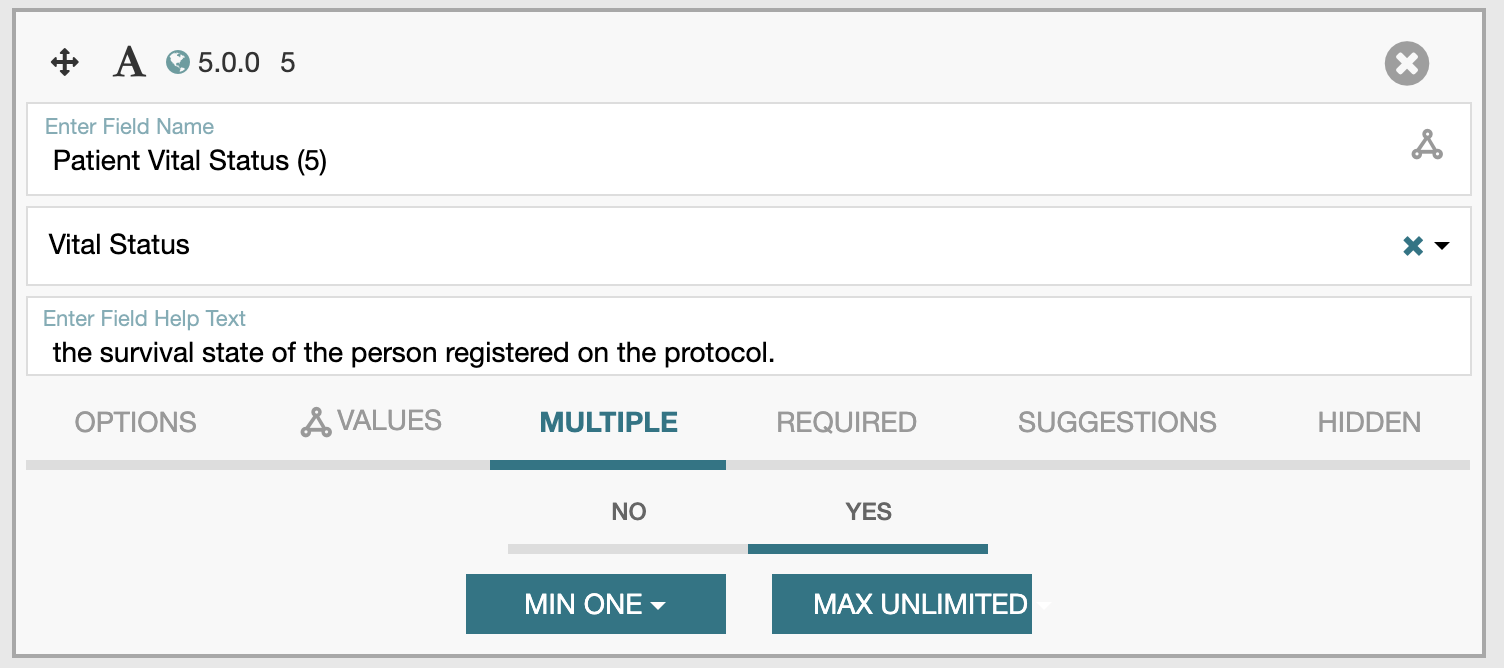
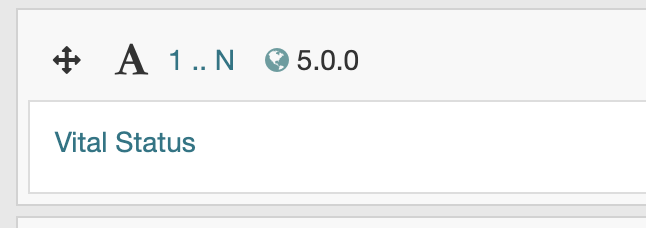
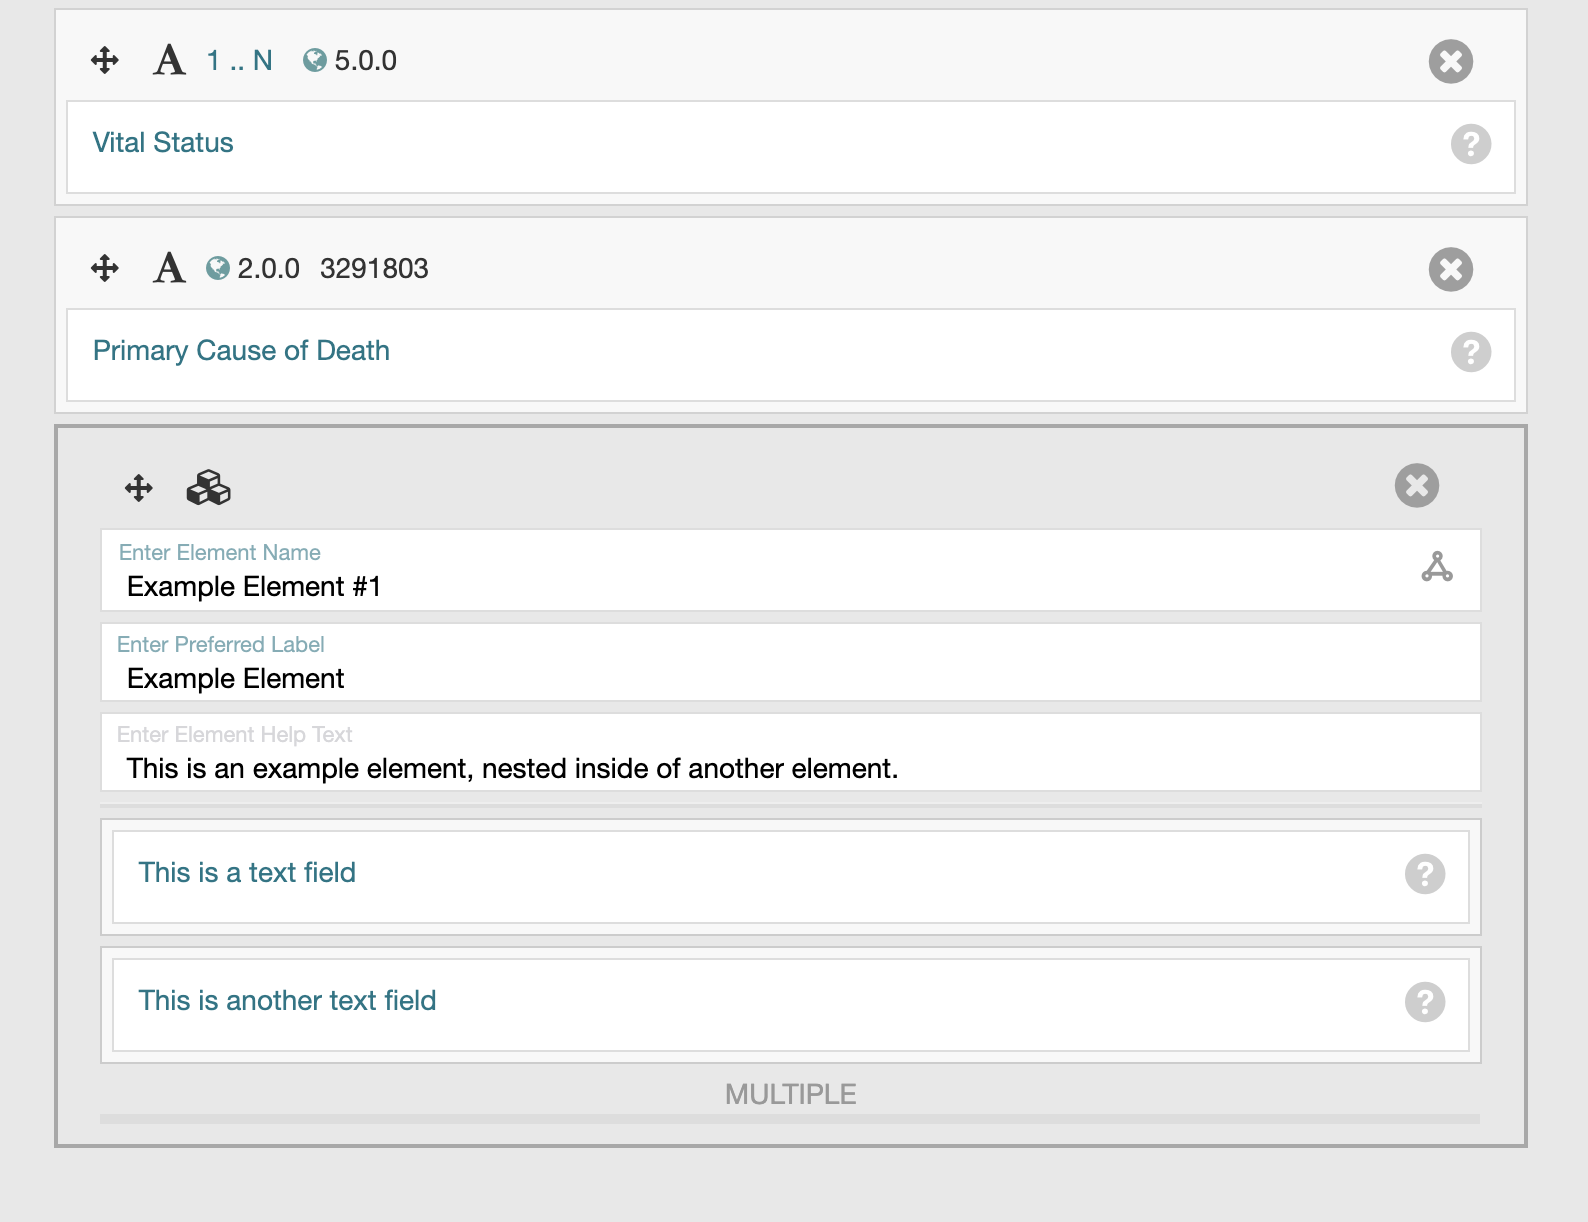
If you specify a cardinality and click the SAVE ELEMENT button, note that the cardinality is then shown as part of the field header, e.g., "1..N" for minimum of one, maximum of unlimited:
Required vs. optional
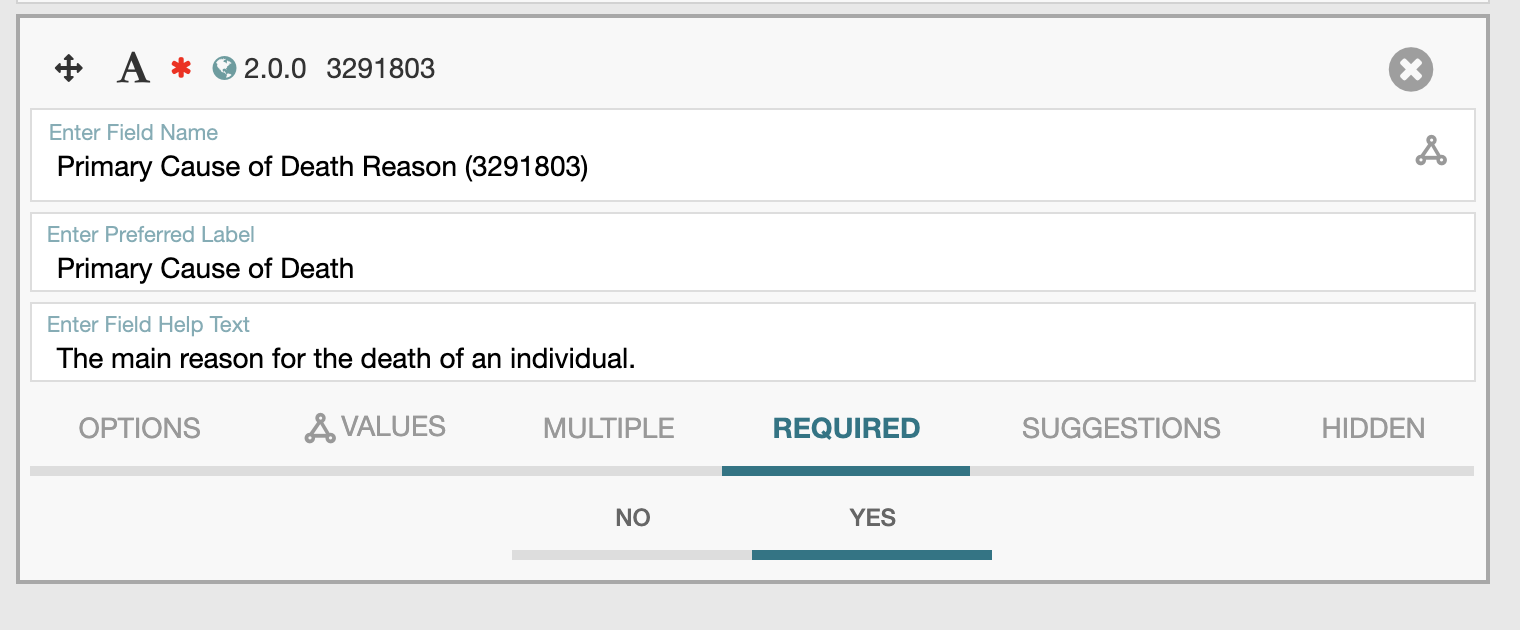
The REQUIRED link allows you to specify whether or not the CDE needs to be filled out. If YES is selected, a red asterisk appears in the CDE header:
Suggestions
Setting SUGGESTIONS to YES enables the CEDAR Workbench intelligent authoring suggestion system for the field. For a detailed explanation of this functionality, see Understanding the Suggestion System.
Hidden
Use HIDDEN if you want a particular field/CDE to be hidden from the end user during template population.
Permissible values
If you added a CDE to your element with permissible values, aka "values" in the CEDAR Workbench, you will see a VALUES link at the bottom of the CDE:
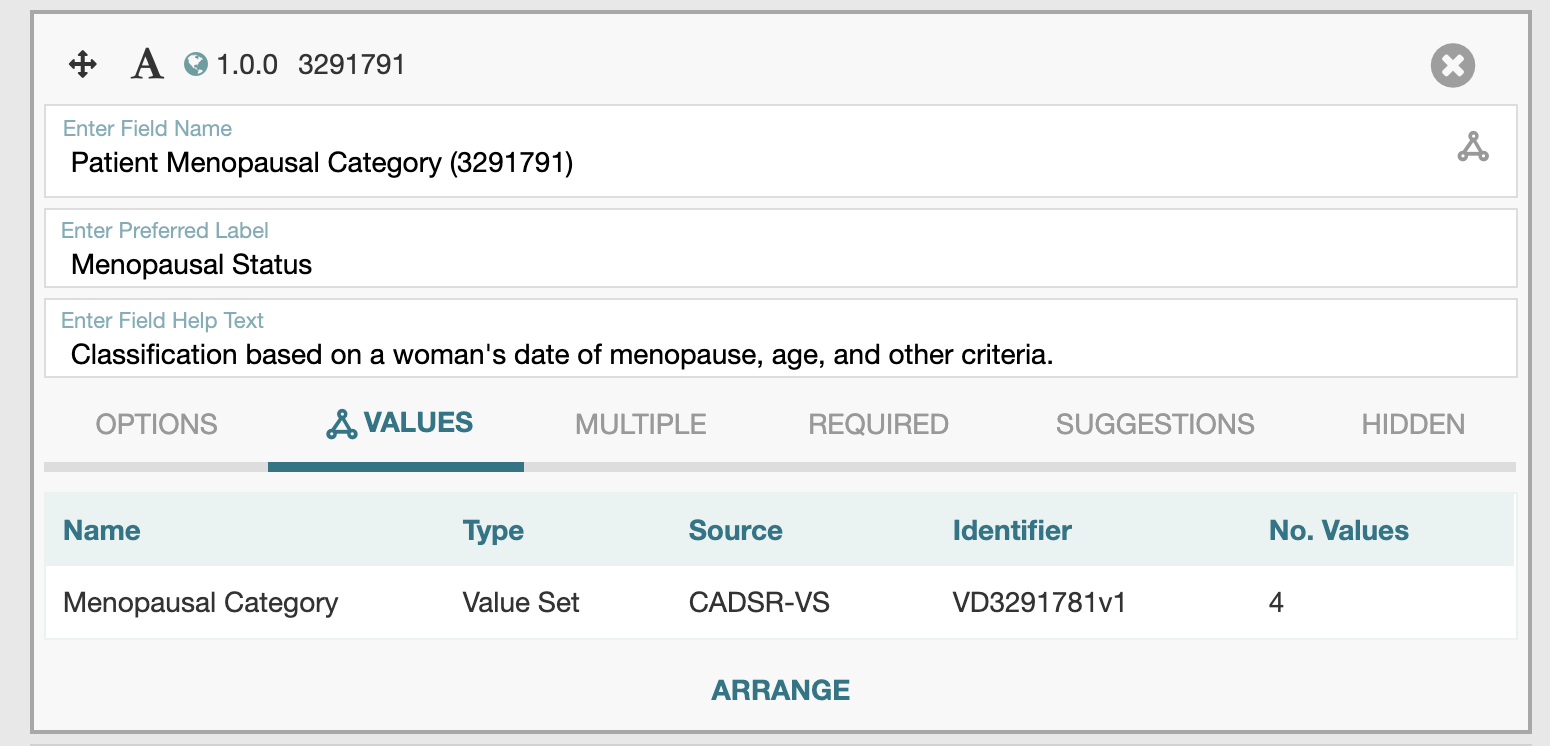
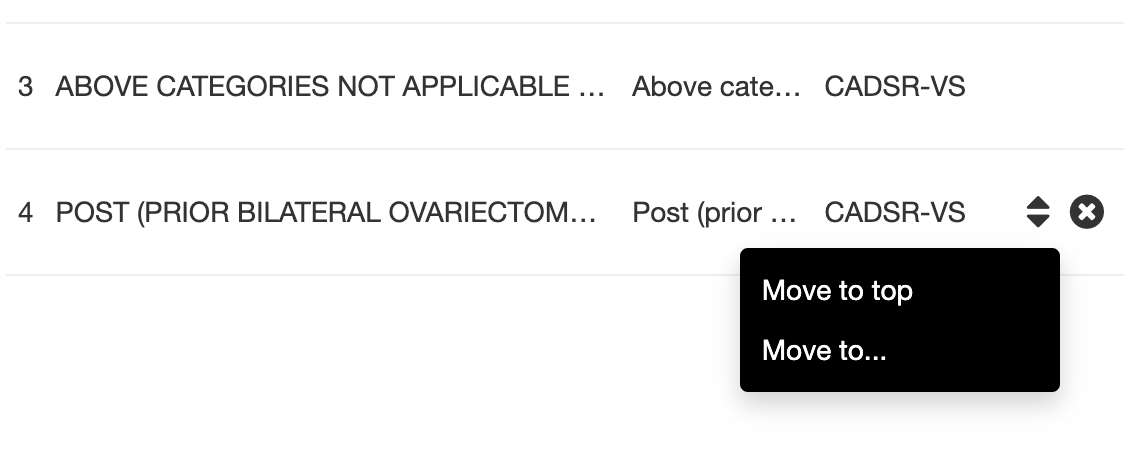
To view the values, click the ARRANGE link, which launches the Arrange Values modal dialog:
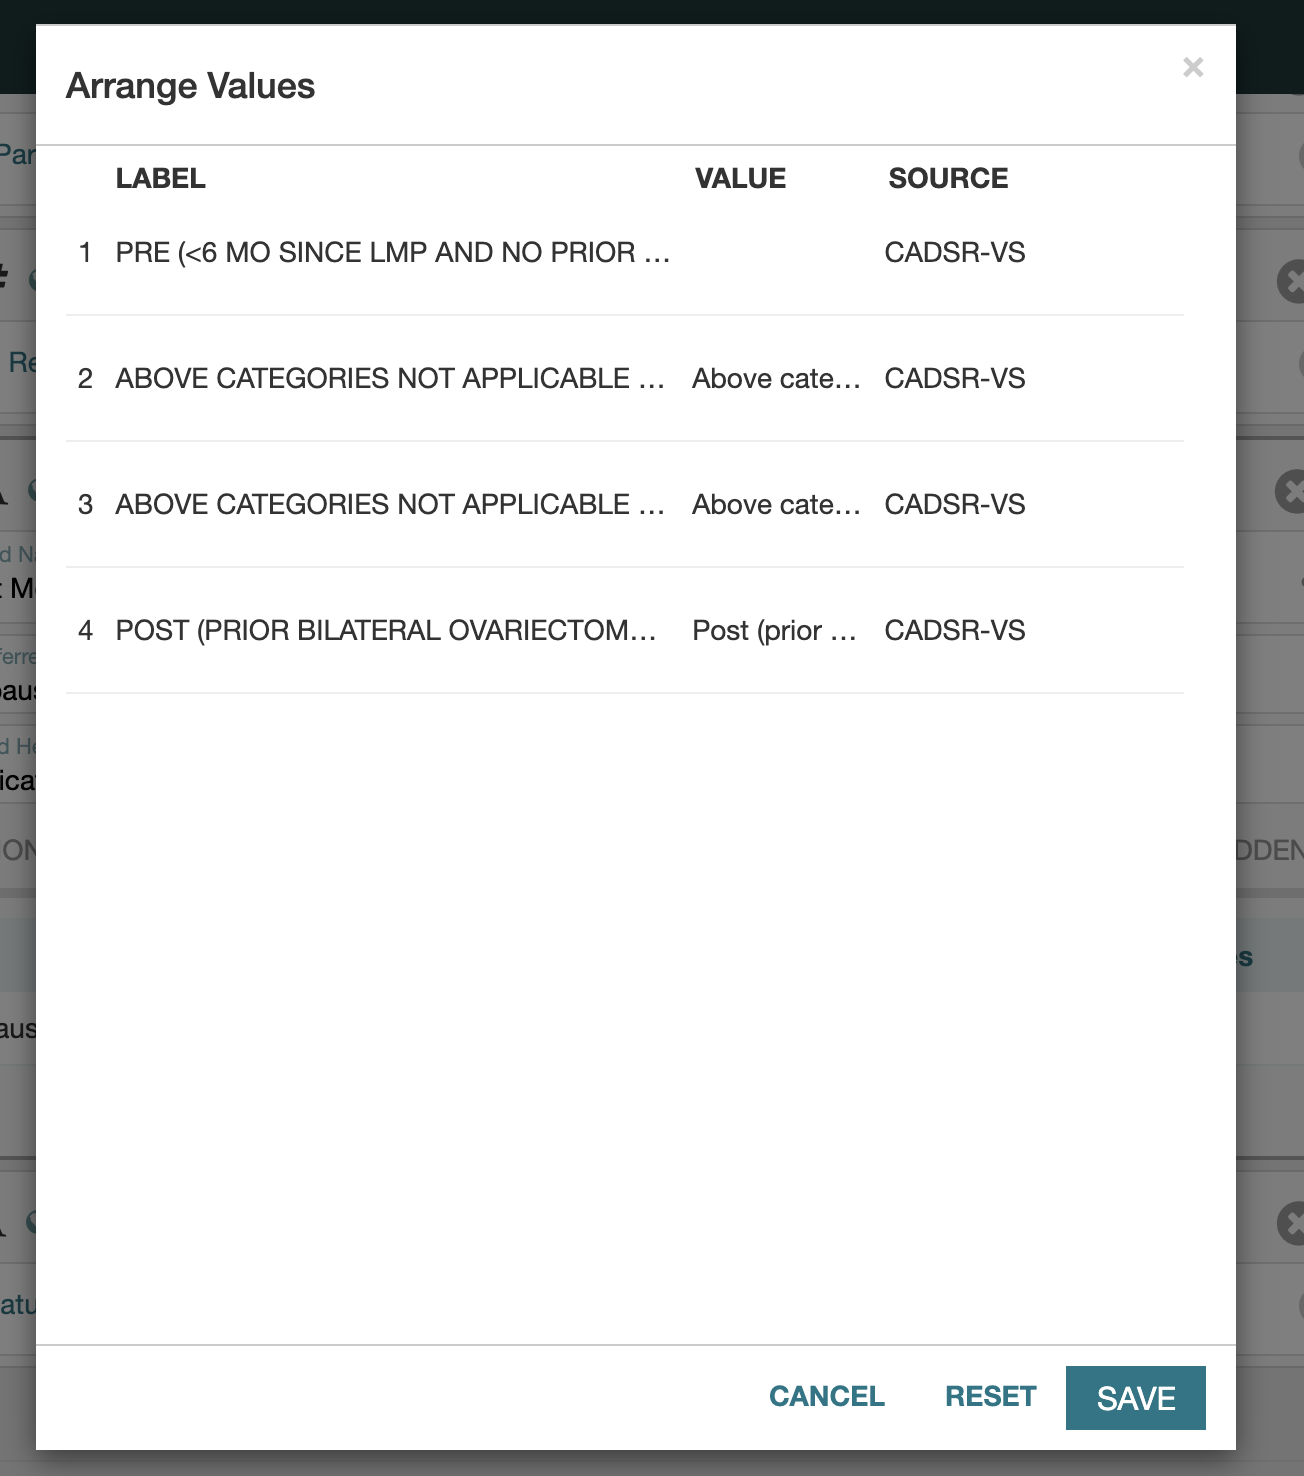
Hover your mouse over individual values to display right hand icons that allow you to either delete a value, or move the value to the top and/or a specific position in the list:
Adding values is not currently possible from within the CEDAR Workbench. Requests for new values should be submitted via email to the following address: caDSR.RA@mail.nih.gov.
Arranging CDEs in elements
The CEDAR Workbench user interface has full drag-and-drop support. To rearrange the ordering of your CDEs and other fields, simply click on the headers and drag to the desired location.
Deleteing CDEs from elements
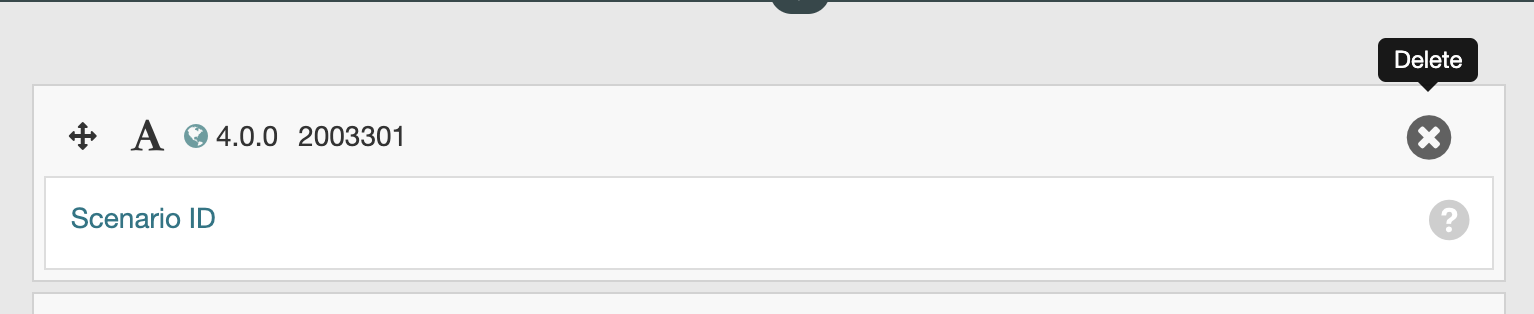
To delete CDEs and other fields from your element, click the 'X' icon on the top right corner of the header:
Nesting elements
The CEDAR Workbench allows users to nest elements inside of other elements. Note that nesting is restricted to one level deep. Adding an element to your element is done in the same way that you added CDEs. Click the "Search for fields and elements" button in the vertical toolbar, and select your element using the modal search dialog. When you add an element inside of another element, the user interface uses a slightly different border display to indicate the nesting:
Adding elements to templates
Once you have created and saved elements in the CEDAR Workbench, you are now able to add those elements to any templates for which you have write access. As a quick example, navigate to your workspace, click the "New +" button, and select Template from the resulting dropdown menu. Use the "Search for fields and elements" button in the vertical toolbar to launch the modal search dialog and select one of your newly created elements. The following screen shot depicts a new template that contains the element created in this step-by-step guide:
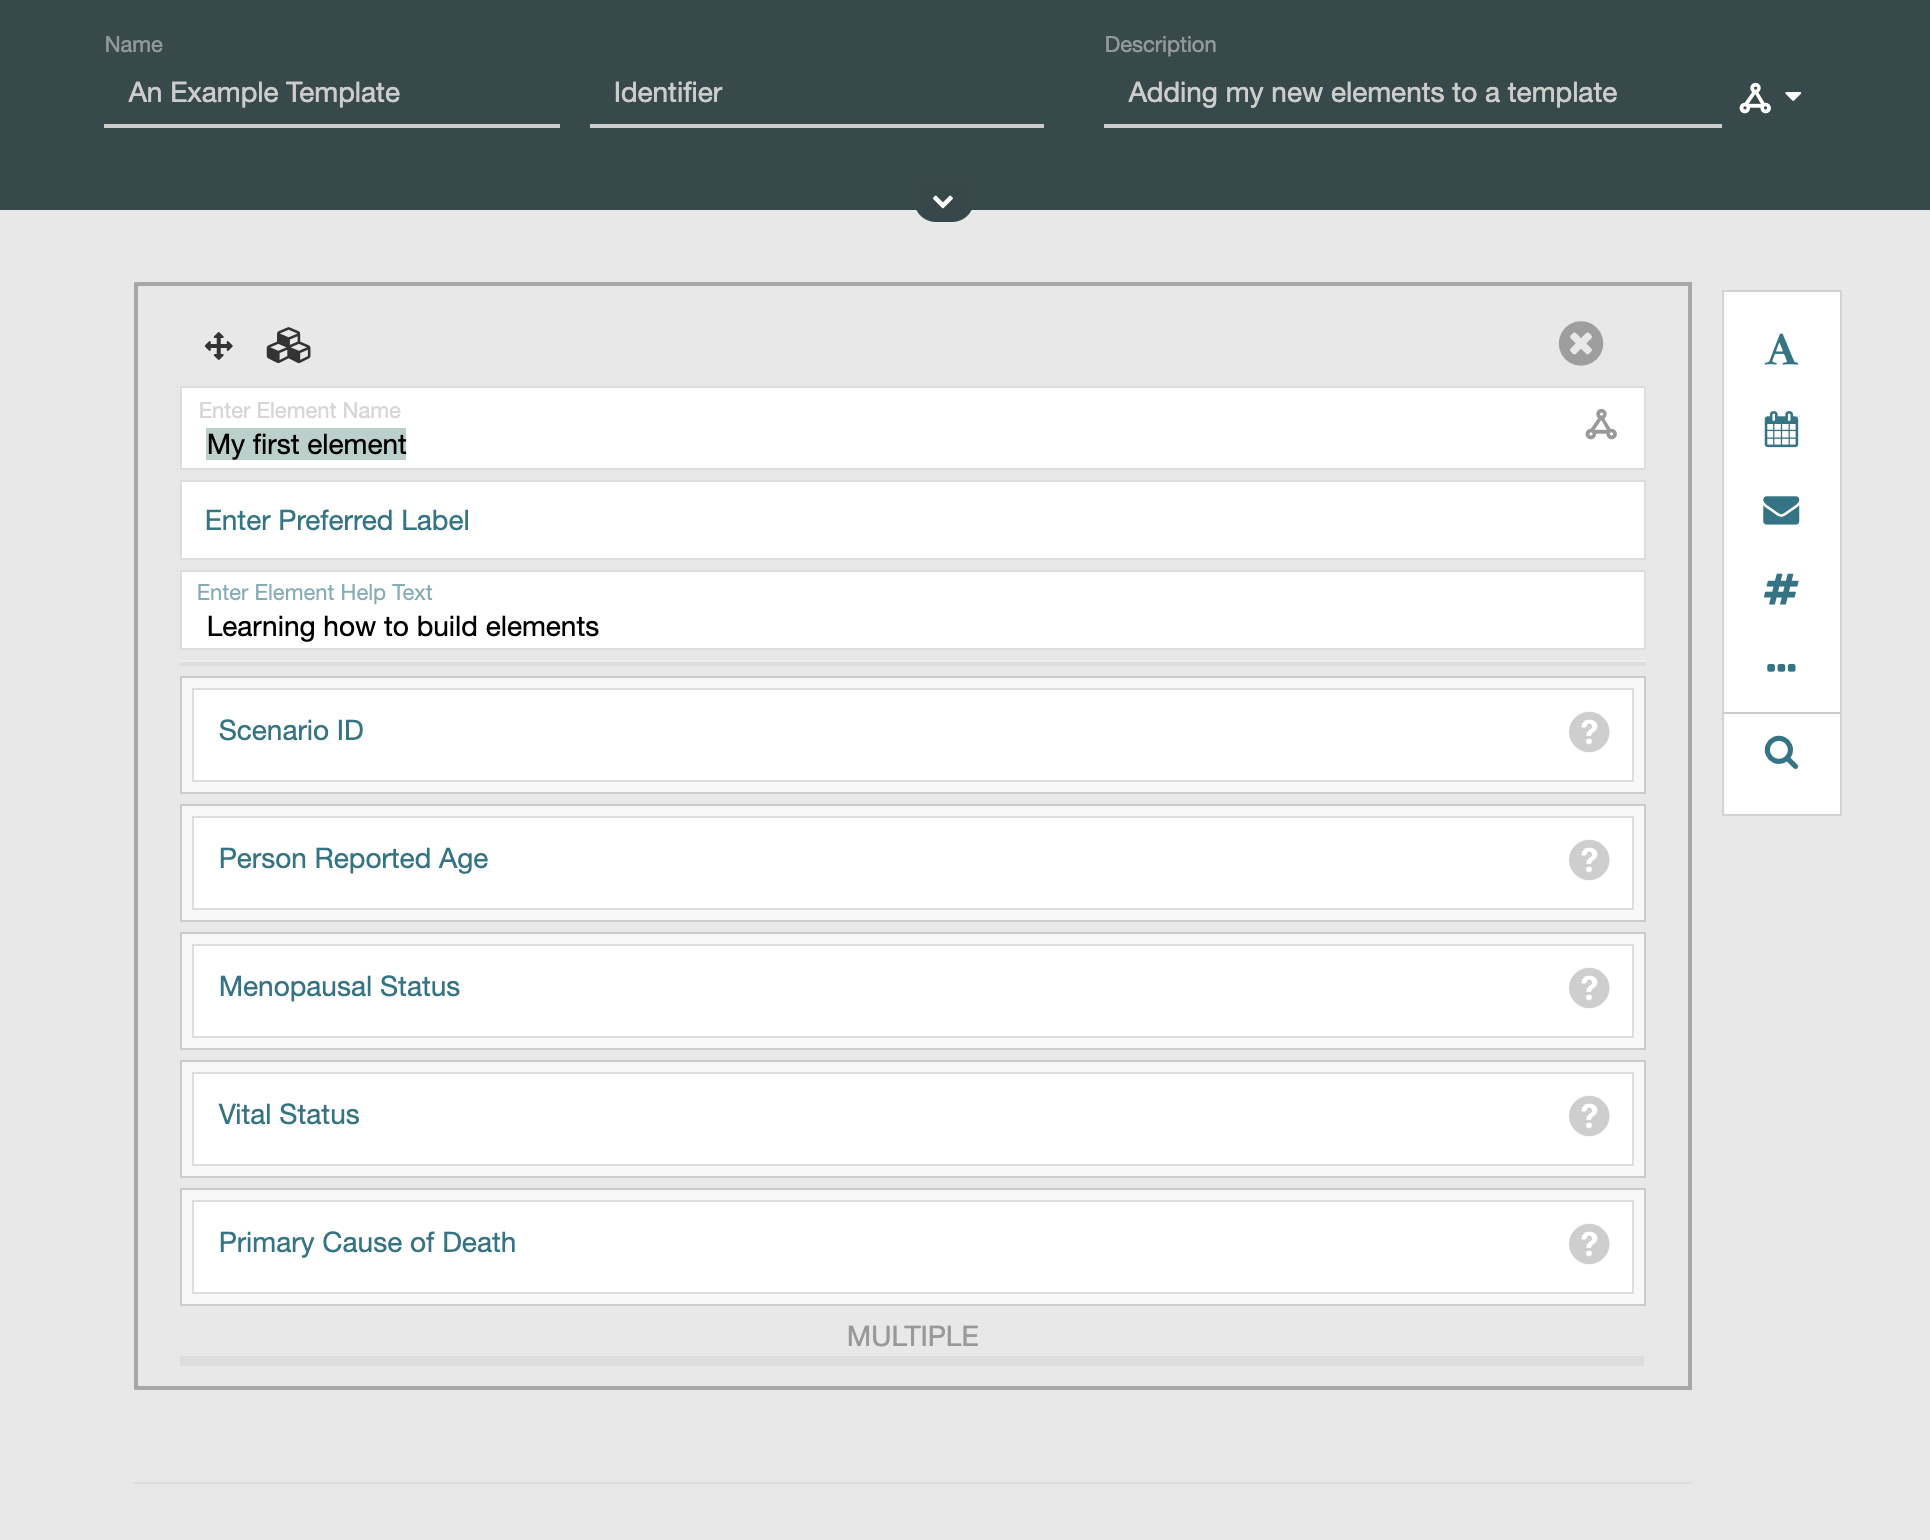
A key thing to note about elements embedded within templates is that only the element name, preferred label, and help text are modifiable. If you need to make changes to the fields within an element, this can't be done from inside the template.
If you find that you added an element to a template and later decide you want to make changes to the element, you could use a workflow something like the following:
- Remove the element from your template
- Exit your template
- Locate the element, make the desired changes in the element designer, and save the element
- Reopen the template
- Add the element with the desired modifications