Your CEDAR Workspace
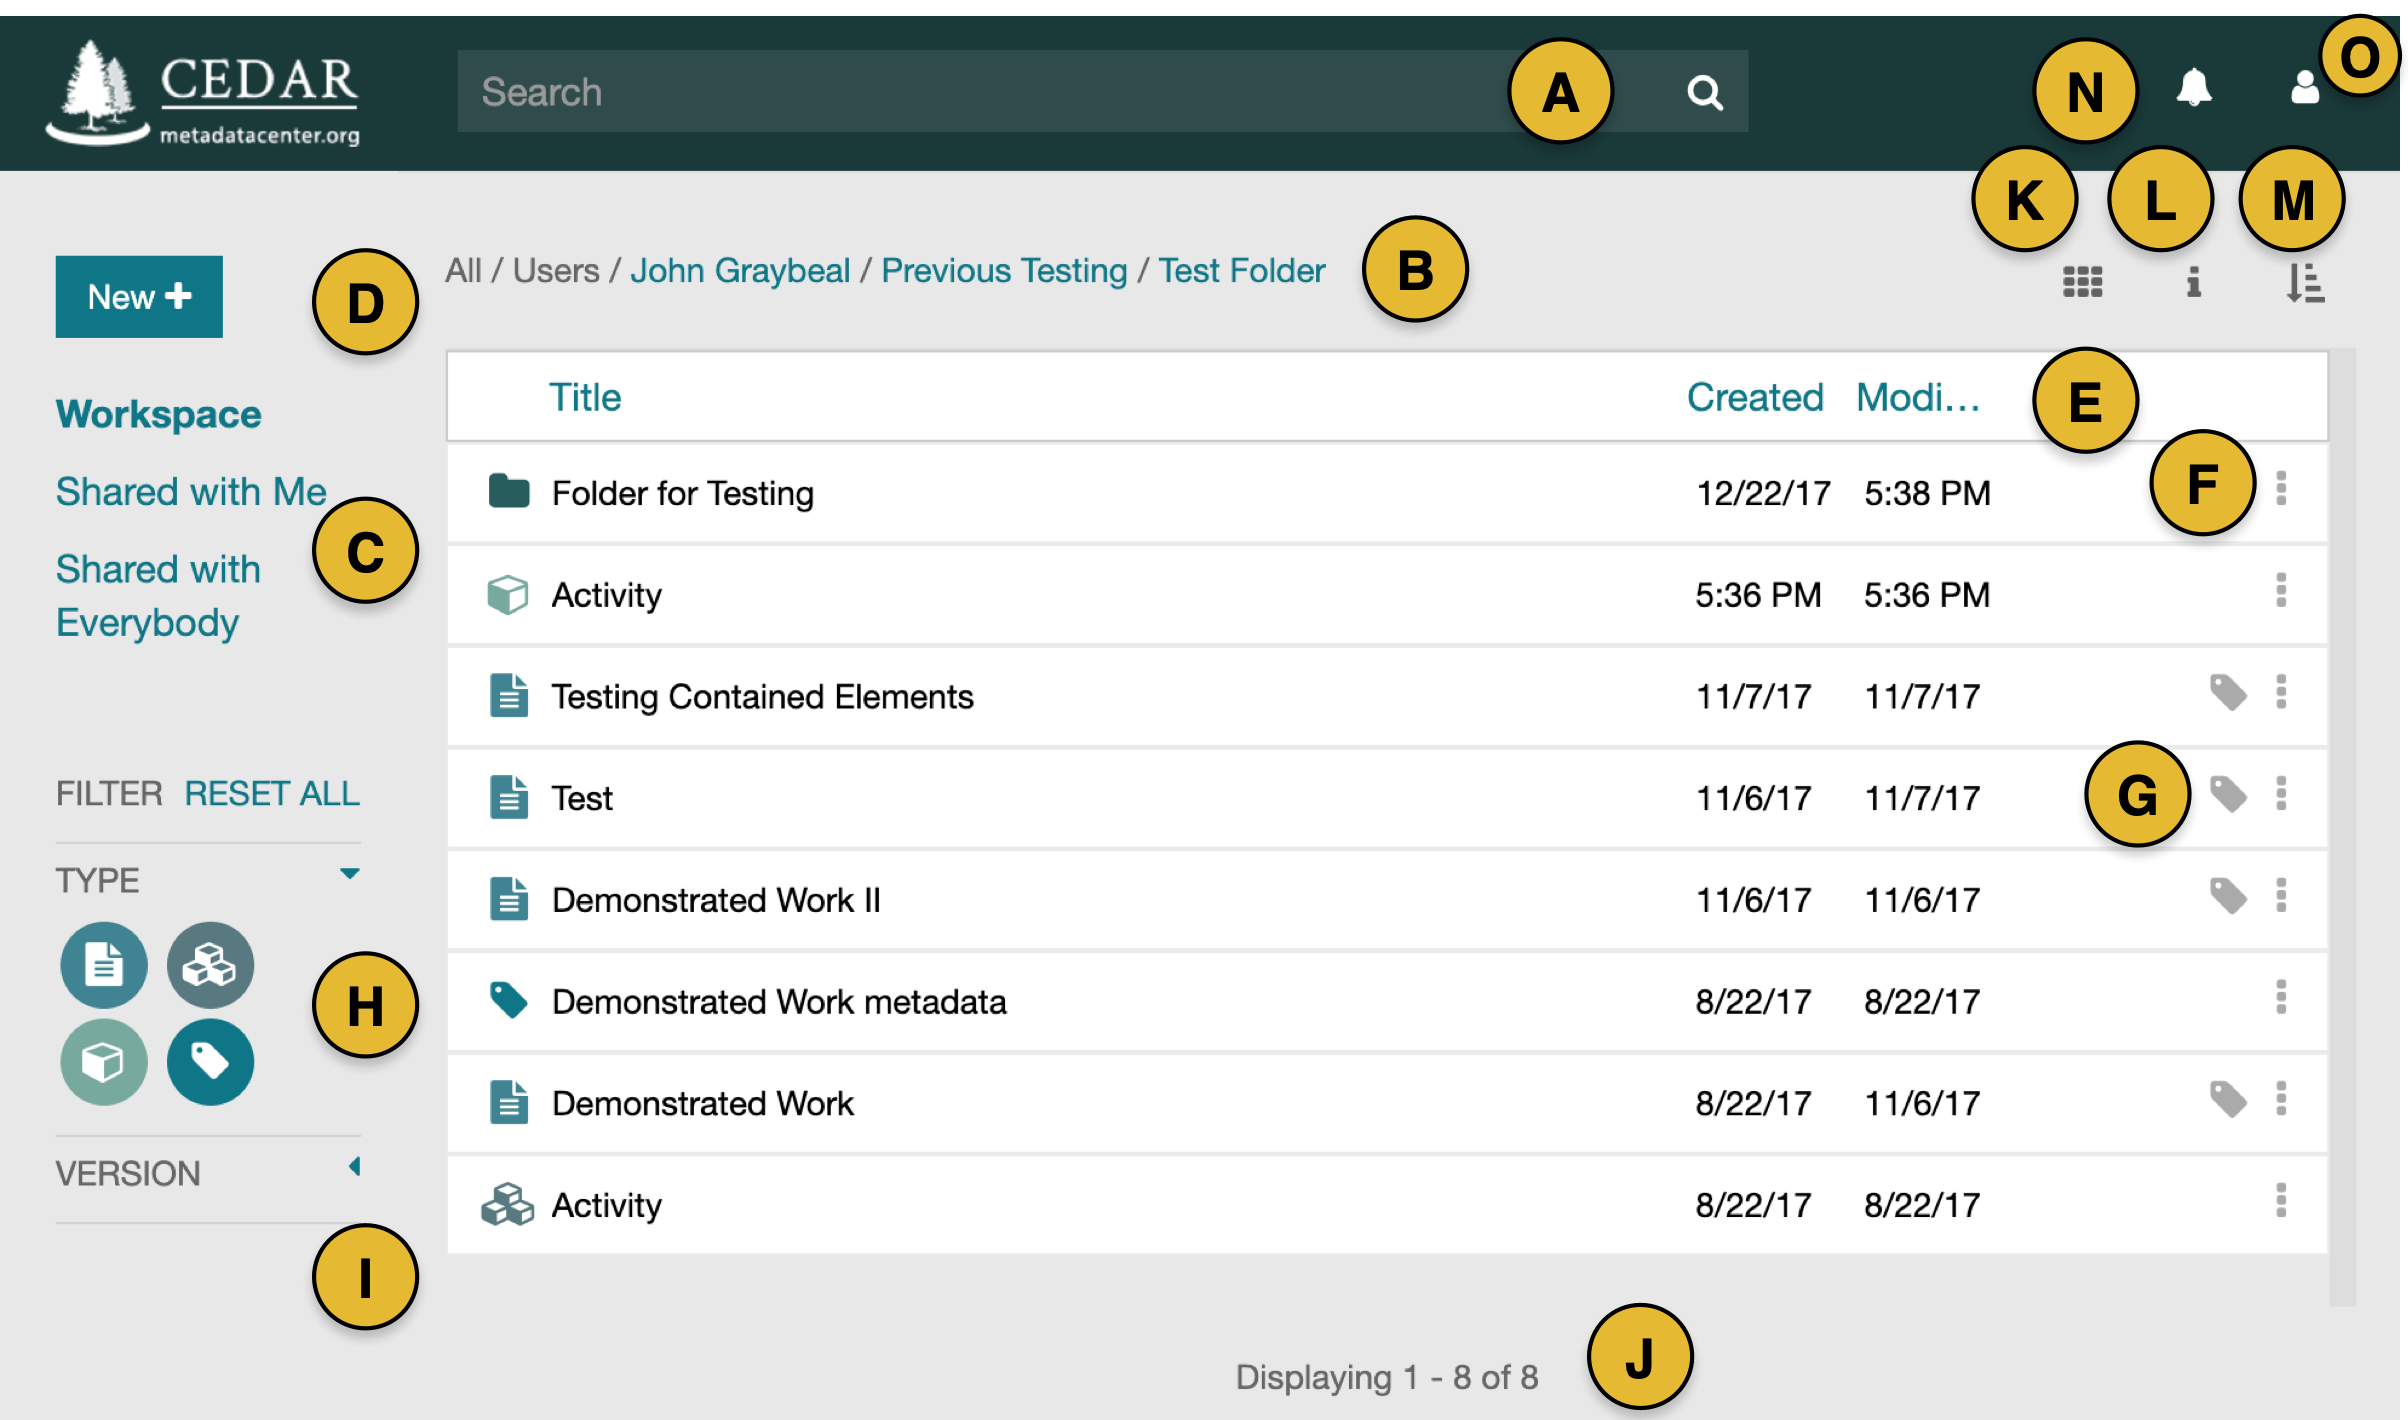
After you first log in to CEDAR, you will be in your own workspace, which will look something like the first annotated screenshot below. (Your workspace will not include any of the resources in the middle of this diagram.) The two smaller screenshots that follow present slightly different views of the CEDAR workspace.
We will walk you through the content of this screenshot using the letters in the yellow circles.
- (A) The search bar lets you find other CEDAR resources.
- (B) The location string tells you the local folder for this display. (If it is not present, you are in a search display, and can click on Workspace (C) to return to this folder view. You can navigate to higher level folders by clicking on them in the location string.
- (C) These 3 options on the left of the window control which kind of resources you will see. The Workspace view shows your home directory. The Shared With Me view shows content that has been explicitly shared with you, or a team you are on. The Shared with Everybody view shows content that has been shared with everyone on CEDAR.
- (D) To start creating your own content—templates, elements, fields, and folders—you will click on the New+ button and select what you want to create. (If you want to create a metadata instance, you must find the template that you want your metadata to follow.)
- (E) The large white Resources box lists the resources you can view. Controls (A), (B), (C), (H), and (I) affect what content you see in this box. You can sort the items in this box by clicking on the header of each column, or by clicking on the sort icon (M).
- (F) Each resource in the Resources box has its own menu dropdown, selected by these vertical triple-dots at the right of the resource. With this menu you can rename, copy, move, share, and perform many other functions with the item.
- (G) Any template can create a form for you to fill in metadata that follows that template. Click on this metadata tag to enter the Metadata Creator and start filling out metadata following that template.
- (H) These round icons on the left side of the window filter what kind of content you can see. If the icon is green (with white figures), it is highlighted and you can see the corresponding content. If the icon is white (with green figures), that content type is disabled. (Folders are always visible.)
- (I) The Version selector dropdown menu lets you control whether you see only the latest published version of a template (including a draft version if it exists), or all versions. The default lets you see only the latest published version (and any draft) of a template.
- (J) The number of items listed in the Resources box is shown here. If the number of items is larger, only a subset are shown. Scroll the display up to see more items.
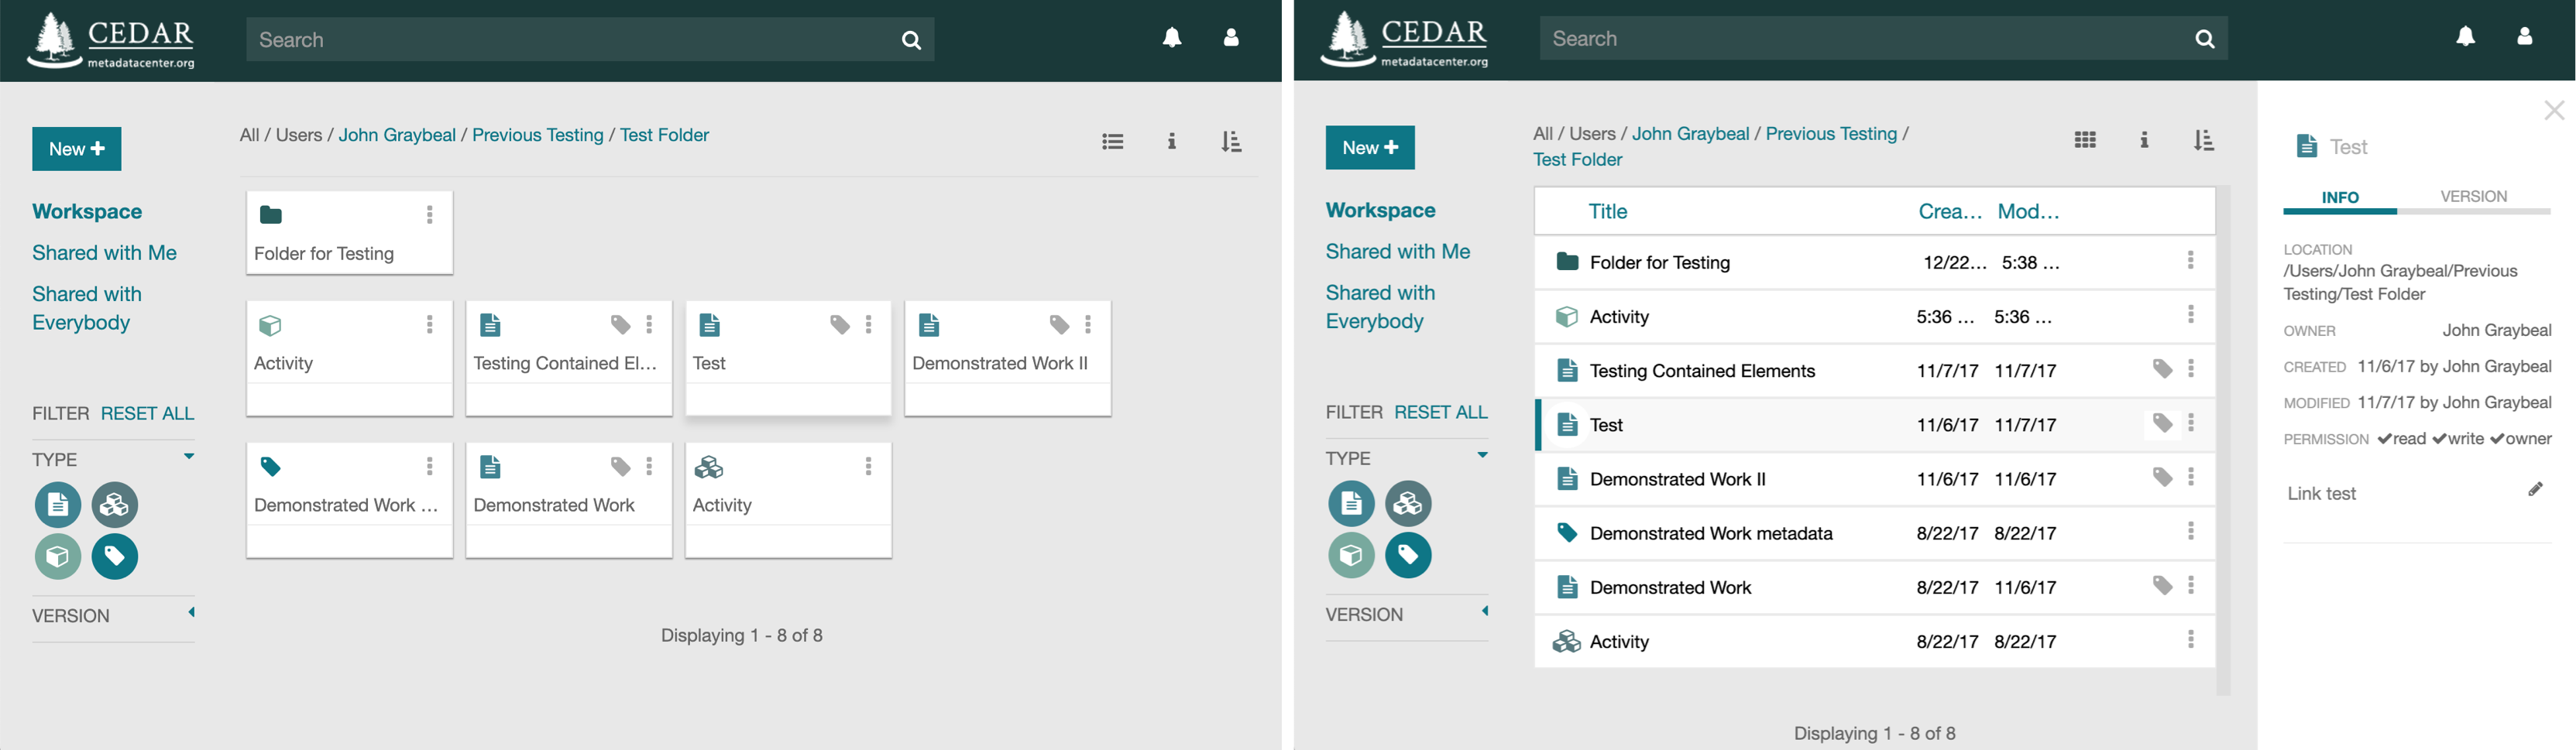
- (K) In this location is an icon to let you switch your Resources box to cards or list format. The cards format is shown in the left-hand smaller image.
- (L) The 'i' icon will bring up an information panel to the right side of your display, providing additional information (metadata) about the selected resource. If no resource is selected, the 'i' icon presents metadata about the folder (B) shown in the Resources box. The right-hand smaller image below shows the information panel for one of these artifacts.
- (M) The sort icon lets you choose the sort criteria for the Resource box contents.
- (N) The bell icon indicates whether you have any messages from CEDAR. A white icon indicates no messages.
- (O) The profile icon lets you see information about your CEDAR profile, including your API key, and offers features like 'Support' and 'Logout'.
The left-hand image below shows the cards-based view of the Resources box. The right-hand image below shows the informational panel with metadata displayed for the highlighted resource.