Adding Fields
Fields can be added to a CEDAR Template in two ways: by importing a stand-alone Field artifact which was created separately, or by defining a field within an Element resource or a Template resource. (We refer to stand-alone CEDAR Field artifacts throughout this User Guide with a capital 'F', and refer to field definitions within templating artifacts with a lower-case 'f'.)
We start this section by describing how a field definition is created directly in a templating resource, then describe how a stand-alone CEDAR Field can be created, and finally how a Field can be found and included in a Template.
Creating Field Content in a Resource
While specifying a field in a templating resource (a Template, Element, or Field), you can customize the Field resource in a number of ways, including constraining the values that metadata editors can input when they enter their metadata for the field. Some customizations apply to almost every field type; others are only allowed for one or two field types.
In Template and Element artifacts, multiple fields can be added; in a Field artifact, only one field can exist, and it must be a data input field.
You organize Fields and Elements in your templating resource by dragging them where you want them. Use the drag handles at the upper left of a Field or Element to grab it, and drag up or down. If you have trouble dragging it to the desired location, try shrinking the view within your browser to put more of the template on the screen. (Note: You can not change or organize content in an imported Field or Element.)
Adding a Field Definition
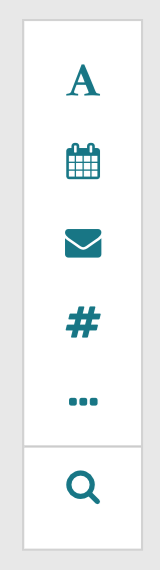 Choose the type of field to add to your templating resource
using the vertical selector at the upper right of your Template Designer window.
The first few choices give you simple ways to add
simple text, date, email, and numeric fields to your Template resource.
Choose the type of field to add to your templating resource
using the vertical selector at the upper right of your Template Designer window.
The first few choices give you simple ways to add
simple text, date, email, and numeric fields to your Template resource.
If you want a less common field type—including organizing and documentation fields— click on the ellipsis (three dots) icon to bring up many more field choices. The choices on the left are fields for data entry; the choices in the right column allow the template author to customize presentation of the template to the metadata creator.
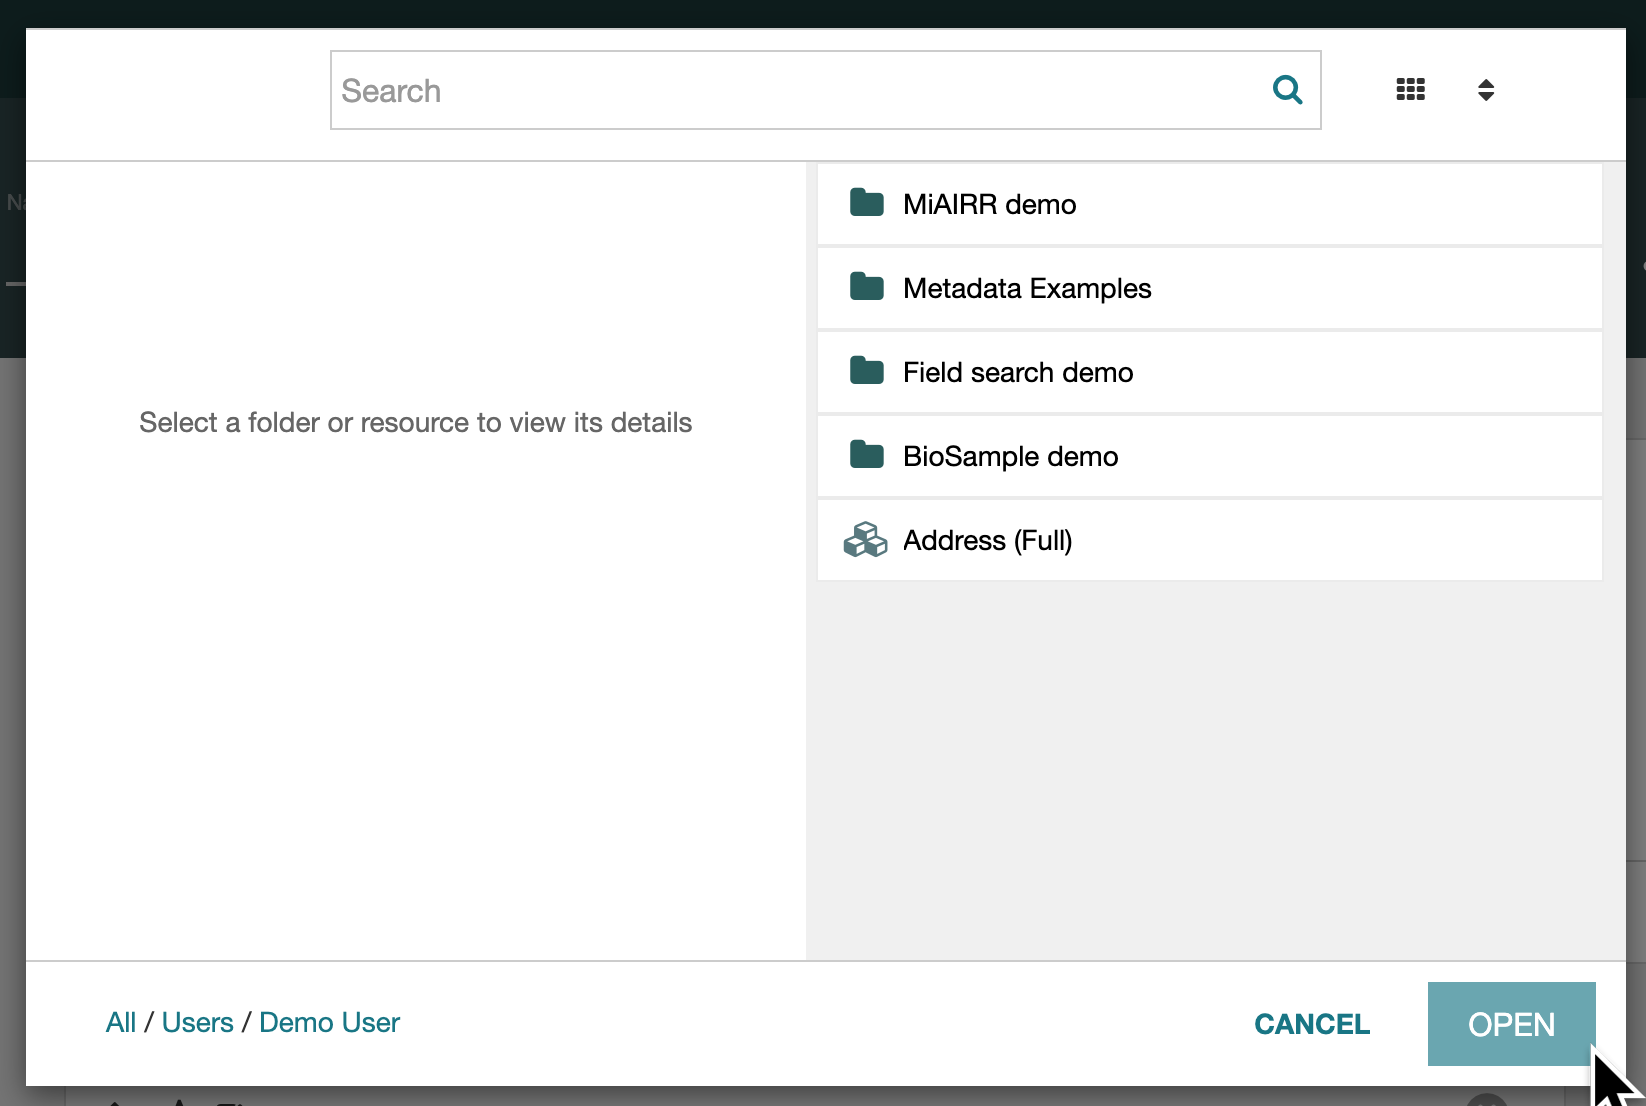
The search (magnifying glass) icon brings up a window to find other CEDAR templating resources—Elements or Fields— that can be imported into the resource you are editing. Use of this window is described in Adding Elements
Choosing and Configuring the Field Definition
For each data-entry field type, CEDAR supports certain options. For example, the Required option is offered on every data-entry field type. You can find simple information about a few key field types below, and detailed information about field types and their customizations in the Field Type Reference.
Common Options
In addition to the Required option mentioned above, many fields support the Multiple option.
Required
If this option is set to Yes, the Metadata Editor indicates to the metadata author that the field is required, and issues a warning when the metadata is saved but this field has not been filled out with metadata. The metadata author can choose to ignore the warning and save the metadata even though the required field is not completed.
Multiple
When Multiple is set to Yes, the Template Designer displays a control to define the minimum and maximum number of entries allowed for the field.
If Multiple is set to Yes, then the Metadata Editor provides an interface to fill out the field multiple times. The Metadata Editor requires the minimum number of cells for that field to be present (though they do not have to be filled out with values), and prevents more than the maximum number of entries by making the Copy icon unavailable).
Value Relation
The Value Relation optionally defines for every metadata-entry field
the relationship from the field's parent entity (the Template, or the Element)
to the field's value. For example, when the Value Relation is 'has study characteristic'
from the Ontology for Clinical Relations (http://purl.org/net/OCRe/OCRe.owl#OCRE406000),
the resulting metadata will be readable as
<ParentElement> has_study_characteristic <user-selected-value>
To select a Value Relation, click on the RDF icon at the right side of the field. This brings up a search field that allows you to choose an appropriate Value Relation. (If the search brings up Classes instead of Properties, click on the Start Over button to clear the previous search.) Once you select a property, you are returned to the template. The selected property can be viewed by clicking on the drop-down arrow next to the RDF icon. (Clicking on the RDF icon again will clear any existing property and begin a new search.)
Configurations for Basic Text Field
Clicking on the Options tab presents additional features appropriate to the field type.
Options—Default Value
The Default Value option specifies the value for the field if the metadata author does not add a value to that field when filling out the metadata. The value can be either a string or a controlled term (expressed as an IRI).
Options—Minimum/Maximum String Length
With this option you can set a minimum length for the string, a maximum length for the string, or both. Users filling out the metadata will see a warning if the metadata is saved while the value in this field has a text length that does not satisfy the criteria.
Values
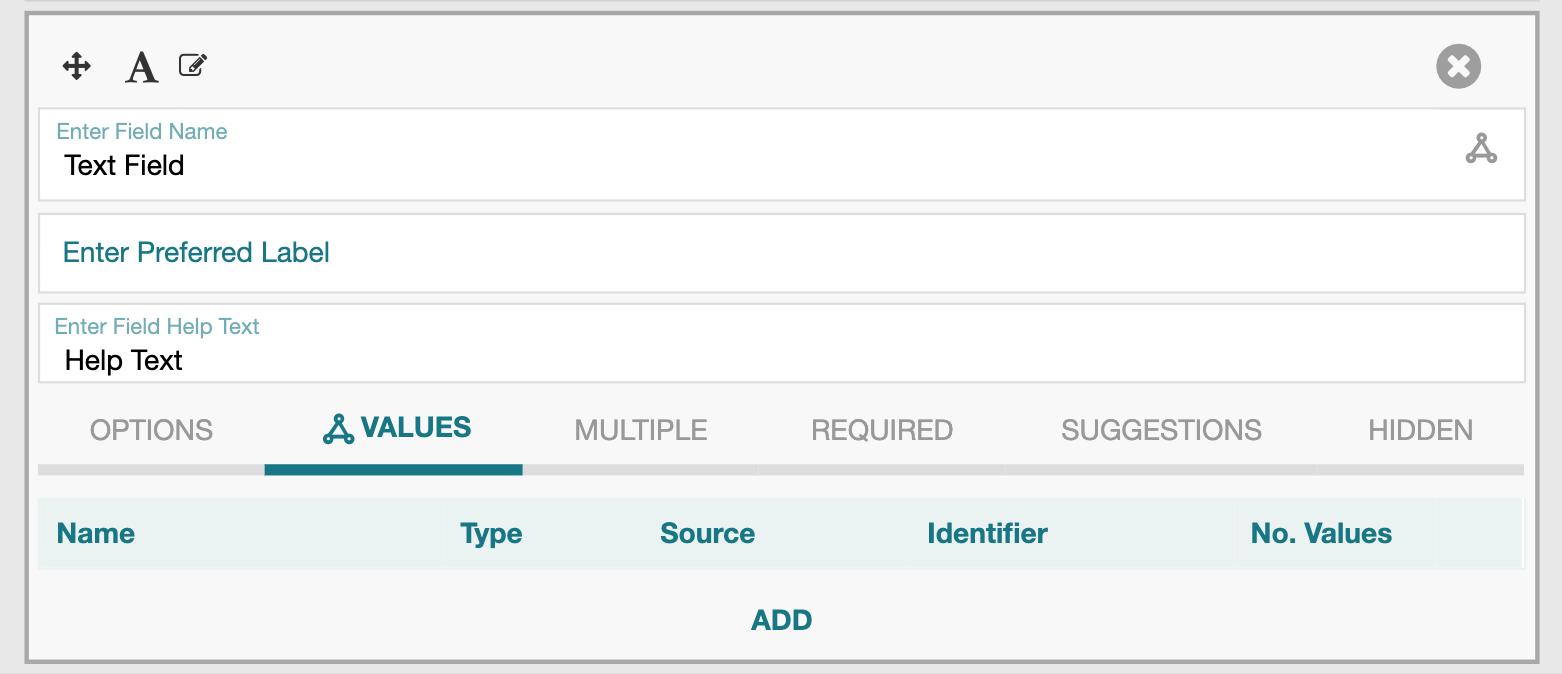 The Values tab shows a view of the current value set(s) that the metadata author
can use to fill out a text field. If no selections are listed, the metadata author
is prompted to enter free text.
This ability to choose controlled values for the field is fundamental
to CEDAR's semantic capabilities.
The Values tab shows a view of the current value set(s) that the metadata author
can use to fill out a text field. If no selections are listed, the metadata author
is prompted to enter free text.
This ability to choose controlled values for the field is fundamental
to CEDAR's semantic capabilities.
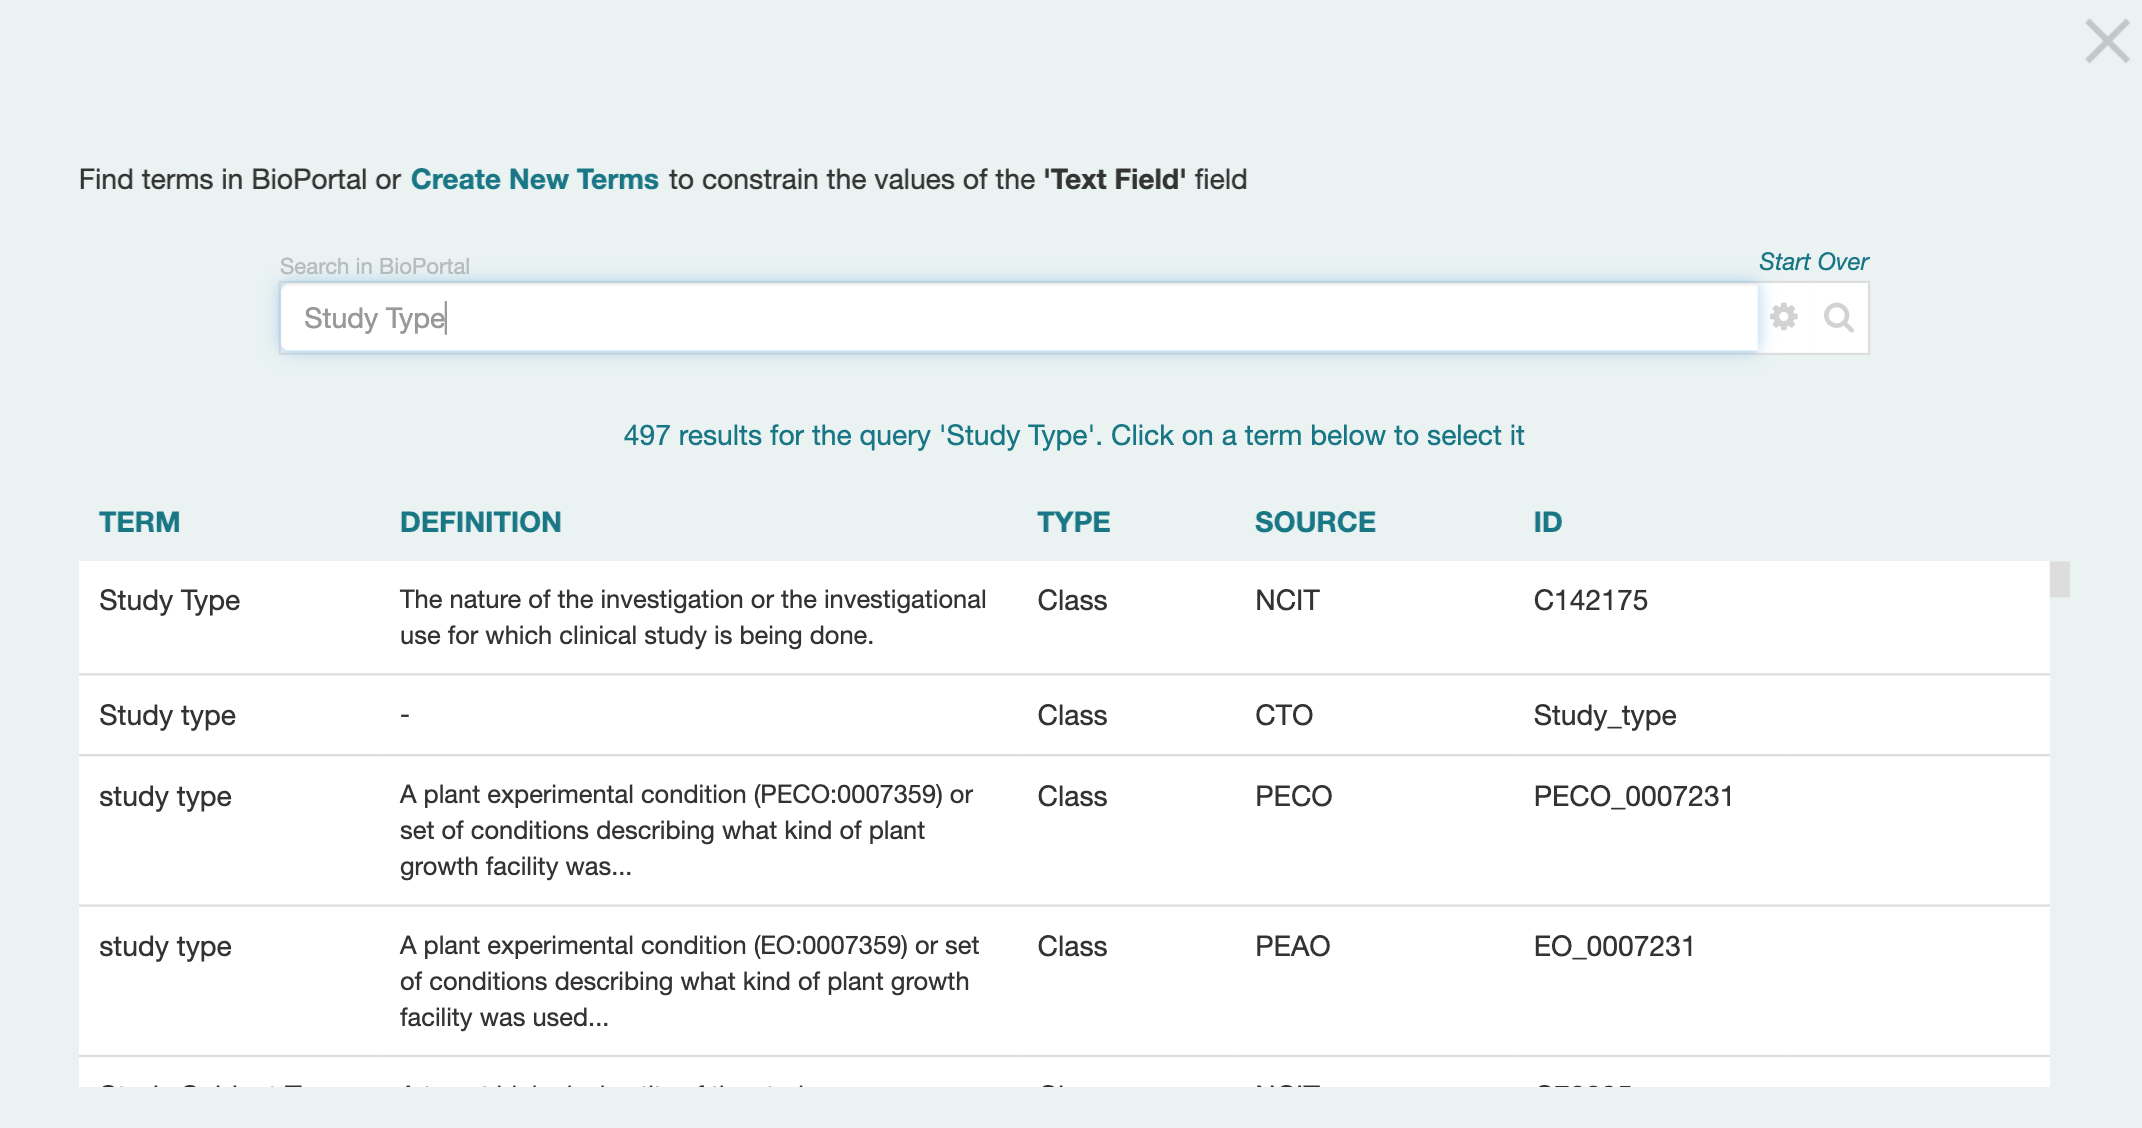 Clicking on the Add button brings up a modal window
from which you can select the term, branch, or ontology
from which legal values may be chosen by the metadata author.
You can repeat this process as often as you want to select additional
terms, branches, or ontologies.
Clicking on the Add button brings up a modal window
from which you can select the term, branch, or ontology
from which legal values may be chosen by the metadata author.
You can repeat this process as often as you want to select additional
terms, branches, or ontologies.
Advice about finding and choosing controlled values is available in the Choosing Controlled Terms section.
Suggestions
Set the Suggestions tab to Yes to enable intelligent authoring suggestions for this field from CEDAR. You can read a detailed explanation of the suggestions system at Understanding the Suggestion System.
Options for Numeric Fields
Number Type
CEDAR provides a default numeric field, whose values can be entered as either an integer or floating point number. As a template creator you can also choose a more specific number type for this field.
To select a specific number type for the field, click on the drop-down menu labeled 'Any numbers'. Select from the list of number formats, including long-integer numbers, integer numbers, double-precision real numbers, and single-precision real numbers. Your choice will be reflected in the JSON value type used to describe the number field in the template (JSON Schema), and to specify the entered value in the metadata (JSON-LD).
Unit of Measure
You can specify the unit of measure as a string. The string will be displayed to viewers and editors of metadata created using this field, both before and after a value is entered for the field.
Minimum/Maximum Value
You can specify a minimum legal value, a maximum legal value, or both. Users entering metadata will be warned in real time if entered values do not meet the field's value limit specifications.
Decimal Places
You can specify the number of decimal places used to display the value entered by the metadata author.
Creating a Stand-Alone Field
This process begins by creating the Field artifact, which is almost exactly like creating the Template artifact in First Steps. After that, the content of the Field artifact—the field definition— is created following the Adding a Field Definition subsection above.
To create a new stand-alone Field, click the "New" button on the Desktop's navigation sidebar (upper left of the Workspace view) and select the "Field" option in the dropdown menu. This step opens up the Field creation form as shown below.
Enter the human-readable Name, Identifier and Description of the Field
using the three text input fields ('Untitled', 'Identifier', 'Description')
underlined in the image below.
Note the Name is used as the name of the artifact in CEDAR,
and can also be changed from the Desktop.
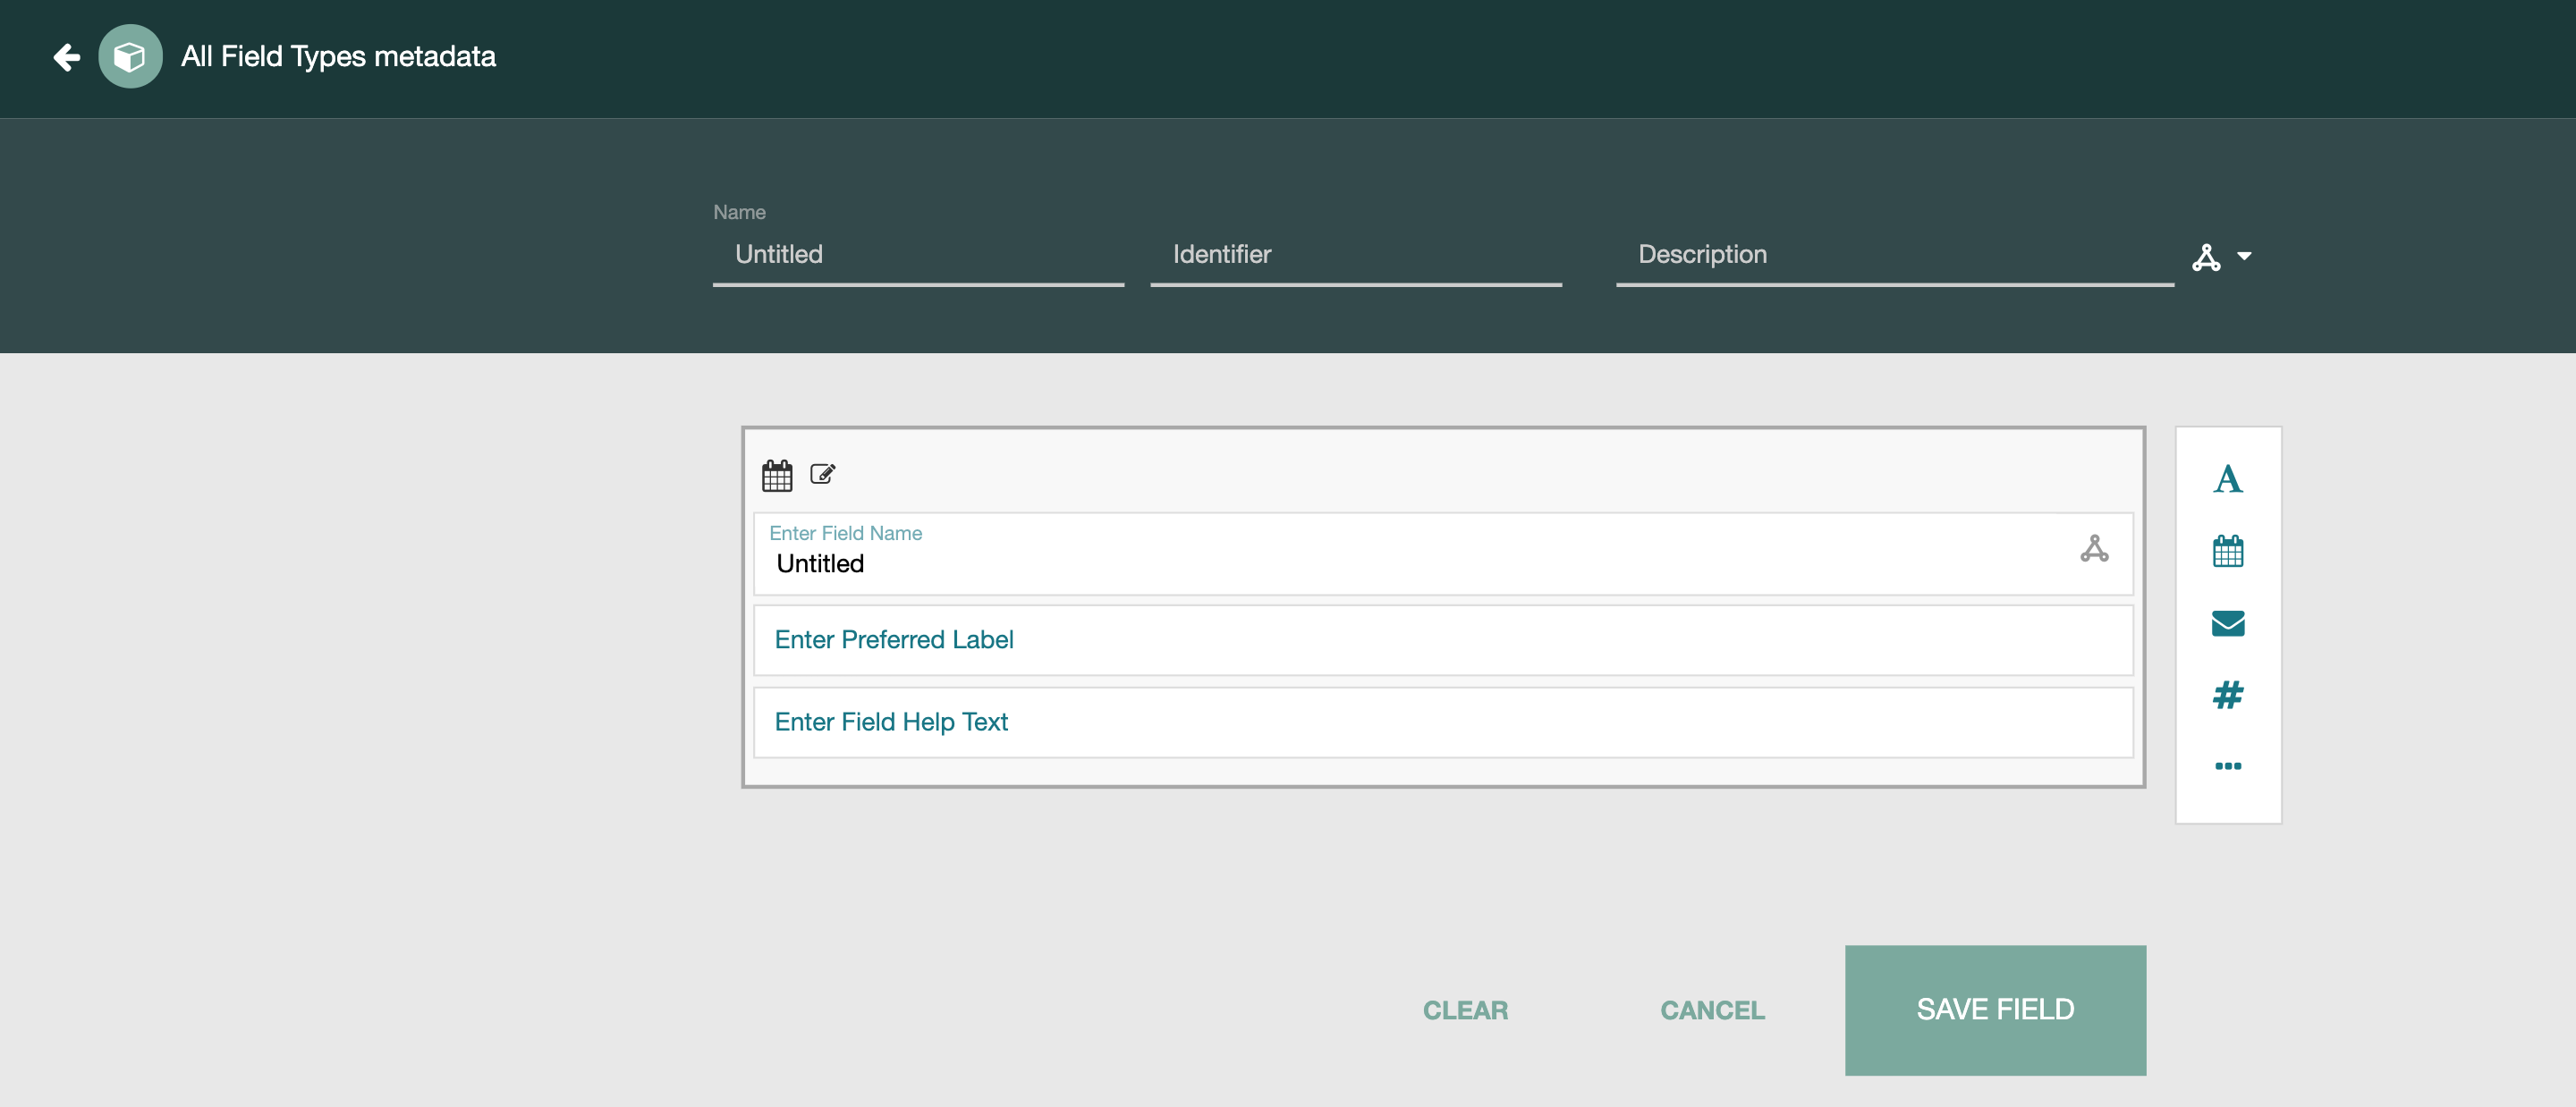
Now the content of the Field artifact—the field definition—can be created. Since only one field specification can be in a Field artifact, the Field template opens with a text field type already selected. If you want a different field type, simply select it from the drop-down menu, and the existing field definition will be replaced.
At any time during or following the Field artifact's creation, you can save the artifact and use the Template Designer's left-arrow to return to the Desktop. From there, you can modify the name, access permissions, and public visibility of the Field artifact, as described in Managing CEDAR Resources.
Importing a Stand-Alone Field
Once the stand-alone Field artifact has been created,
you can import it into other Templates and Elements.
As mentioned above,
when you are editing a Template or Element,
the search (magnifying glass) icon in the Template Designer's field addition menu
brings up a window to find other CEDAR templating resources—Elements or Fields—
that can be imported into the Element or Field you are editing.
Use of this window is described in Adding Elements.
Next Steps
You can fill in more content of your template by Adding Elements, or save and close it to return to it later.