Creating the Metadata Form (Instance) for Filling
CEDAR's Metadata Instance
In CEDAR, the forms to fill out with metadata are created as what we call metadata forms, or to avoid confusion with templates, Metadata Instances or Instances. The instances contain provided answers for each of the fields, and if the answers are unique identifiers for controlled terms, the instances also contain the labels so that tools can display the values without performing a lookup. When instances allow multiple entries for a field or element, entered values are stored in arrays. CEDAR stores all of this information in JSON-LD-formatted documents
CEDAR instances contain contextual metadata describing the instance, just as templates contain contextual metadata for template artifacts. One of those contextual fields specifies the CEDAR Metadata Template (and its version) from which the instance was created.
CEDAR instances do not contain detailed descriptions of the questions being asked, nor details about the possible answers for those questions. Anyone who wants this information can use the identifier of the instance's source template to get a copy of the instance and look up those values.
Creating the Instance
CEDAR offers several strategies for initiating a metadata form. These are described below according to the needs they satisfy, and ordered from simplest to most complex.
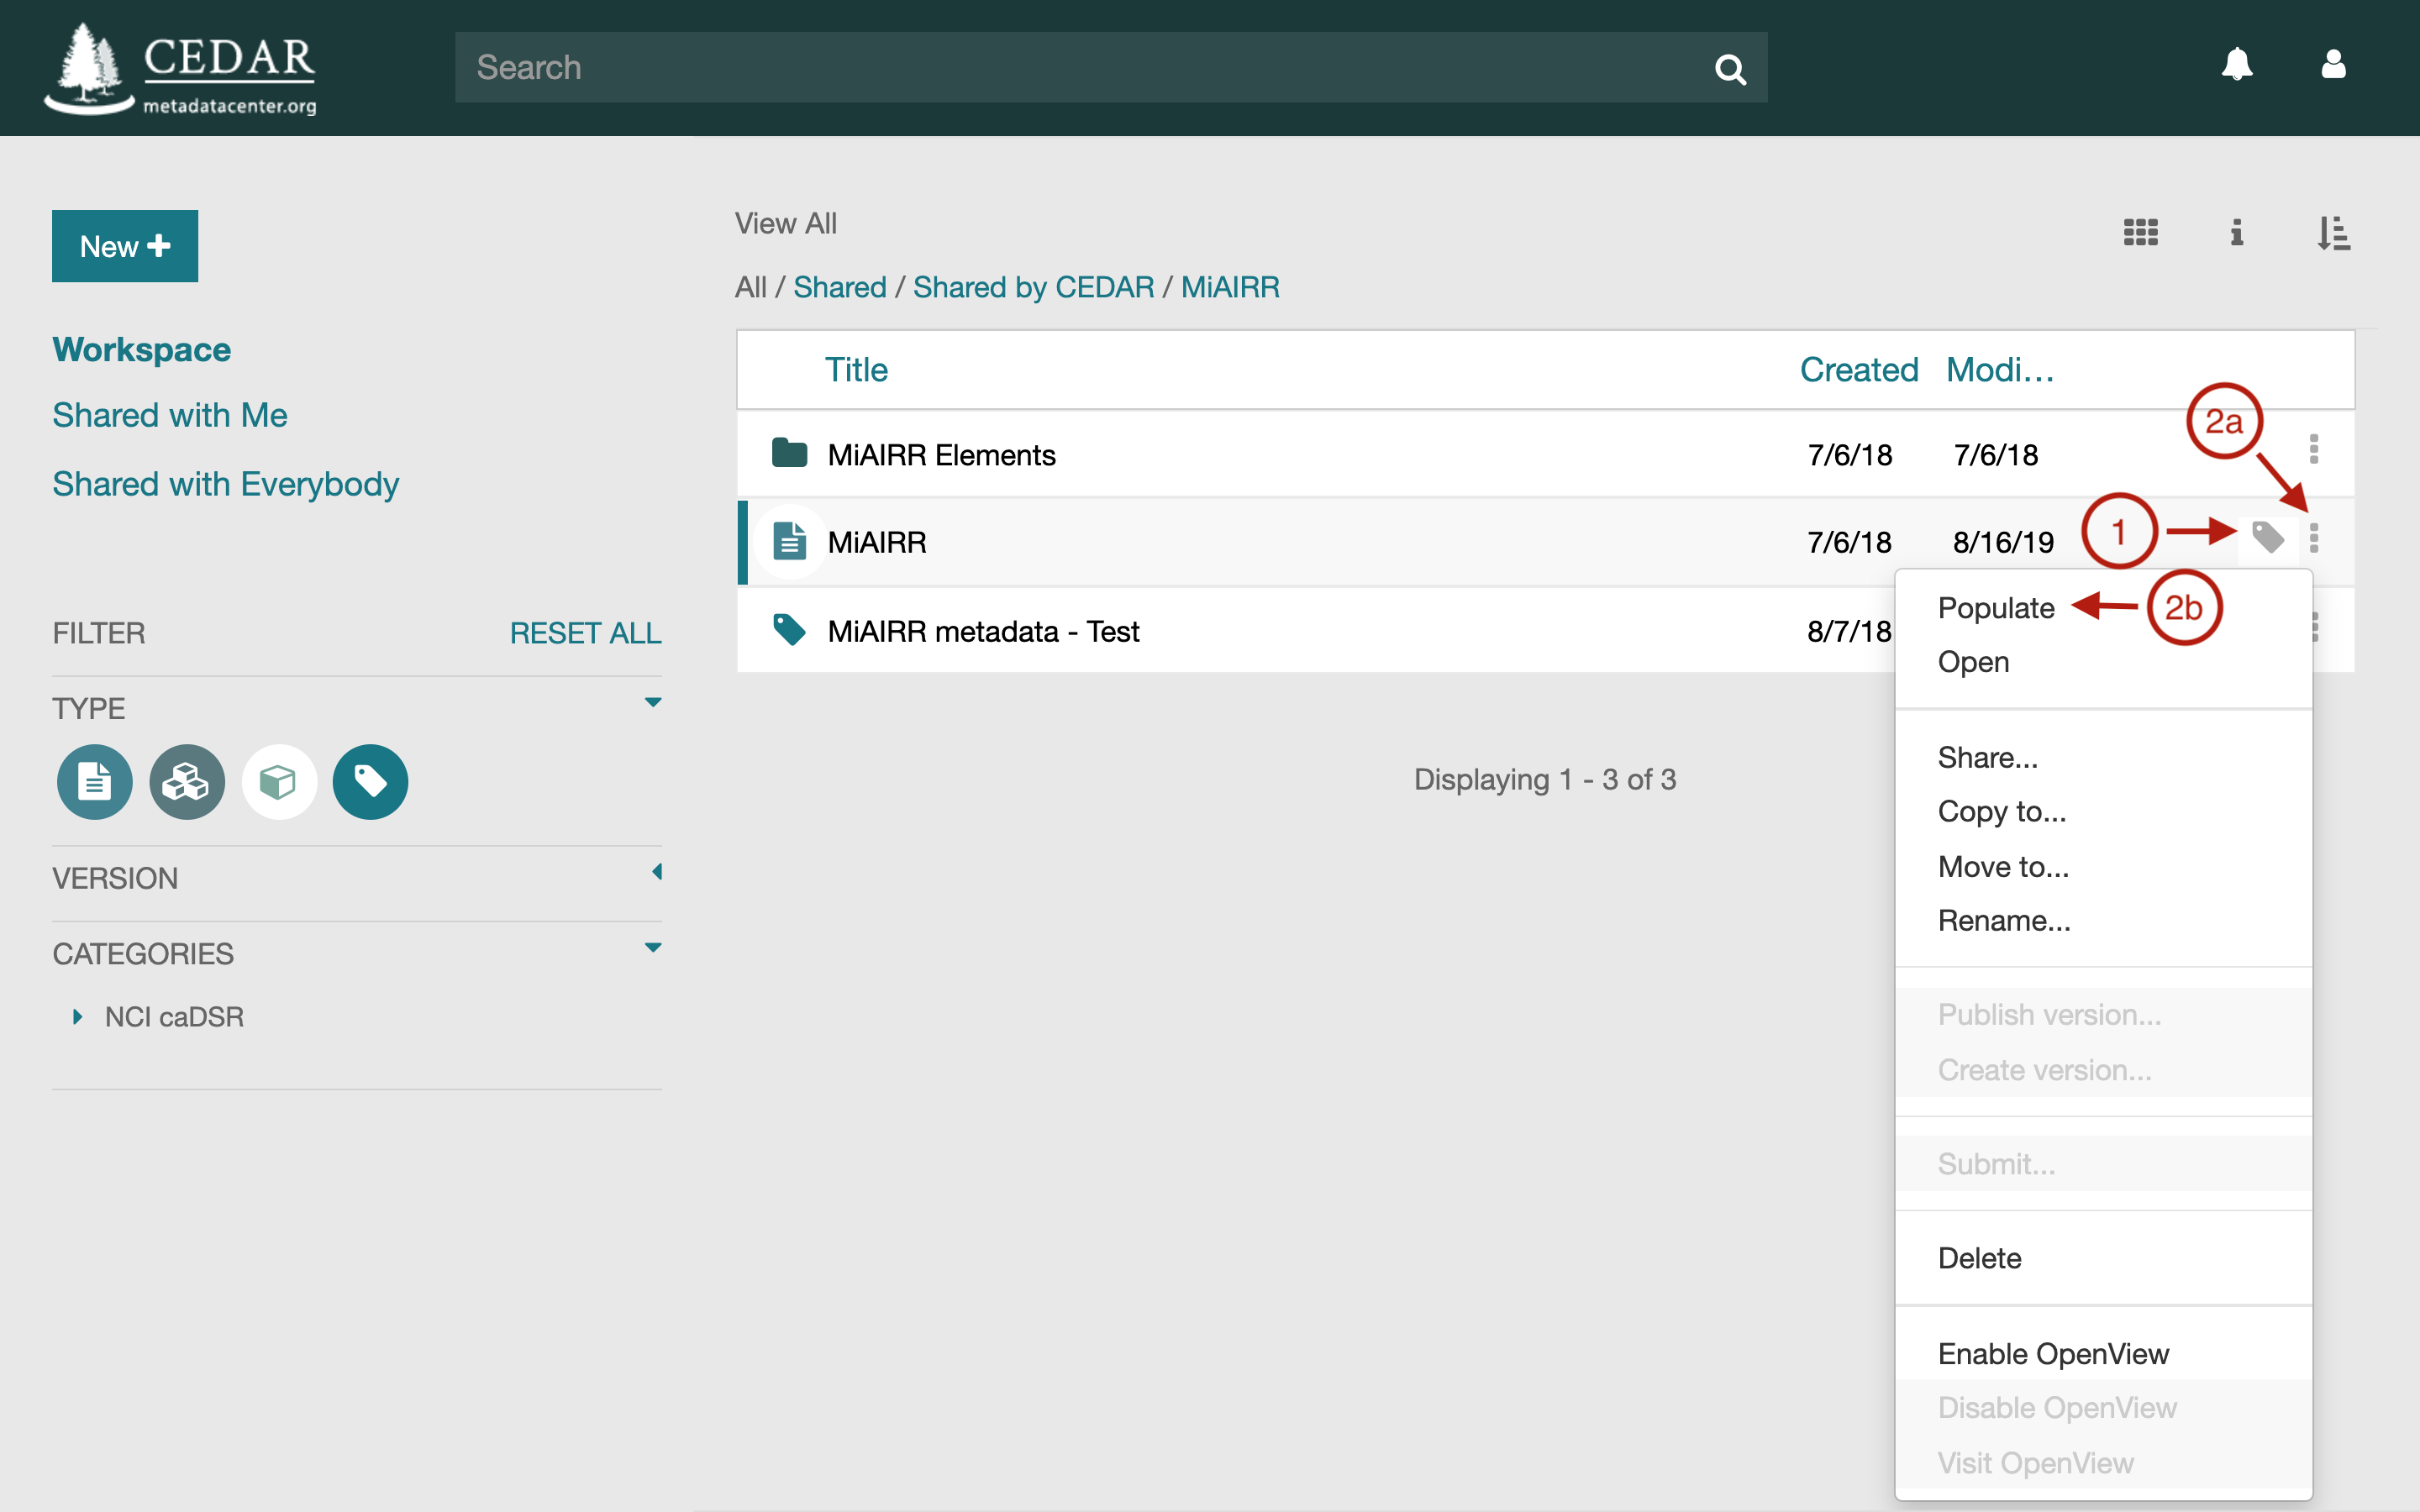
From a Workspace view of the template
This is the most common way to create an instance. If the workspace doesn't have a view of the template, navigate in the workspace or perform a search to bring the template into view in the List or Cards workspace view.
There are two variants to create a new metadata instance from the Workspace view:
either click on the metadata tag to the right side of the template box (Item 1), or
click on the dropdown menu (Item 2a, the kebab, :) and select Populate Template (Item 2b).
Via a Web Link (An External IRI)
In this scenario, the template creator has obtained a web link (an IRI) that, when entered into a browser or included clicked on as a link in a web page, will create a metadata instance for that template. (To create such a link for a template, see Building Shareable Metadata Creation IRIs.
For example, clicking on the following link will start the process of creating an instance to be filled out for the Adaptive Immune Receptor Repertoire community's minimum information model (MiAIRR). The string after 'templates/' is the UUID for the MiAIRR template.
https://cedar.metadatacenter.org/instances/create/https://repo.metadatacenter.org/templates/ea716306-5263-4f7a-9155-b7958f566933
A logged-in user will proceed directly to the Metadata Editor with the newly created instance already opened.
If the user activating the link does not have a CEDAR account or is not logged in, CEDAR will redirect the person's browser to the CEDAR authentication page. At that point the user can log in or register for an account, and will be returned to the Metadata Editor with the newly created instance already opened.
Below is the Metadata Editor opened to the MiAIRR instance requested by the link above.
![]()
From an existing instance made from that template
If you will be creating a number of metadata instances with many of the fields populated exactly the same, you can create a instance profile with those fields pre-populated. For example, if your template is called Study Object, you can populate it as an instance profile called "MyLab Study Object Metadata name date", pre-filling it with all the values that will be the same for every instance.
Before starting to create individual instances, make the instance read-only so that it is not accidentally overwritten. Make sure all the people who will be filling out a copy of it have read permission on the object or its enclosing folder. (You may also wish to add a dedicated folder for all the saved instances, with a title like "MyLab Study Object Completed Metadata".)
When you or any other user wants to create a new metadata instance, make a copy of the instance profile and replace 'name' and 'date' in the title with the name of the author and the date of this copy (or a short instance sequence number), or any other appropriate unique labeling. (Note that the intended location to receive the filled-out instances must be writable by all the people who are creating metadata.) See Sharing Your Content for more information on creating writable folders.
The copied instance will have all the information that was in the instance profile, and can be filled out and saved normally.
From an API call to CEDAR
The Template Instance API can be used to create or update an instance:
Each requires inclusion of the JSON content to use for that instance.
To copy an existing instance, you would have to first download the instance using a GET, then upload your copy to a new instance (using the POST as above).