Managing CEDAR Resources
Introduction
This section describes how to manage CEDAR resources. In CEDAR, resources include the various artifact types (templates, elements, fields, metadata instances) and folders. These are all managed through the CEDAR Desktop, typically through your workspace view. Management operations include copying, moving, renaming, and deleting resources, and setting sharing permissions on resources.
If you want to fill out metadata for a particular template, the Populate command will open the Metadata Creator set up to fill in metadata for that template. If you want to edit an artifact (including a populated metadata instance), the Open command will open the appopriate tool (Template Editor for templates, elements, and fields; and Metadata Creator for metadata instances) with that resource. For a folder, the Open command changes the Resources box view to show the selected folder.
Other artifact-related commands like Publish/Create version, Submit, and Enable/Disable/View OpenView are addressed in their respective sections of the User Guide.
Resource Menu
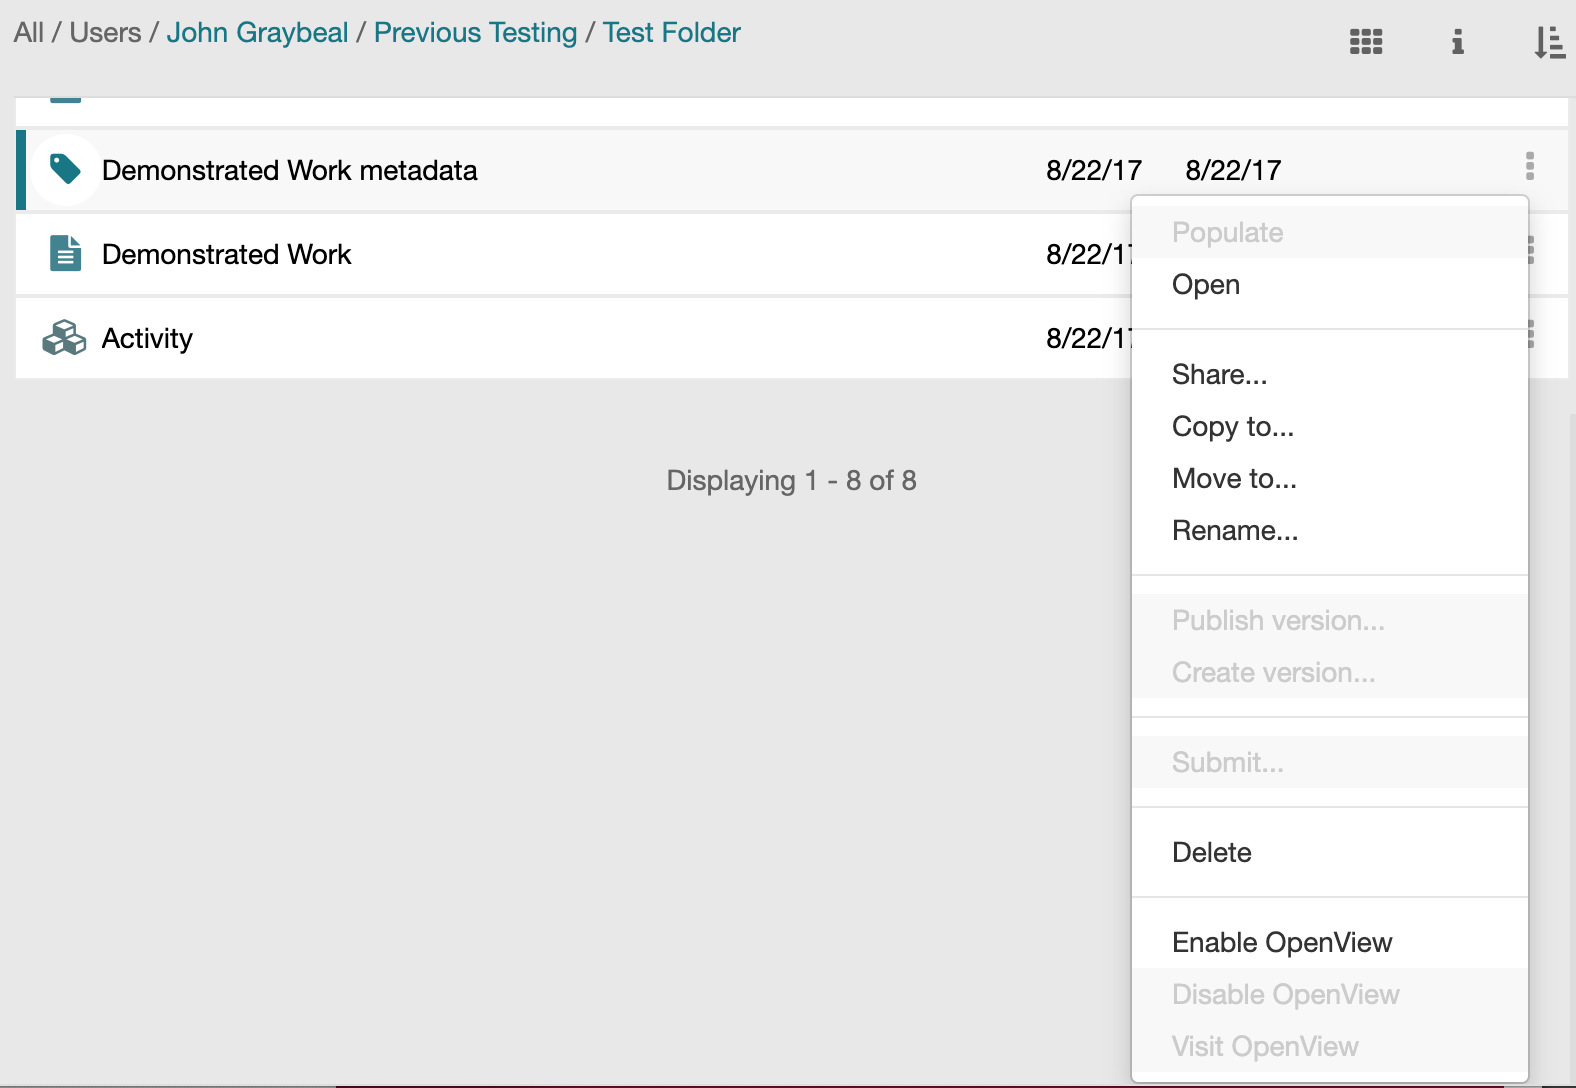
All the resource options are managed through the menu of the resource (shown below). Access the resource menu by clicking on the vertical dots (the 'kebab menu', ⋮) on the right side of the resource. A drop-down menu provides access to the options for moving, copying, renaming, deleting, and sharing the resource. If a menu item like Copy… is grayed out, it is not available for that resource. If all menu items are grayed out, either no resource is selected, or there is a permissions inconsistency.
Destination Commands and Selection Window
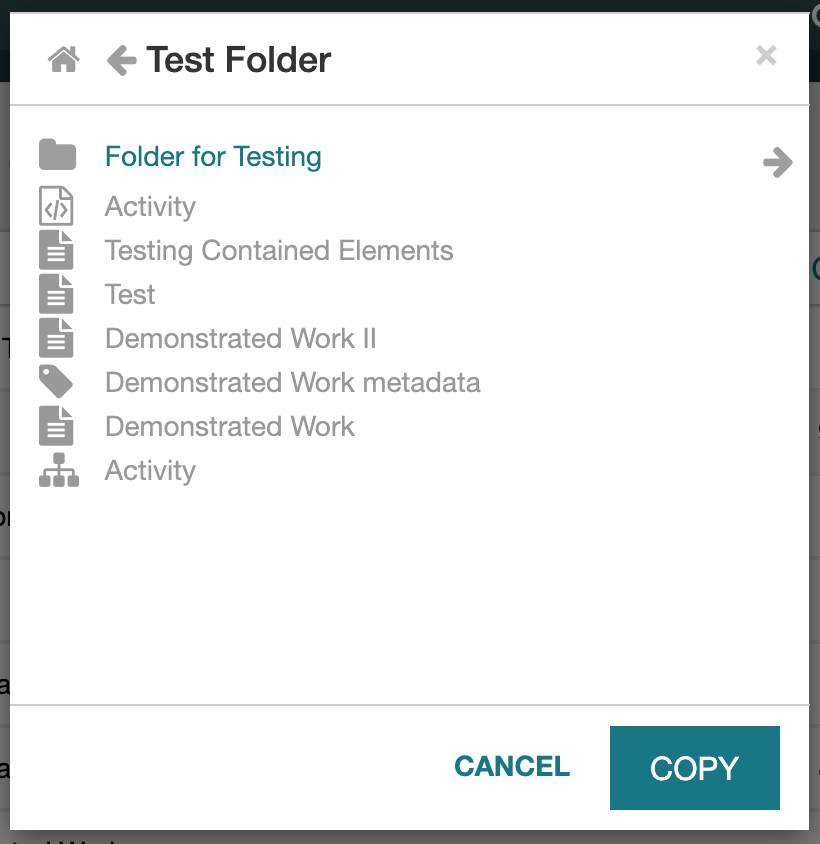
The Copy to… and Move to… commands will display a window for you to choose the destination for the command, shown here. The starting location is your current workspace folder. To navigate in this window, click on the left arrow to move up in the folder hierarchy, click on the right arrow for a folder to move into that folder, and click on the Home icon at upper left go to to your workspace (home folder).
If you try to navigate to a folder to which you do not have needed permissions, an error message will be displayed.
There is always a destination folder selected. If no folder is highlighted in the window, the destination folder is the currently displayed folder. If a folder is highlighted in the window, the highlighted folder is the target folder that will be used.
Copy to… Command
After selecting the Copy… command, you will be asked to select the destination folder, and can then complete the operation by clicking on COPY.
his operation requires read permission for the resource. You can copy any CEDAR artifact to another directory for which you have write permissions. However, you can not copy an entire CEDAR folder with a single command.
Move to… Command
After selecting the Move… command, you will be asked to select the destination folder, and can then complete the operation by clicking on MOVE.
his operation requires write permission for the resource. You can move any CEDAR artifact or folder to another directory for which you have write permissions.
Rename Command
After selecting the Rename… command, you will be asked for the new name. This operation requires write permission for the resource.
Share… Command
The Share… command opens a sharing configuration window.
In this window you can perform all sharing and group management operations needed to control resource access in CEDAR. See the Sharing Your Content section for detailed information about sharing resources in CEDAR.
Delete Command
The delete command displays a confirmation box, then deletes the item.
Use this command with caution, as there is no undo command. Contact the CEDAR team to restore content you have deleted.