CEDAR Tutorial
CEDAR and Metadata Standards
Science increasingly expects that research datasets be FAIR — findable, accessible, interoperable, and reusable — so that people other than the original investigators can discover the data, understand them, and build on them. Behind that acronym is one simple, demanding requirement: data must be accompanied by rich, standardized metadata that describe who performed the experiment, what the subjects were, what the experimental conditions were, and what the results appear to show — described in a way that is understandable both to humans and to machines (Musen et al. 2025).
In practice this rarely happens. Most experimental results are annotated in idiosyncratic, ad hoc ways — one dataset says "PI," another "Principal Investigator," a third "lead researcher" — which makes it nearly impossible for a third party (or a program) to combine datasets or even to know what a field means. Where standards do exist, investigators find them hard to apply consistently. The result is a mass of data that is technically available but practically unusable.
CEDAR — the Center for Expanded Data Annotation and Retrieval — addresses this by letting a scientific community capture its reporting guideline (the set of attributes that ought to describe a given class of experiment) as a machine-actionable template. A template is a small, inspectable knowledge base: it enumerates the fields, fixes each field's type, marks which are required, and — crucially — can bind a field's allowed values to a controlled vocabulary or an external authority. Filling out a template produces a metadata instance: a set of attribute–value pairs that annotates a specific dataset and, by construction, adheres to the standard.
community standard  →  template  →  metadata instance  →  dataset
   (the guideline)     (the form)    (the filled-in form)   (what it describes)
This tutorial has you play both roles. First you act as the standards author, designing templates that encode how a study should be described. Then you act as the investigator, filling those templates out to produce clean, standards-adherent metadata. Along the way you'll bind fields to a real biomedical ontology and to global registries for people and organizations, so that the values you record are resolvable, machine-actionable identifiers rather than free text. Finally you'll version a template and share an instance on the public web.
Concretely, you will:
- Create a folder to work in
- Design a simple Study template and fill it out
- Design a richer Clinical Study template that binds fields to controlled terms and external authorities (ORCID and ROR)
- Publish a versioned release of the template
- Share a completed instance on the open web with OpenView
You need a CEDAR account and about 30 minutes. If you don't have an account yet, see Accounts and Logging In in the CEDAR user guide for how to register and sign in. Everything you create lives inside a single folder, so nothing here disturbs the rest of your workspace.
1. Create a Folder
When you log in, CEDAR opens in your Workspace — your home for folders, templates, and metadata.
First, create a folder to hold everything you build in this tutorial.
Click New + at the top left. The menu lists the things CEDAR lets you create — a Folder, a Field, an Element, or a Template — plus Import. Choose Folder.
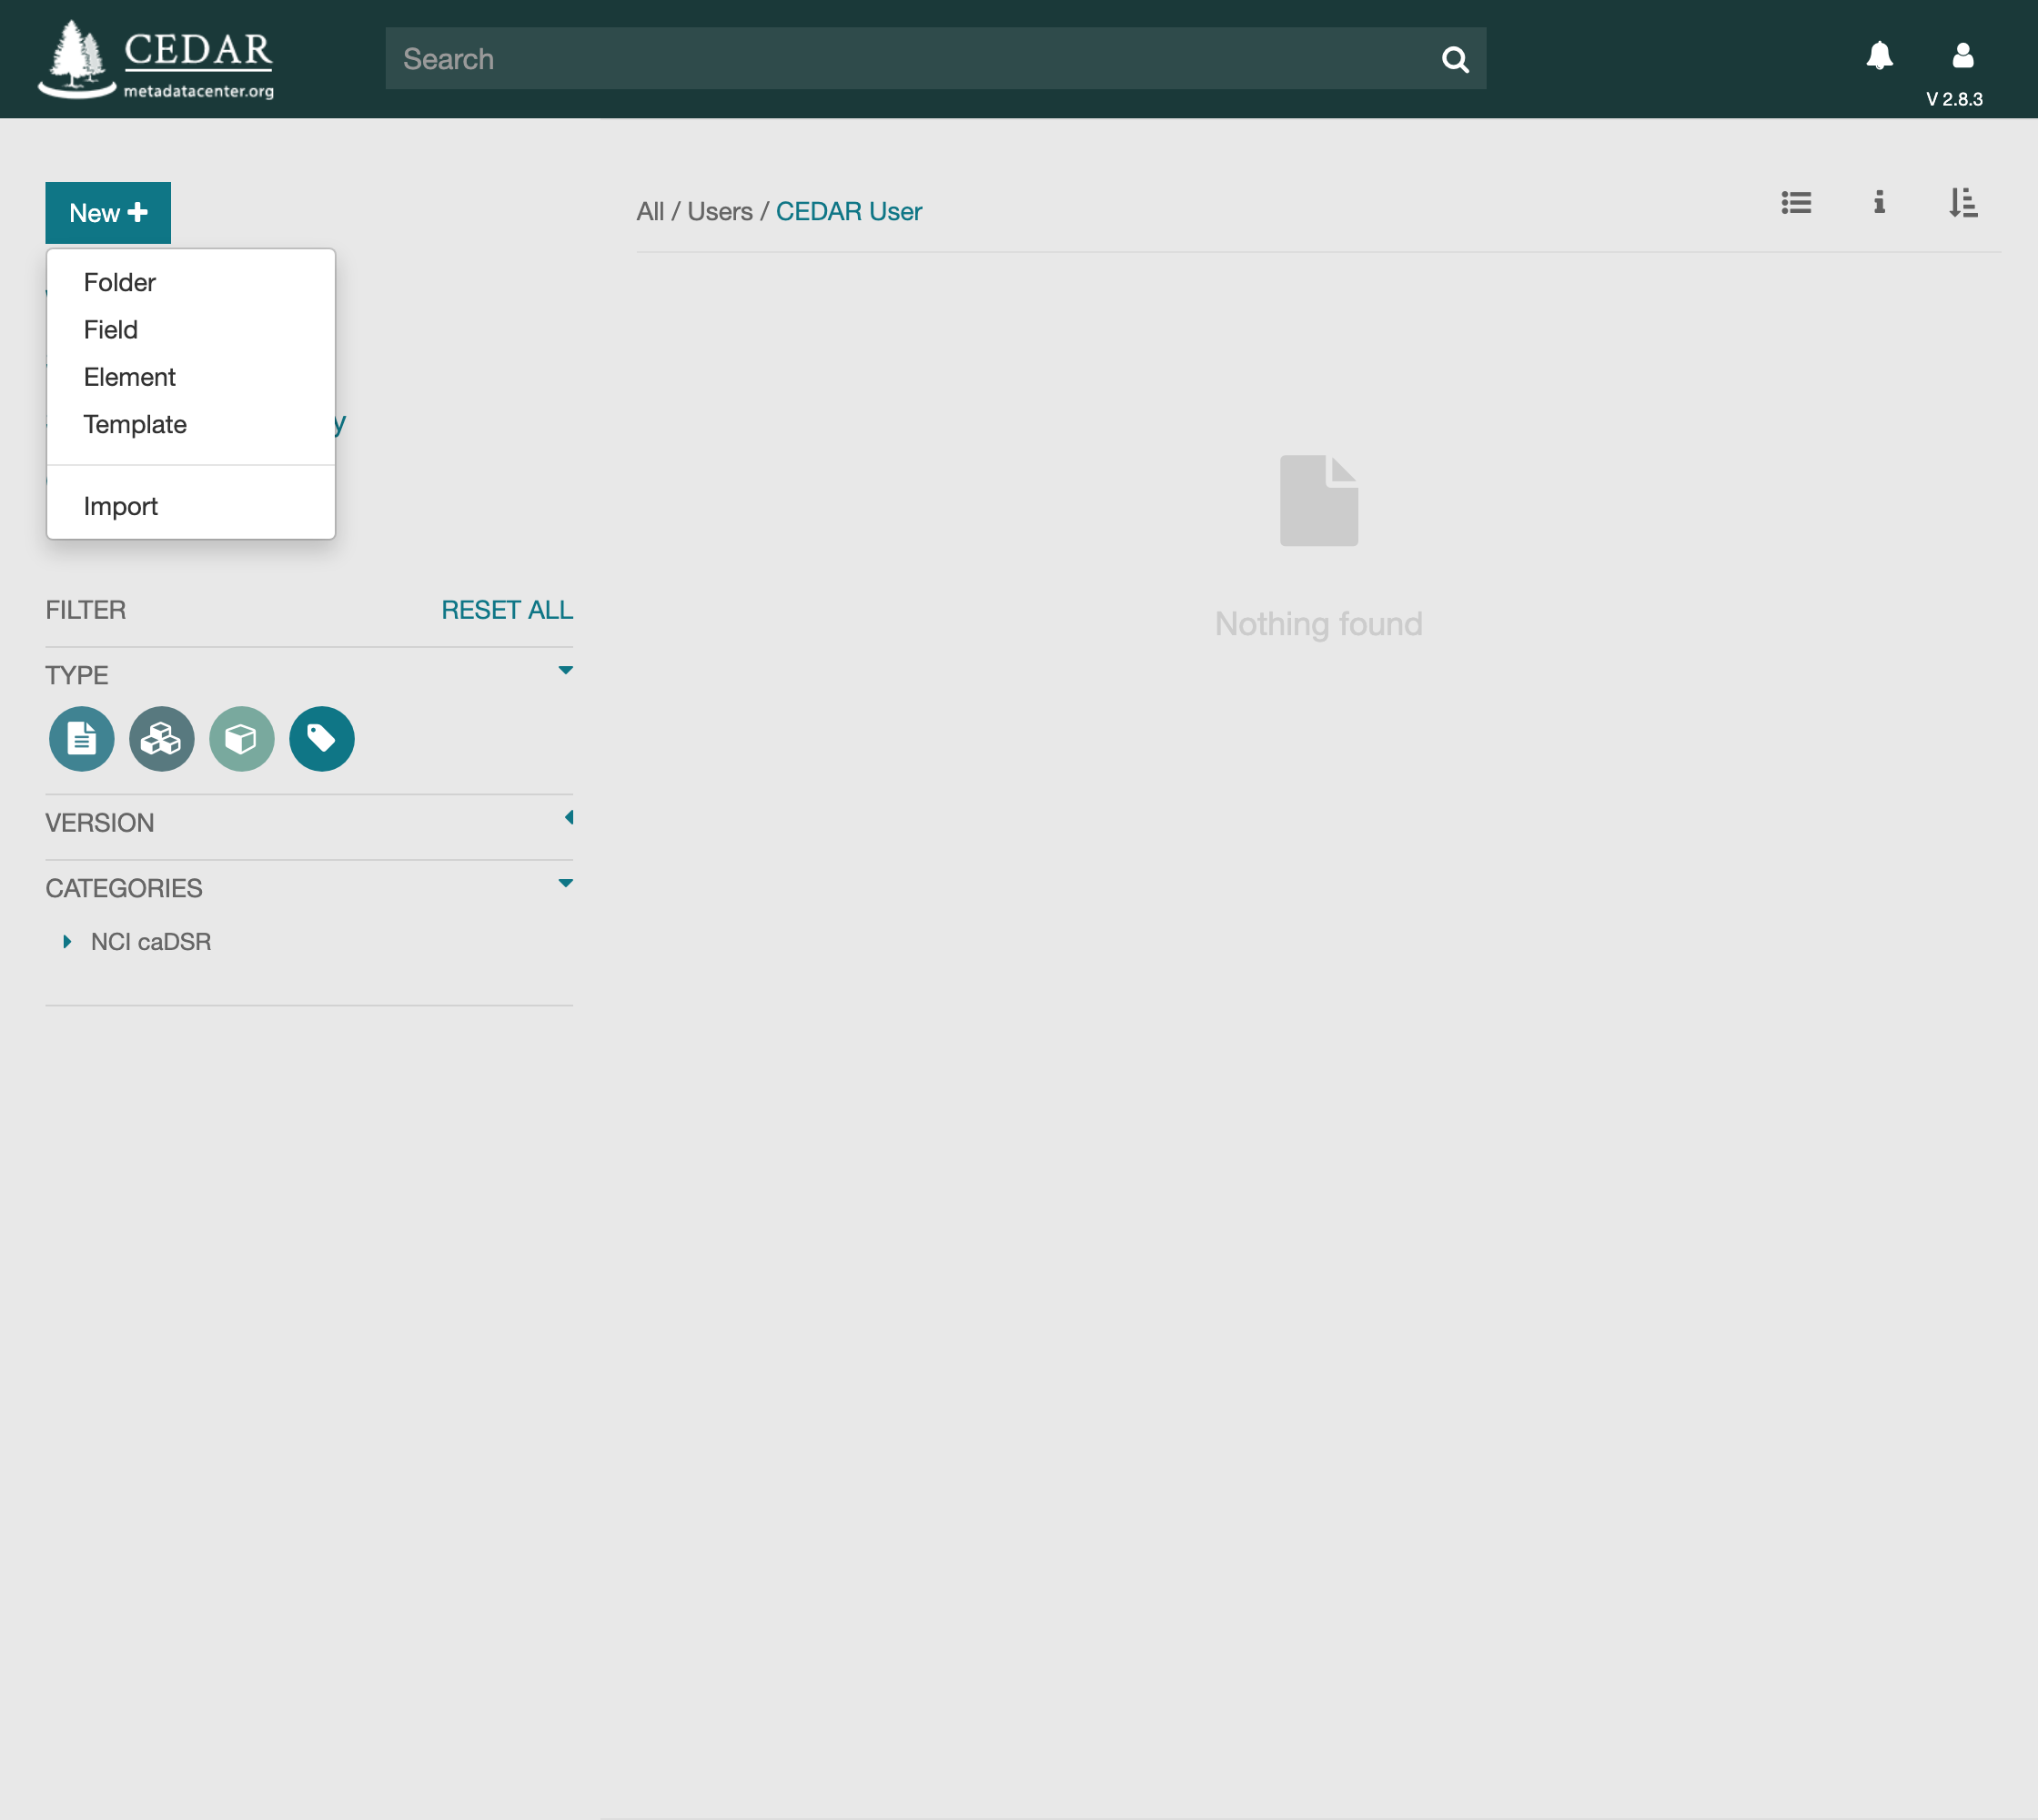
Name the folder something you'll recognize, such as CEDAR Tutorial, and click
Save.
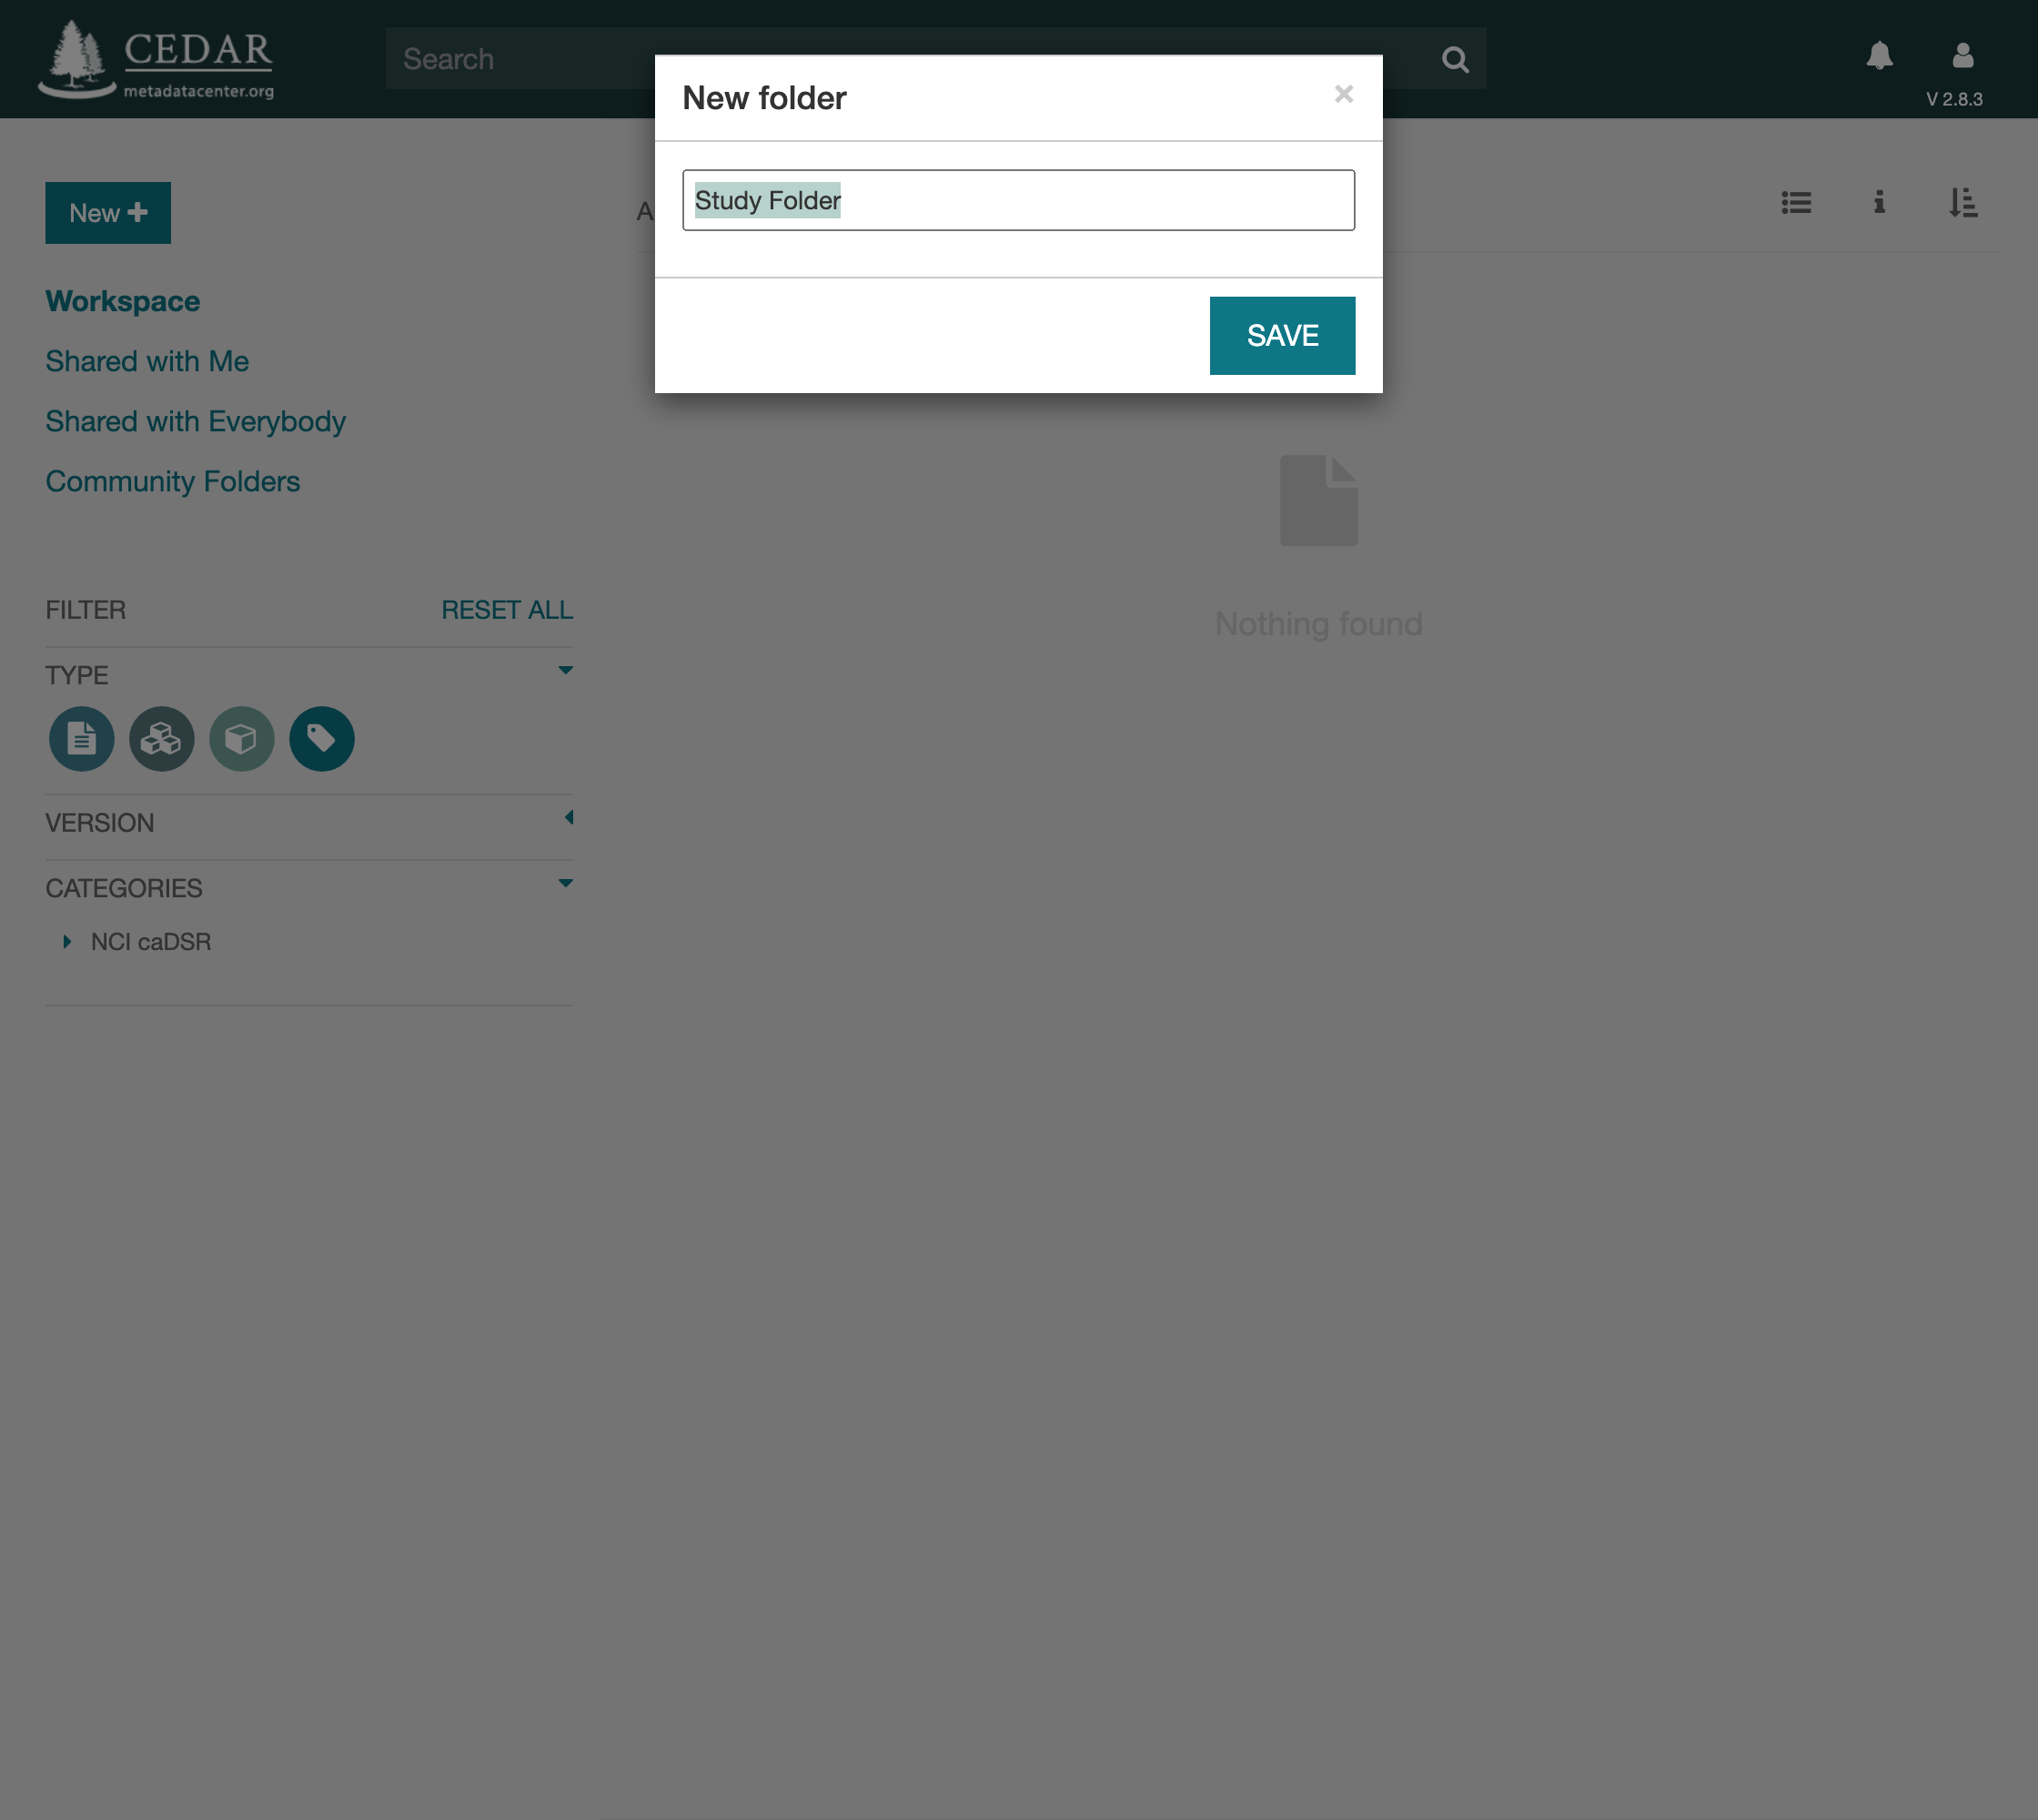
Double-click the new folder to open it. Everything you build in this tutorial will land in this folder.
2. Design a Study Template
A template is a reusable blueprint that defines the shape of your metadata: which fields exist, what type each one is, and any rules about their values. In CEDAR's model a template is a formal reporting guideline: authoring one is the act of writing down, in machine-readable form, exactly what a community decides must be recorded to describe a study.
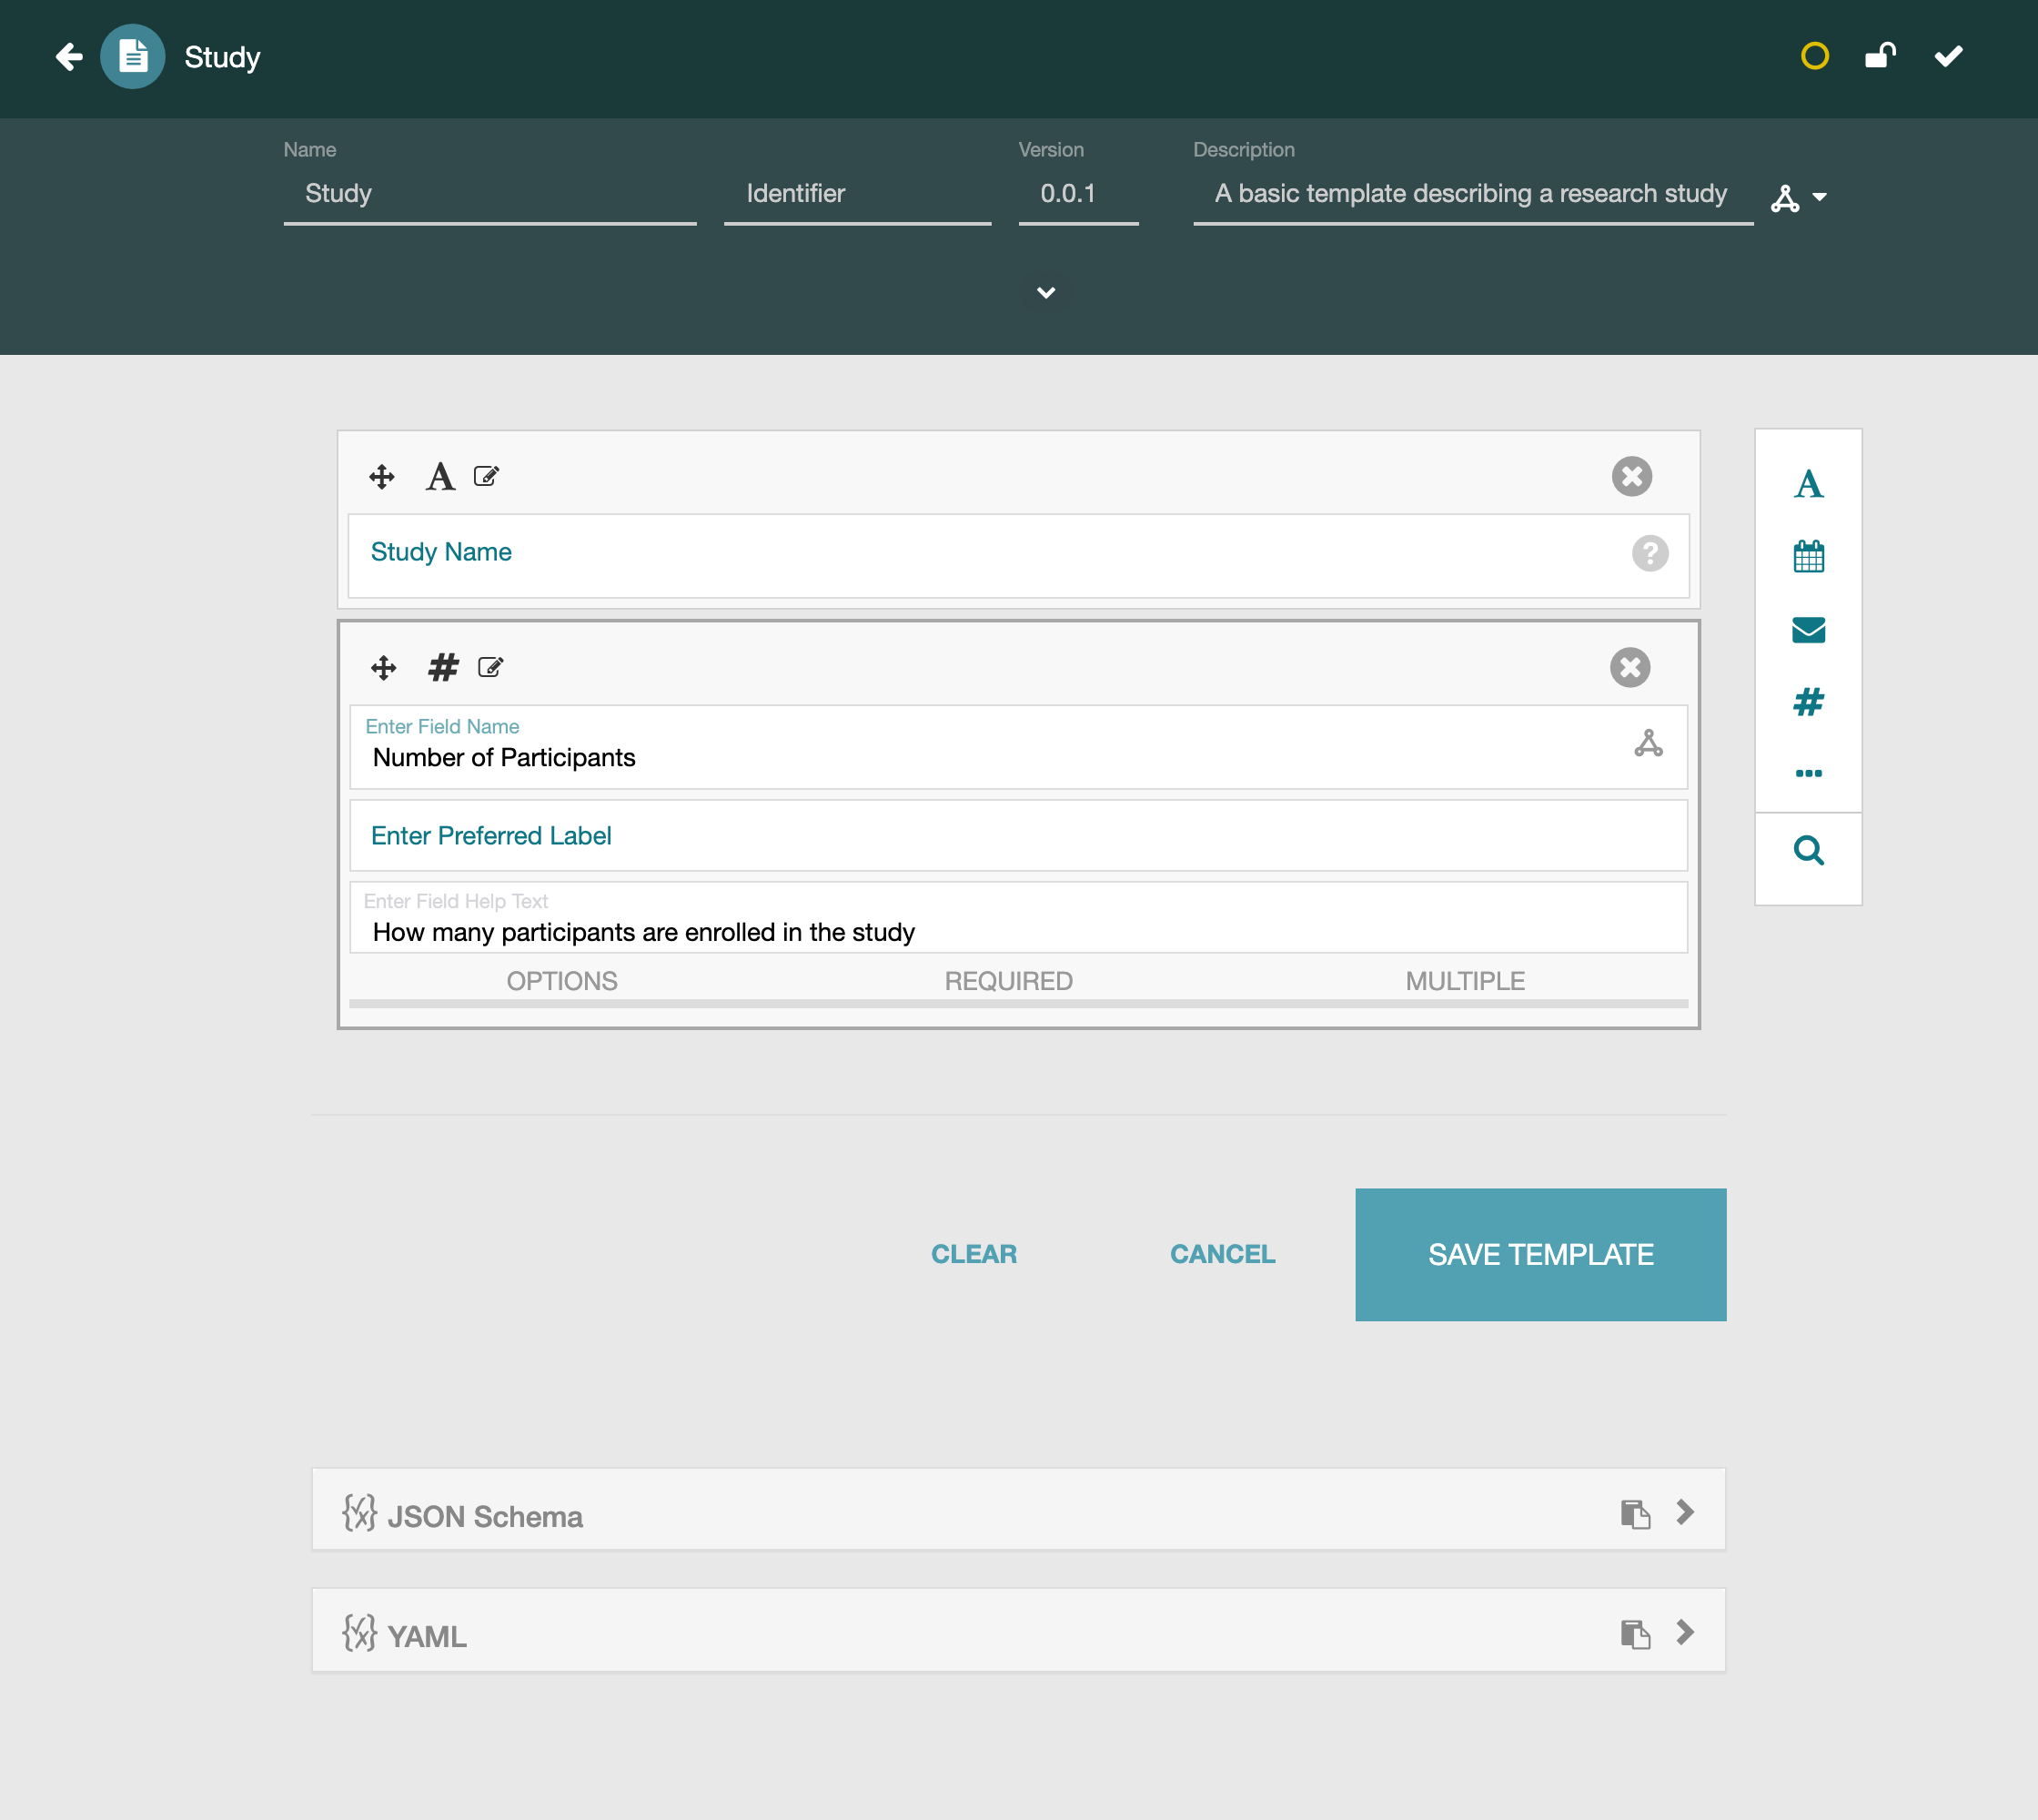
To start, you'll build a simple Study template with two fields: a text field for the study's name and a numeric field for the number of participants. Both are plain fields with no controlled values yet; that comes in Section 4. For now the goal is to learn how a template is assembled in the designer. The steps below walk through it.
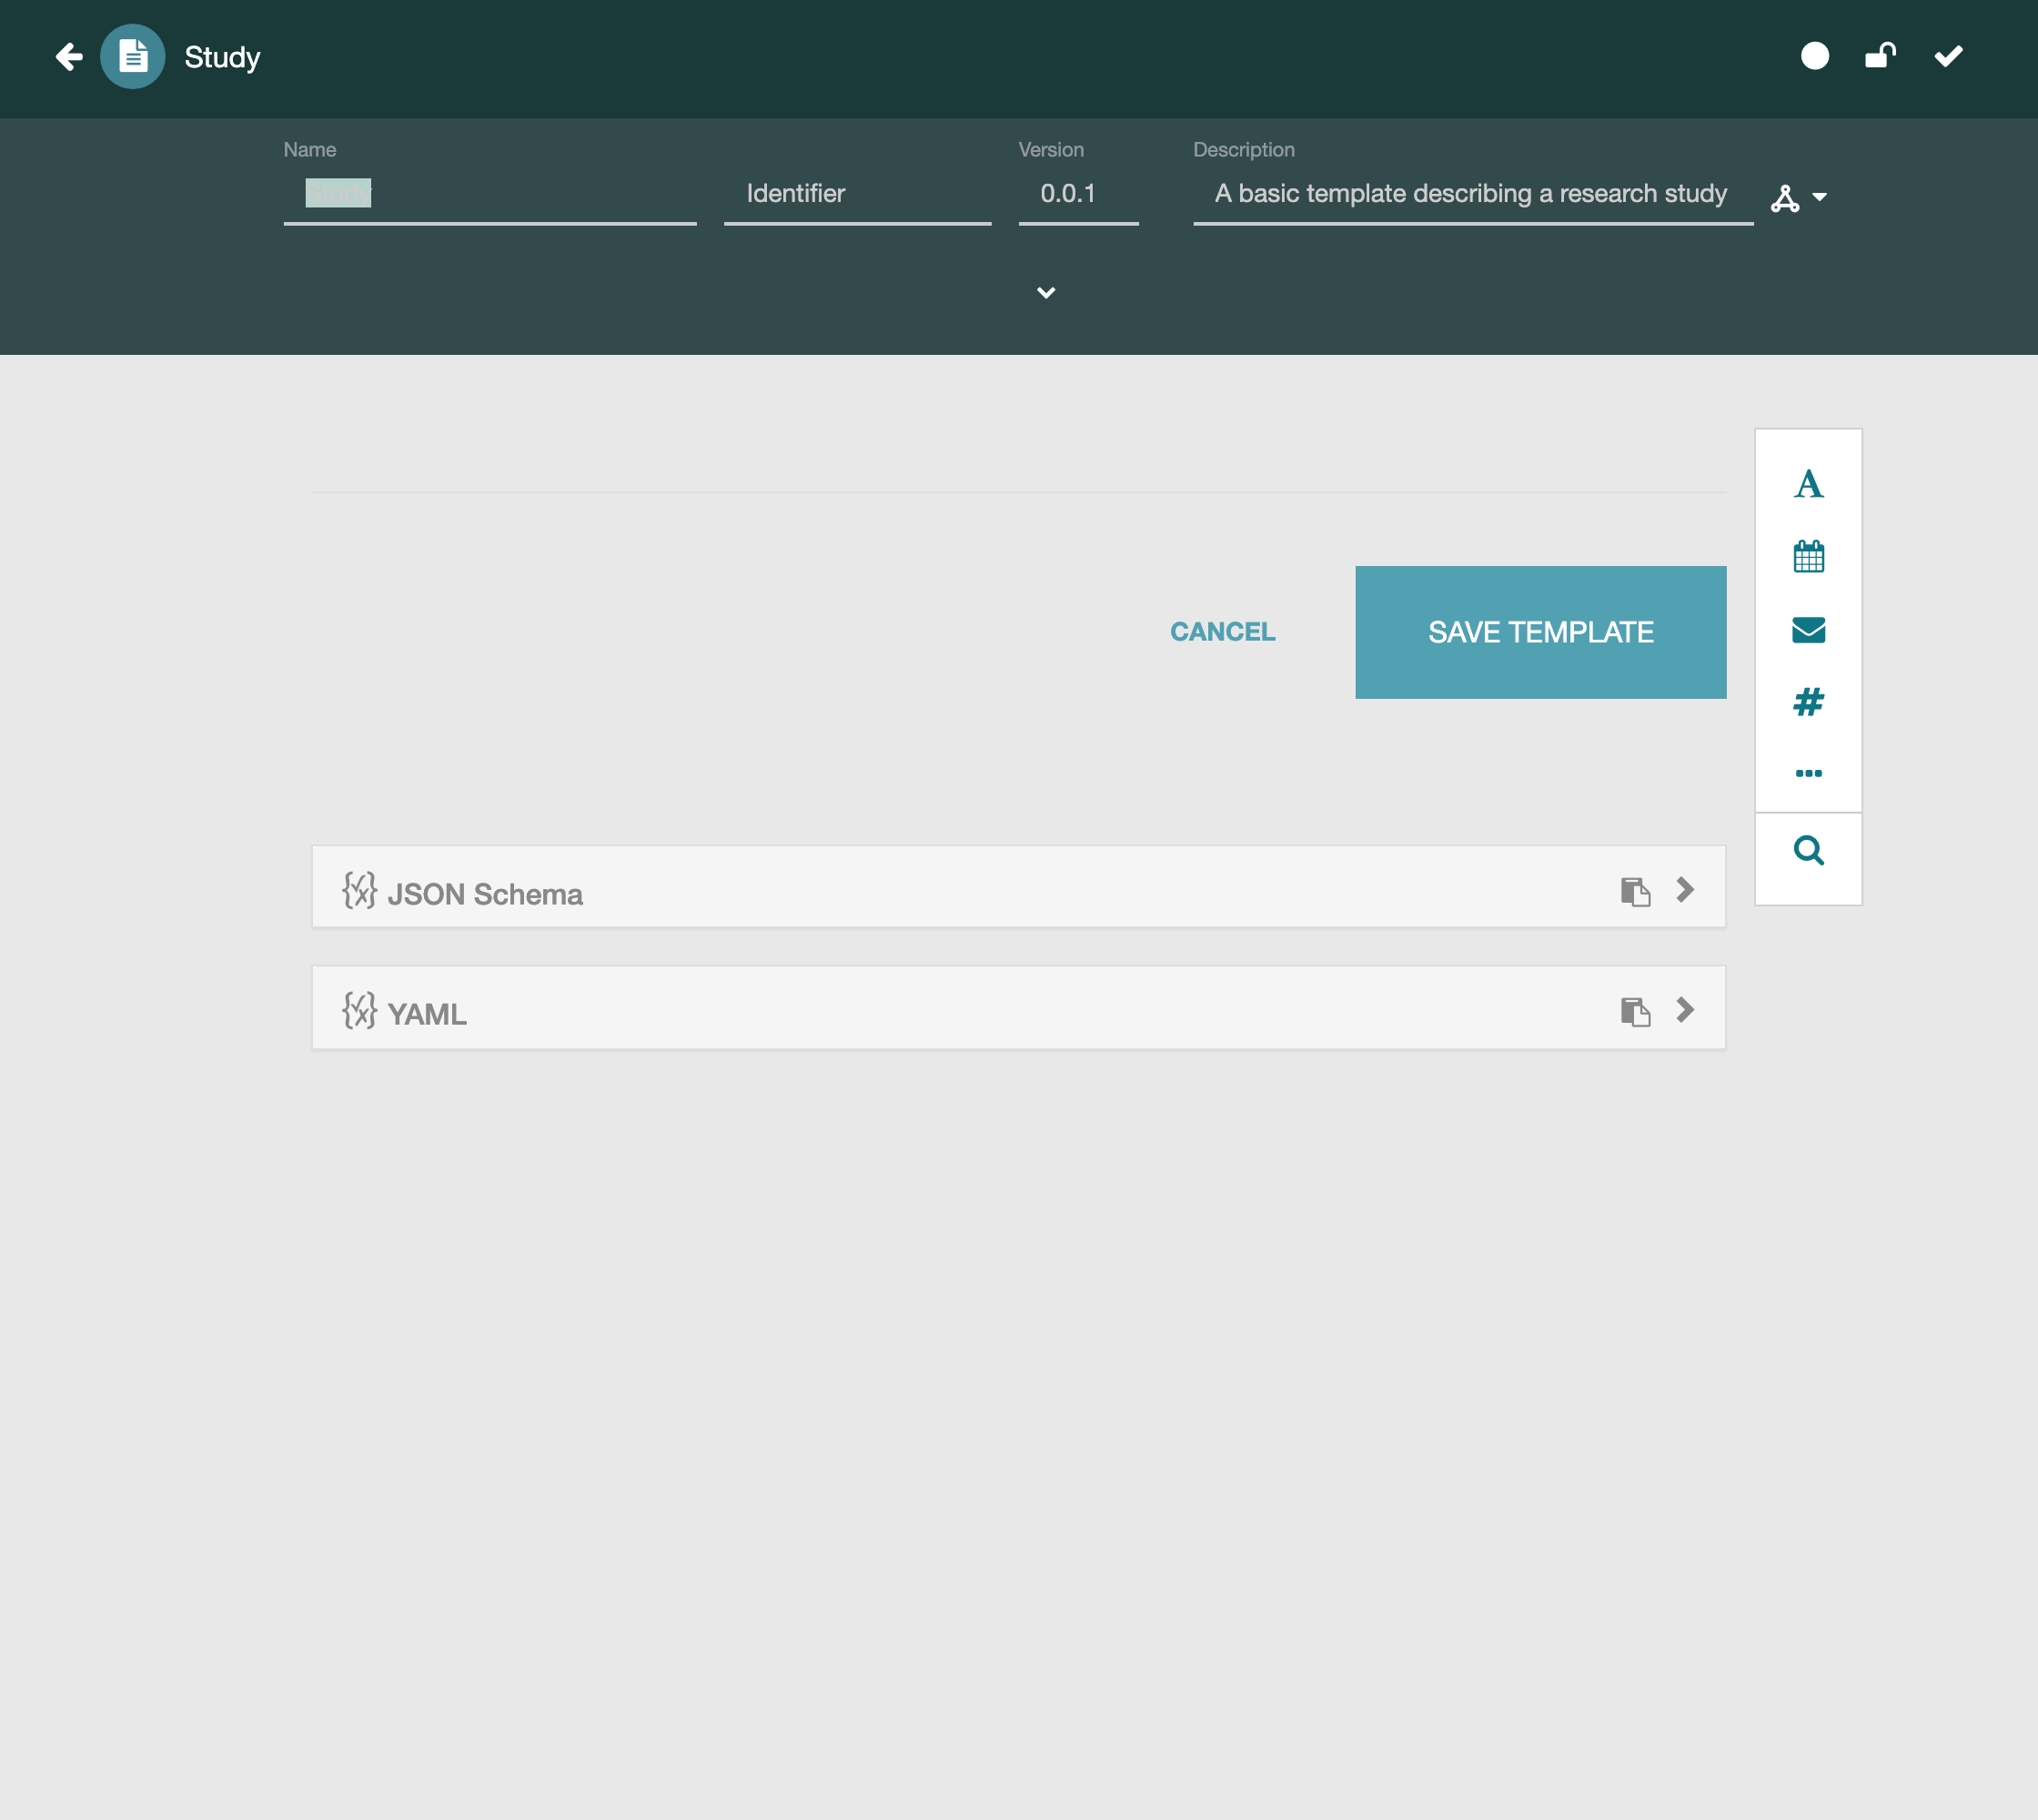
Inside your folder, click New → Template. The CEDAR Template Designer opens.
First, set the Name field to Study. CEDAR starts the Version at 0.0.1
and tracks it for you.
On the right is the field palette. Each icon adds a field of a given type: A for text, # for a number, a calendar for dates, an envelope for email, and ⋯ for a variety of other field types.
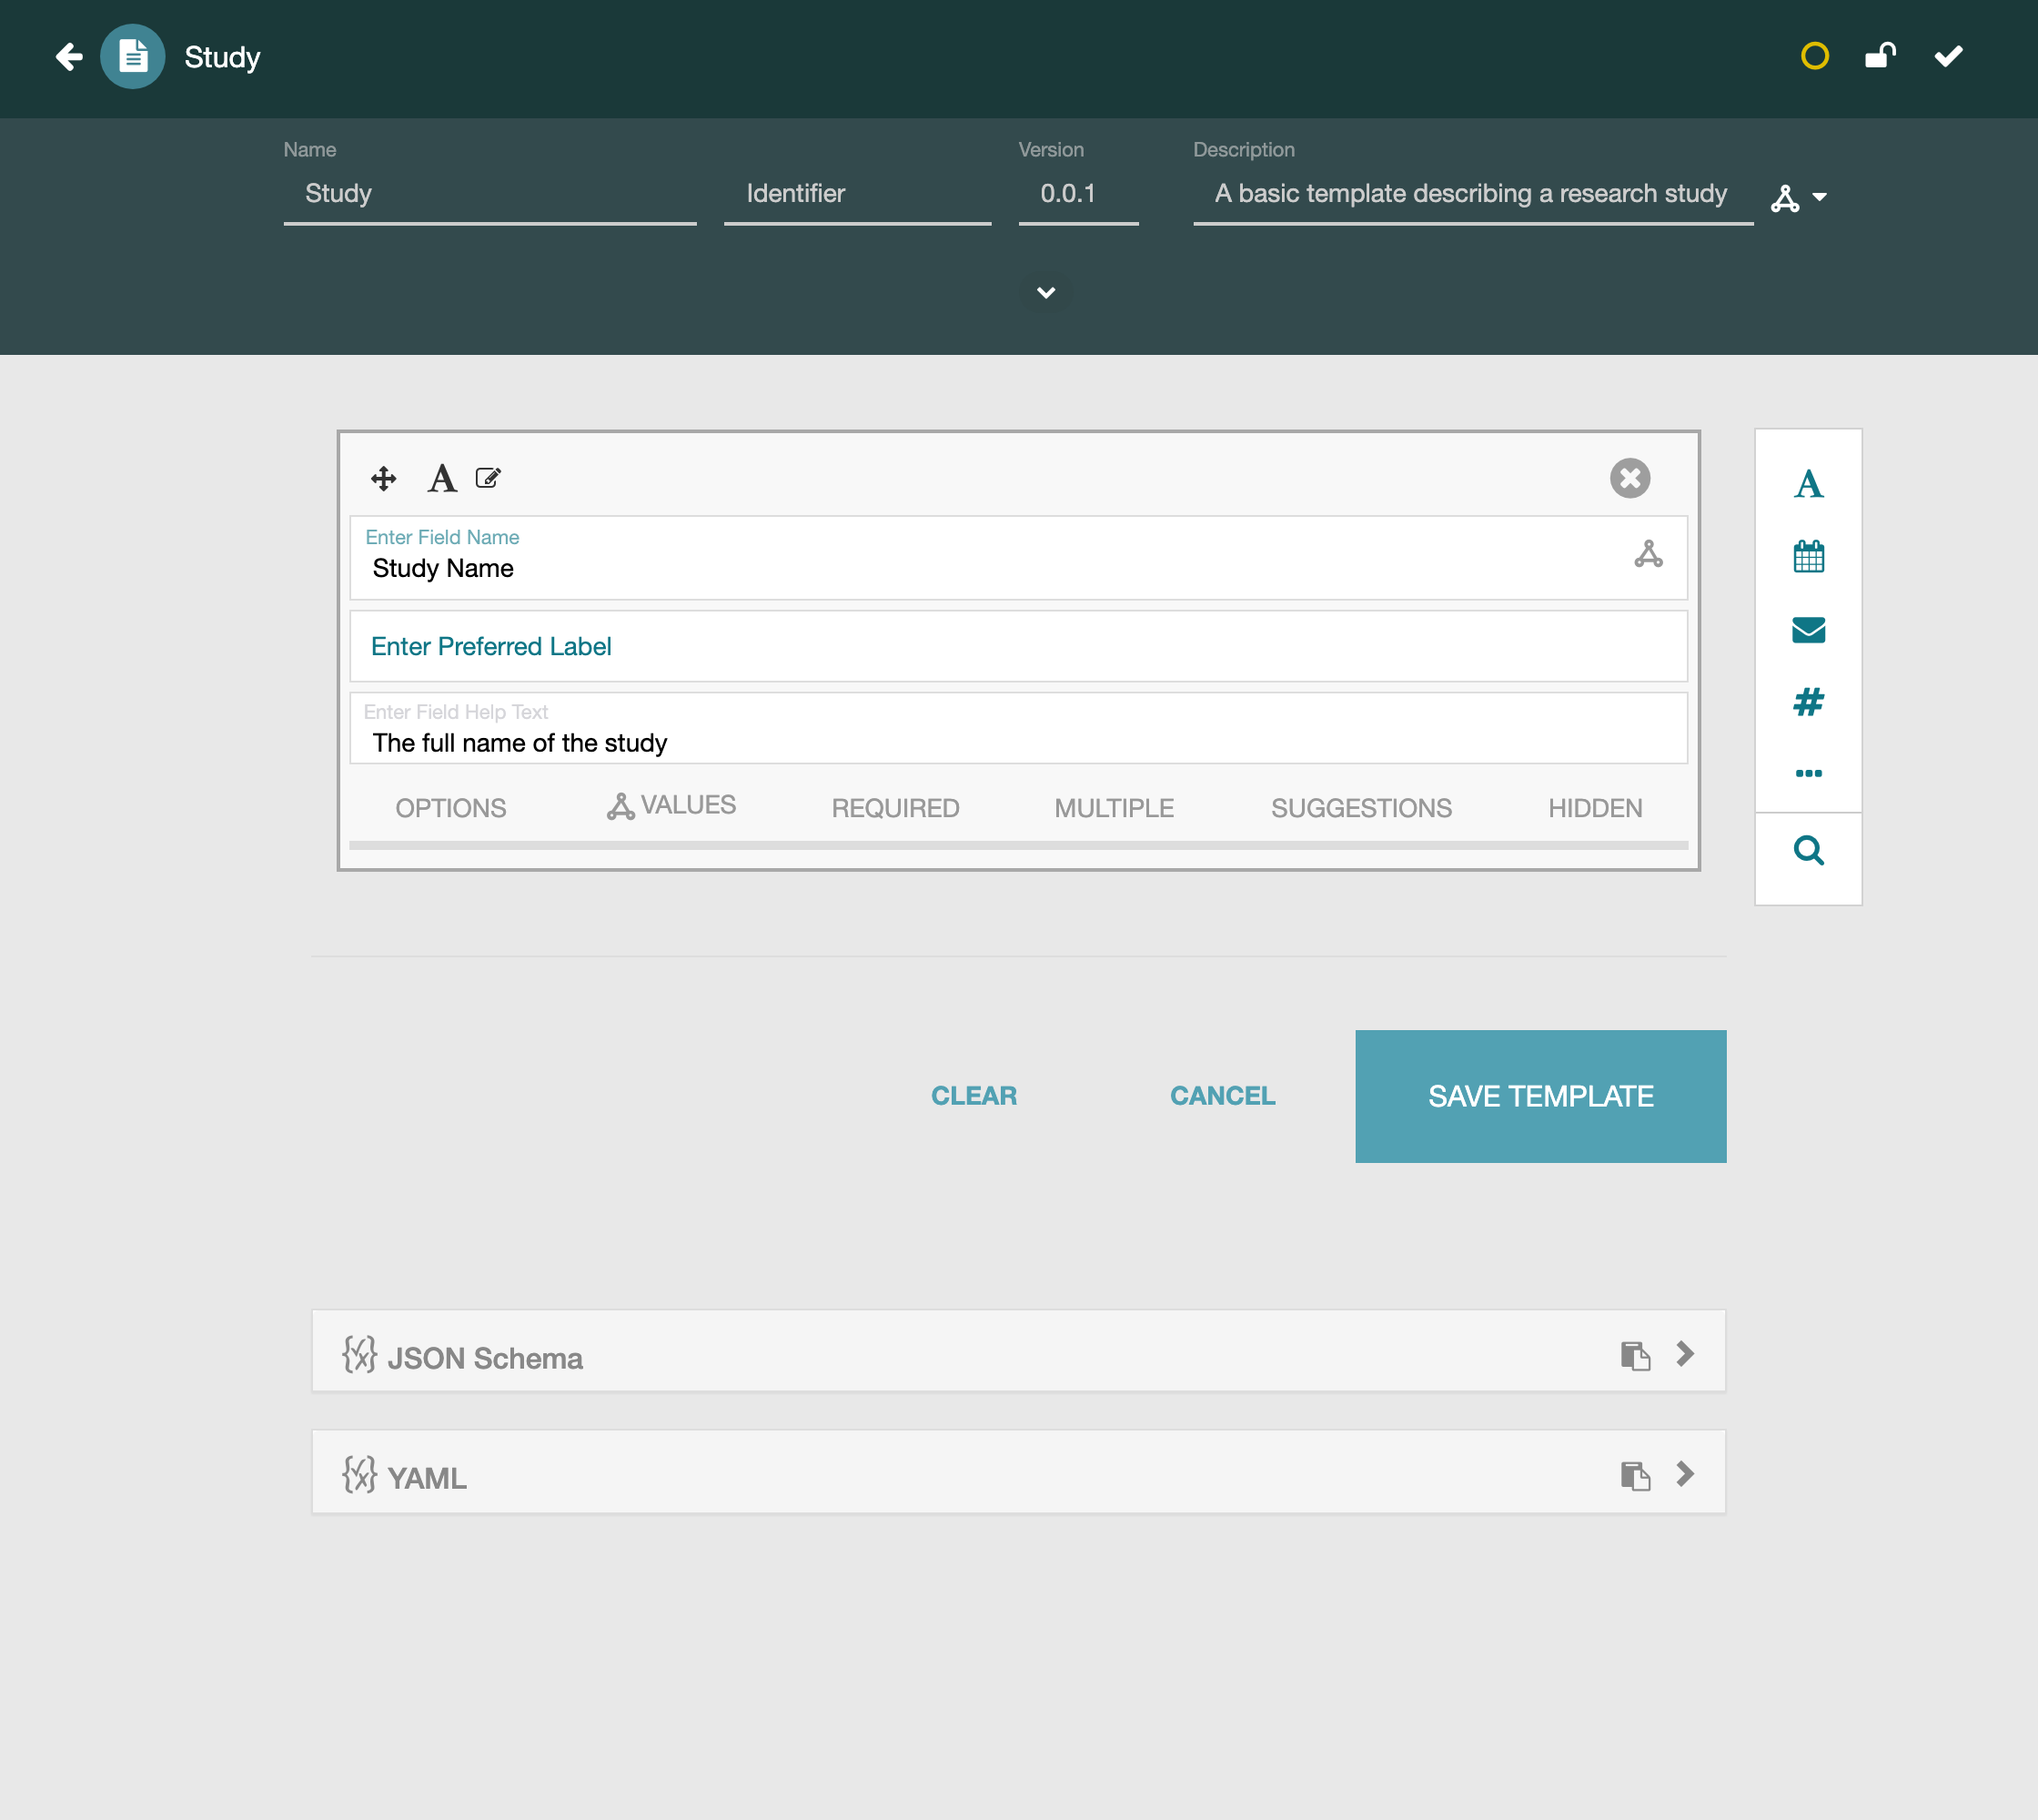
Click the A (text) icon to add your first field. In the field editor, set
Enter Field Name to Study Name, and add Field Help Text such as
The full name of the study. Help text becomes the guidance shown to whoever
fills out the form later.
Now click the # (number) icon to add a second field named
Number of Participants, with help text like
How many participants are enrolled in the study. Because it's numeric, CEDAR
will accept only numbers. Each field also carries Options, Required, and
Multiple controls for making a field mandatory or repeatable — the defaults
are fine here.
With both fields in place, click Save Template.
3. Fill Out the Form
Your template is a blueprint; to capture real metadata you create an instance of it. This template/instance split is central to CEDAR: the template is the standard, authored once; each instance is a populated copy that annotates one dataset and inherits the template's structure and constraints.
Here you'll fill out the Study template to create your first metadata instance.
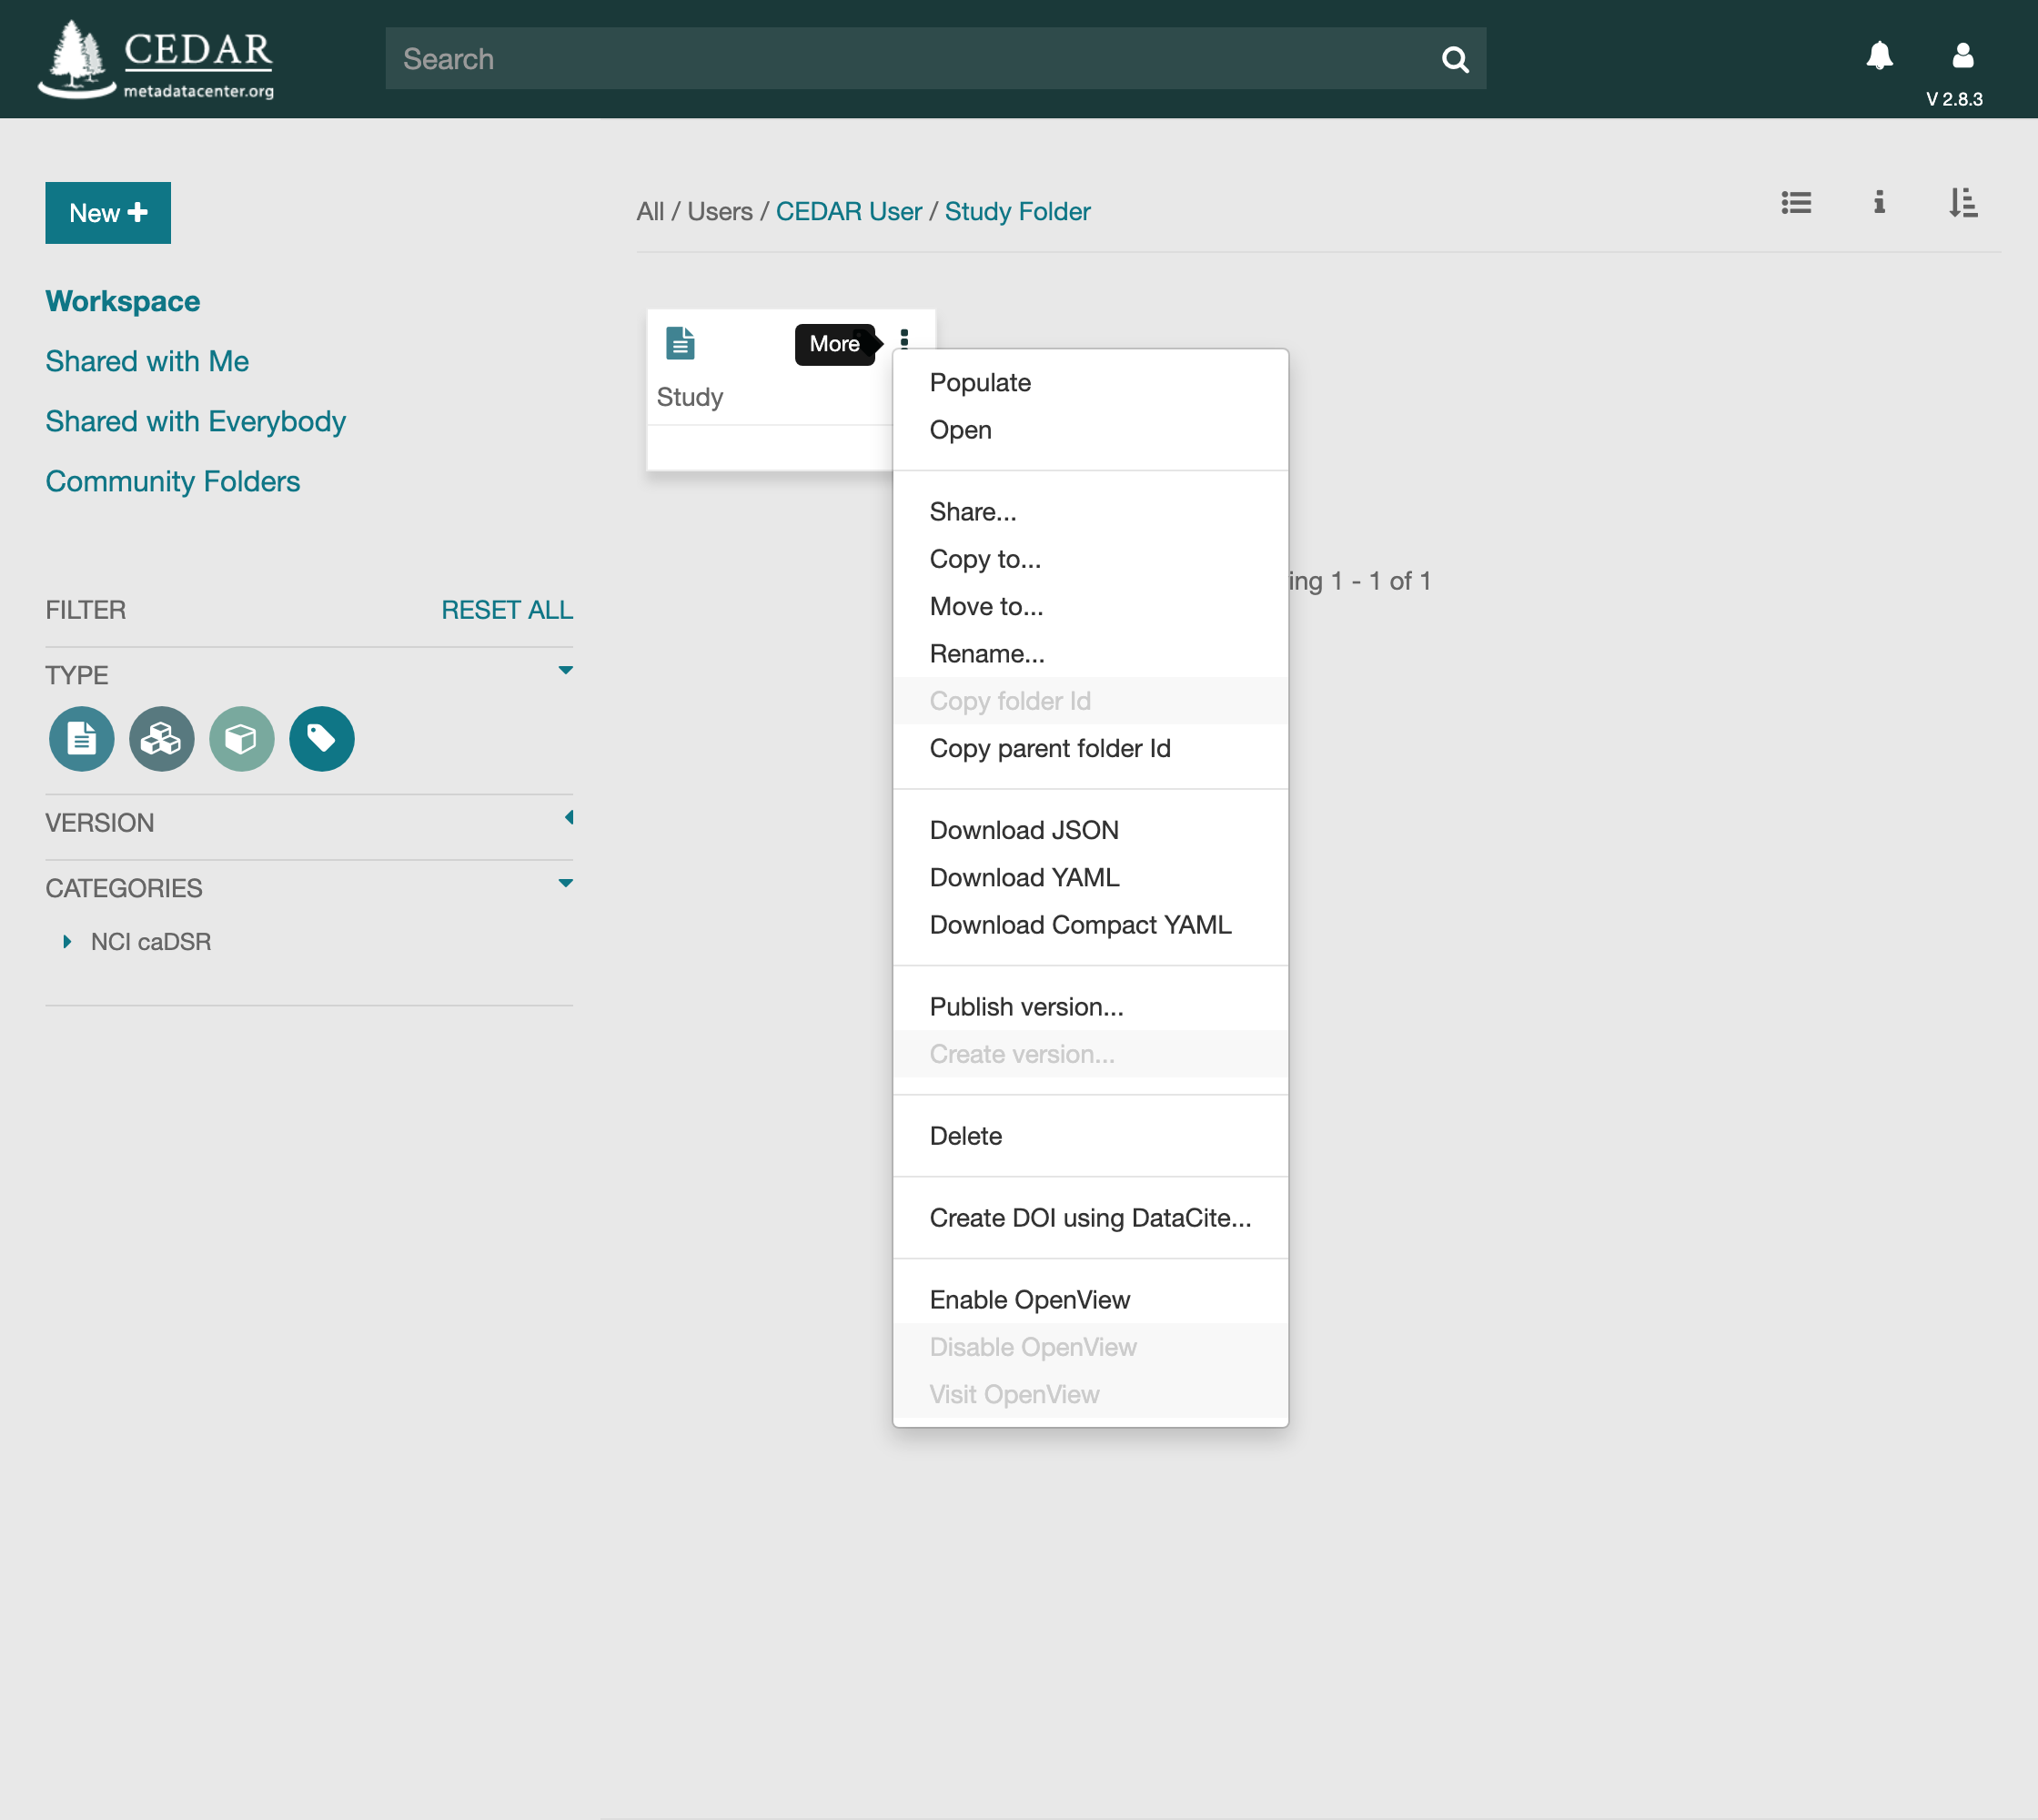
Back in your folder, open the ⋮ menu on the Study row and choose
Populate.
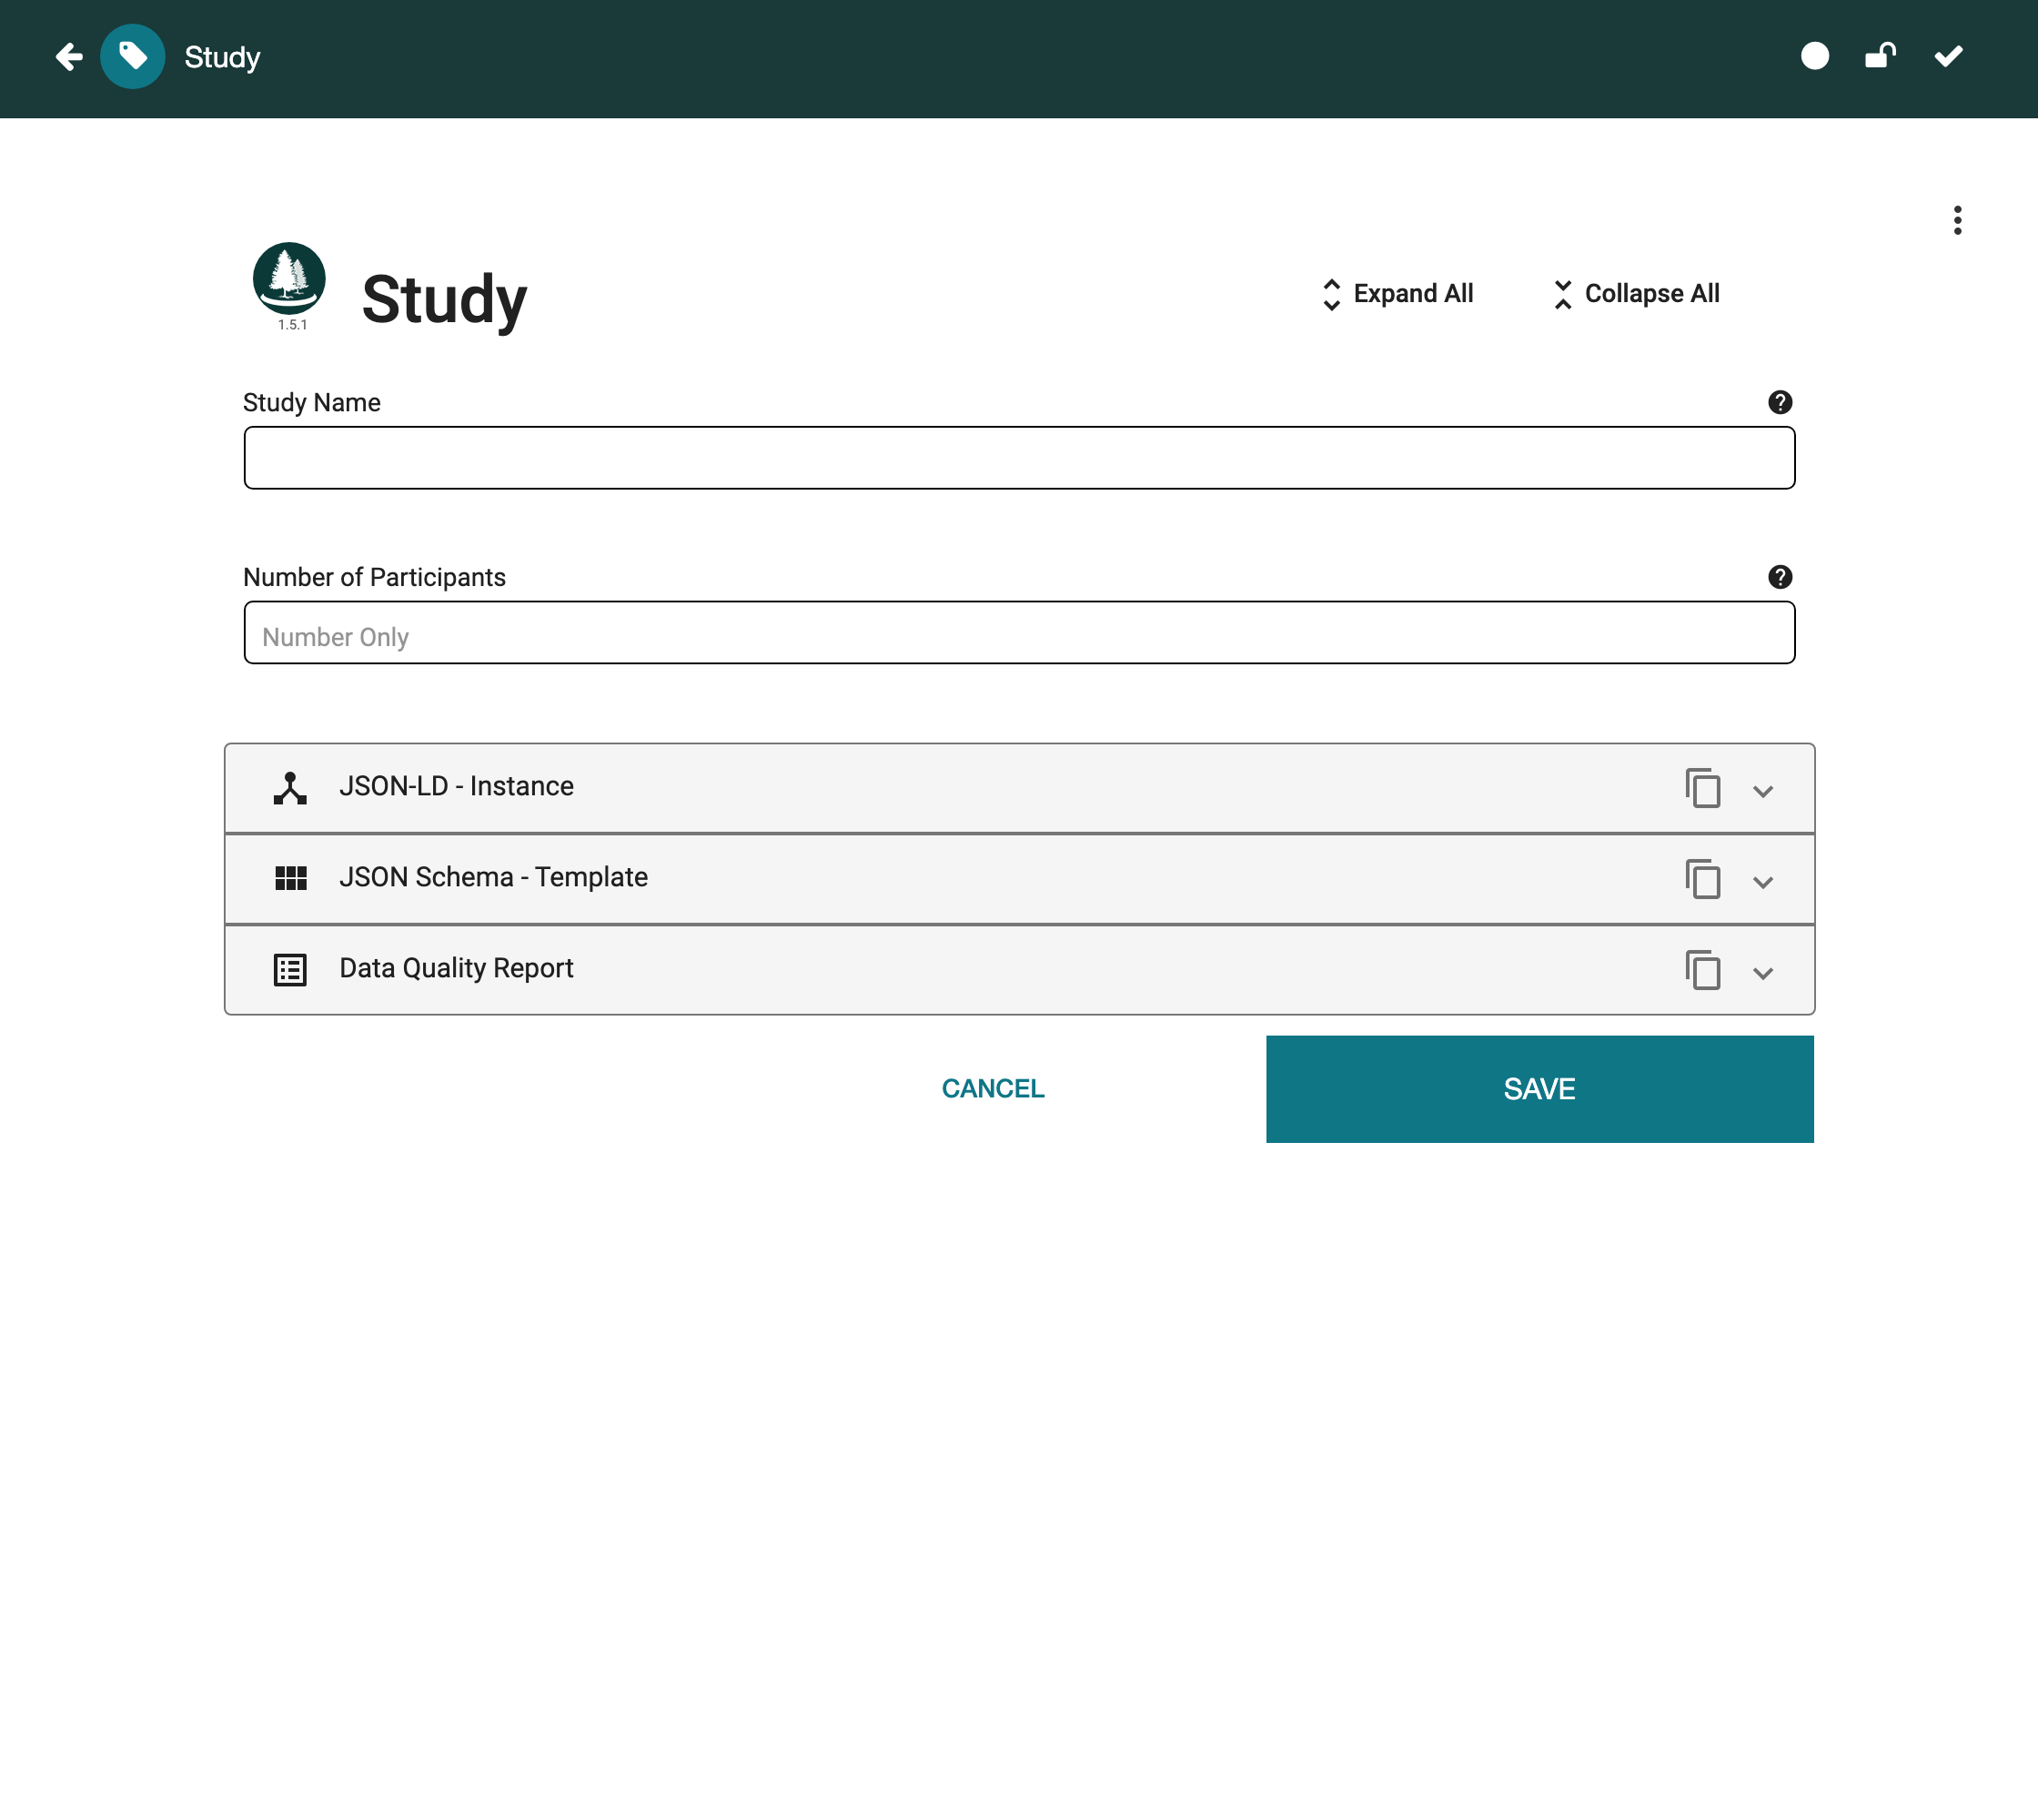
CEDAR generates a fillable Web form from a template on the fly with the CEDAR Metadata Editor.
Here, it shows the empty form to be filled in.
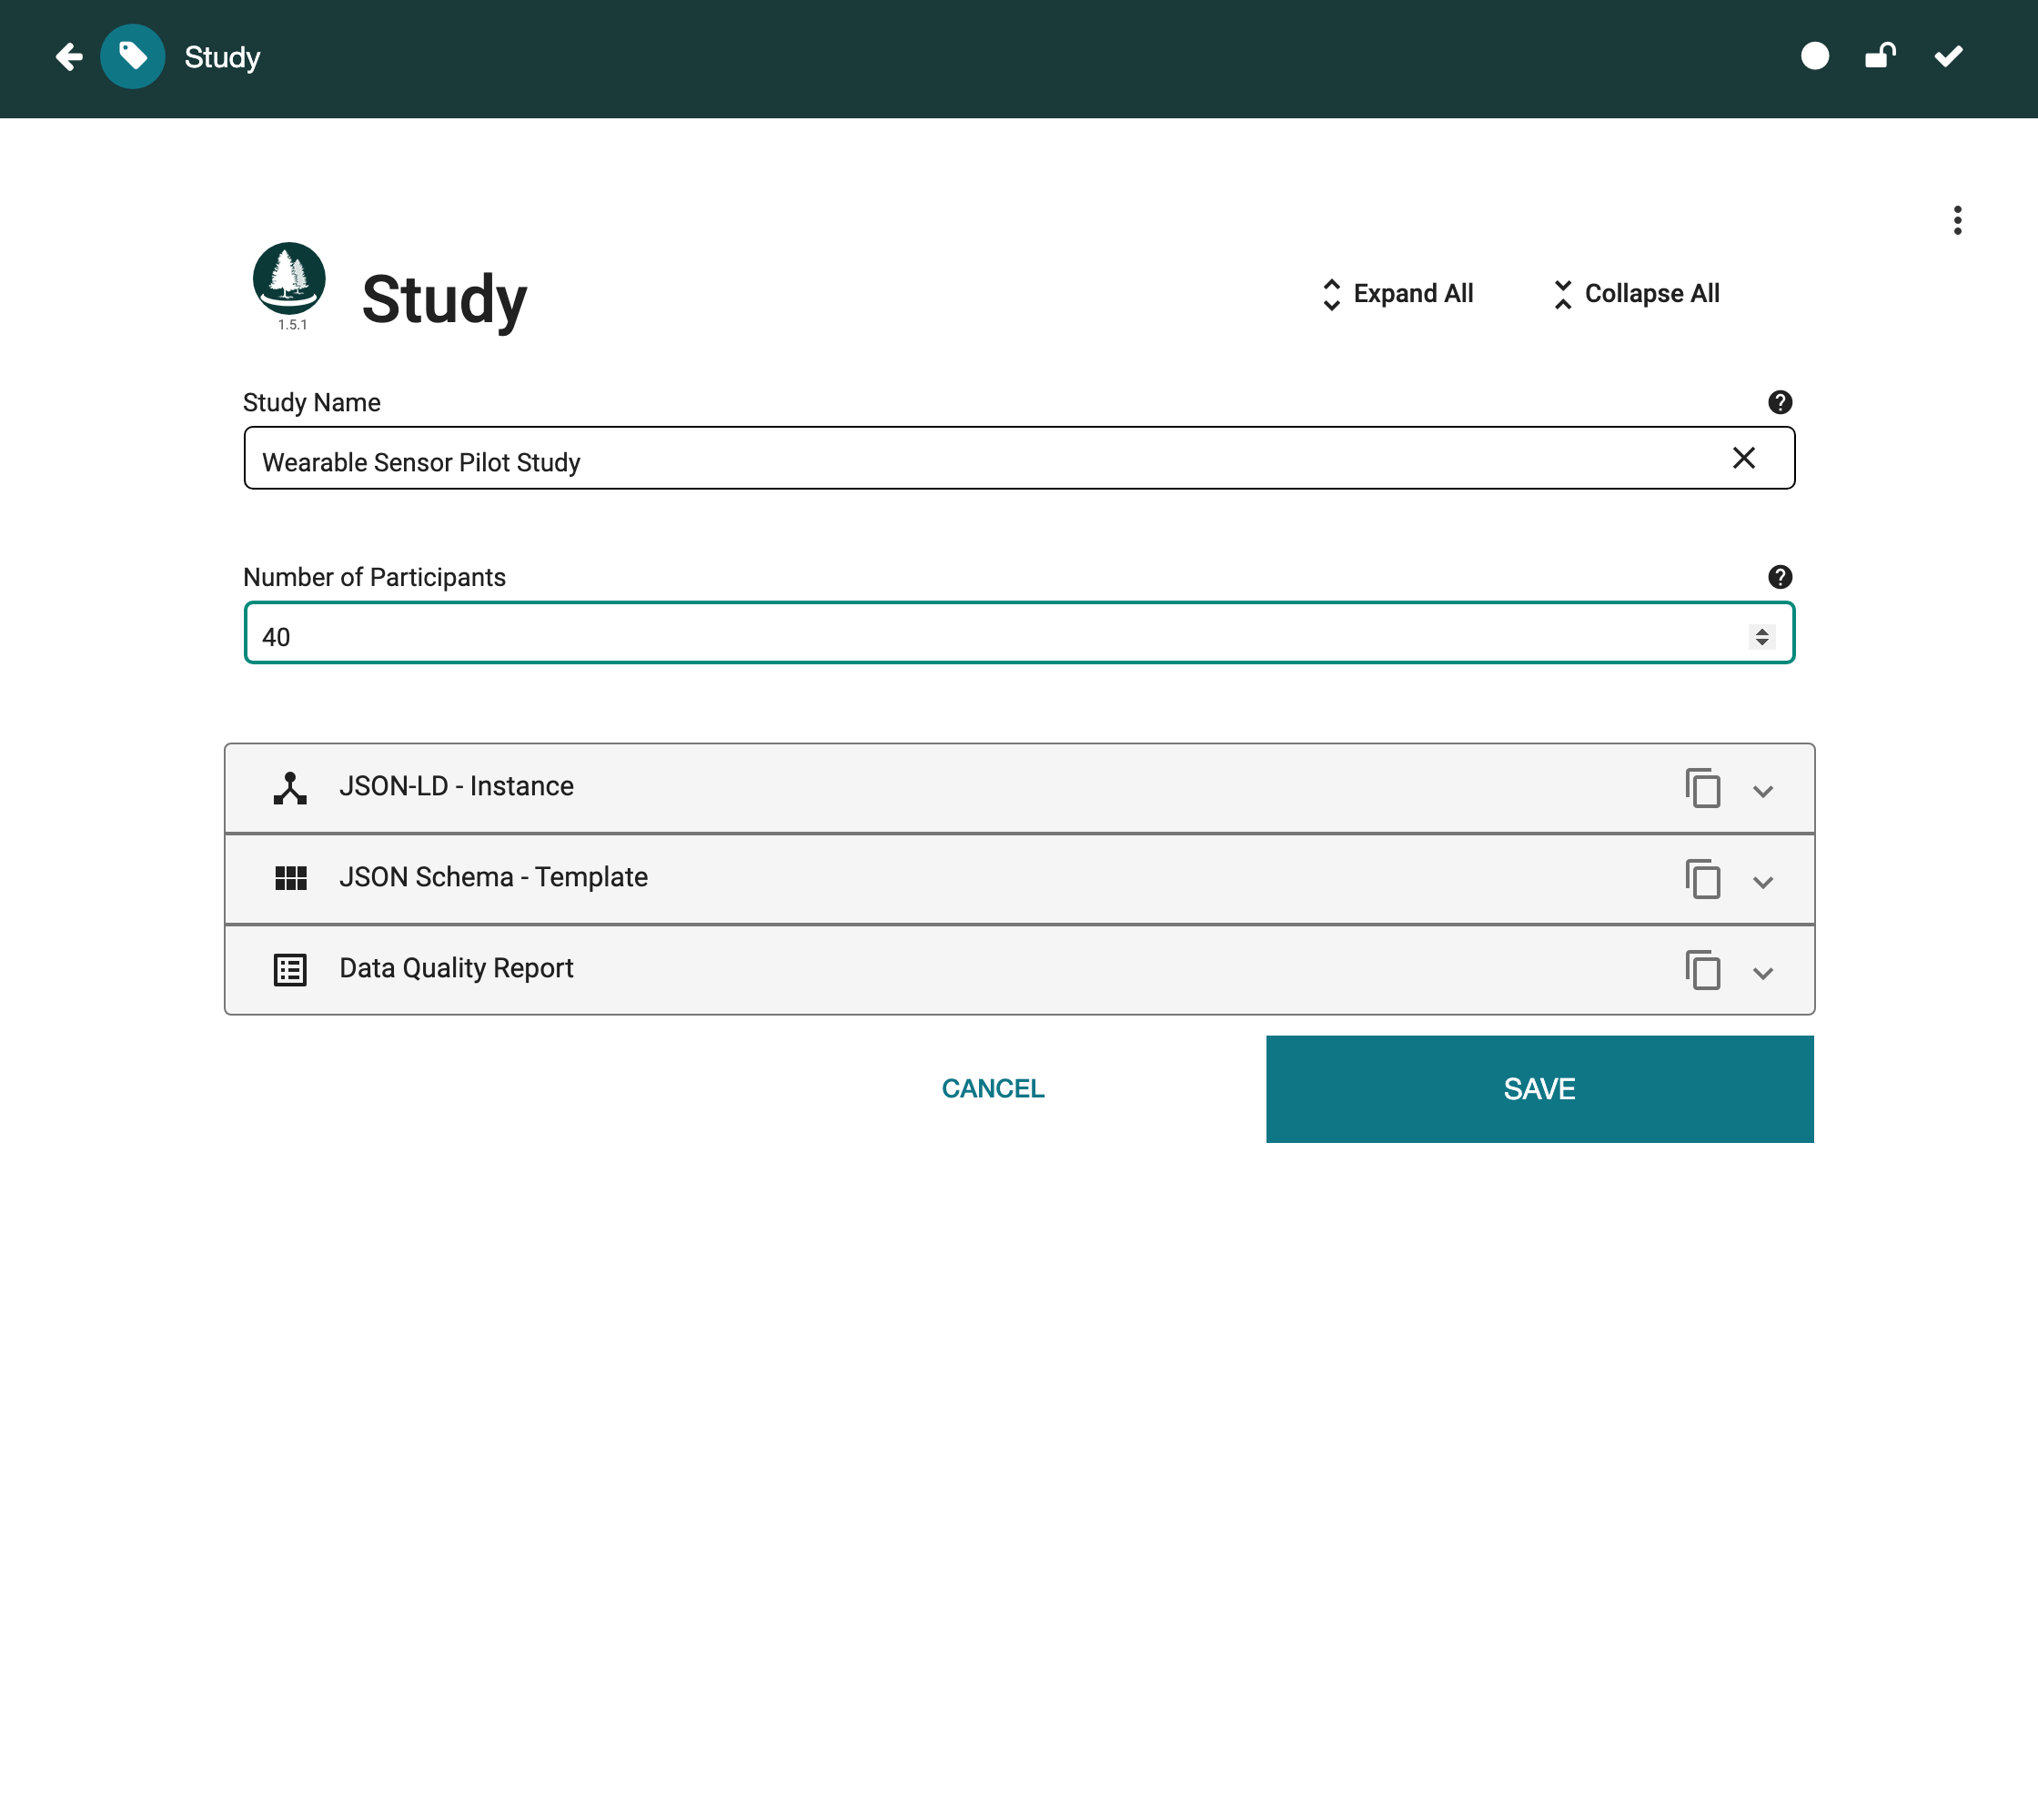
Enter a Study Name — Wearable Sensor Pilot Study — and a
Number of Participants — 40. The number field won't accept text.
The collapsible panels below (JSON-LD, JSON Schema, Data Quality Report) let you watch the machine-readable metadata take shape: CEDAR stores templates as JSON Schema and instances as JSON-LD, so what you type is immediately available as linked data that can be converted to RDF.
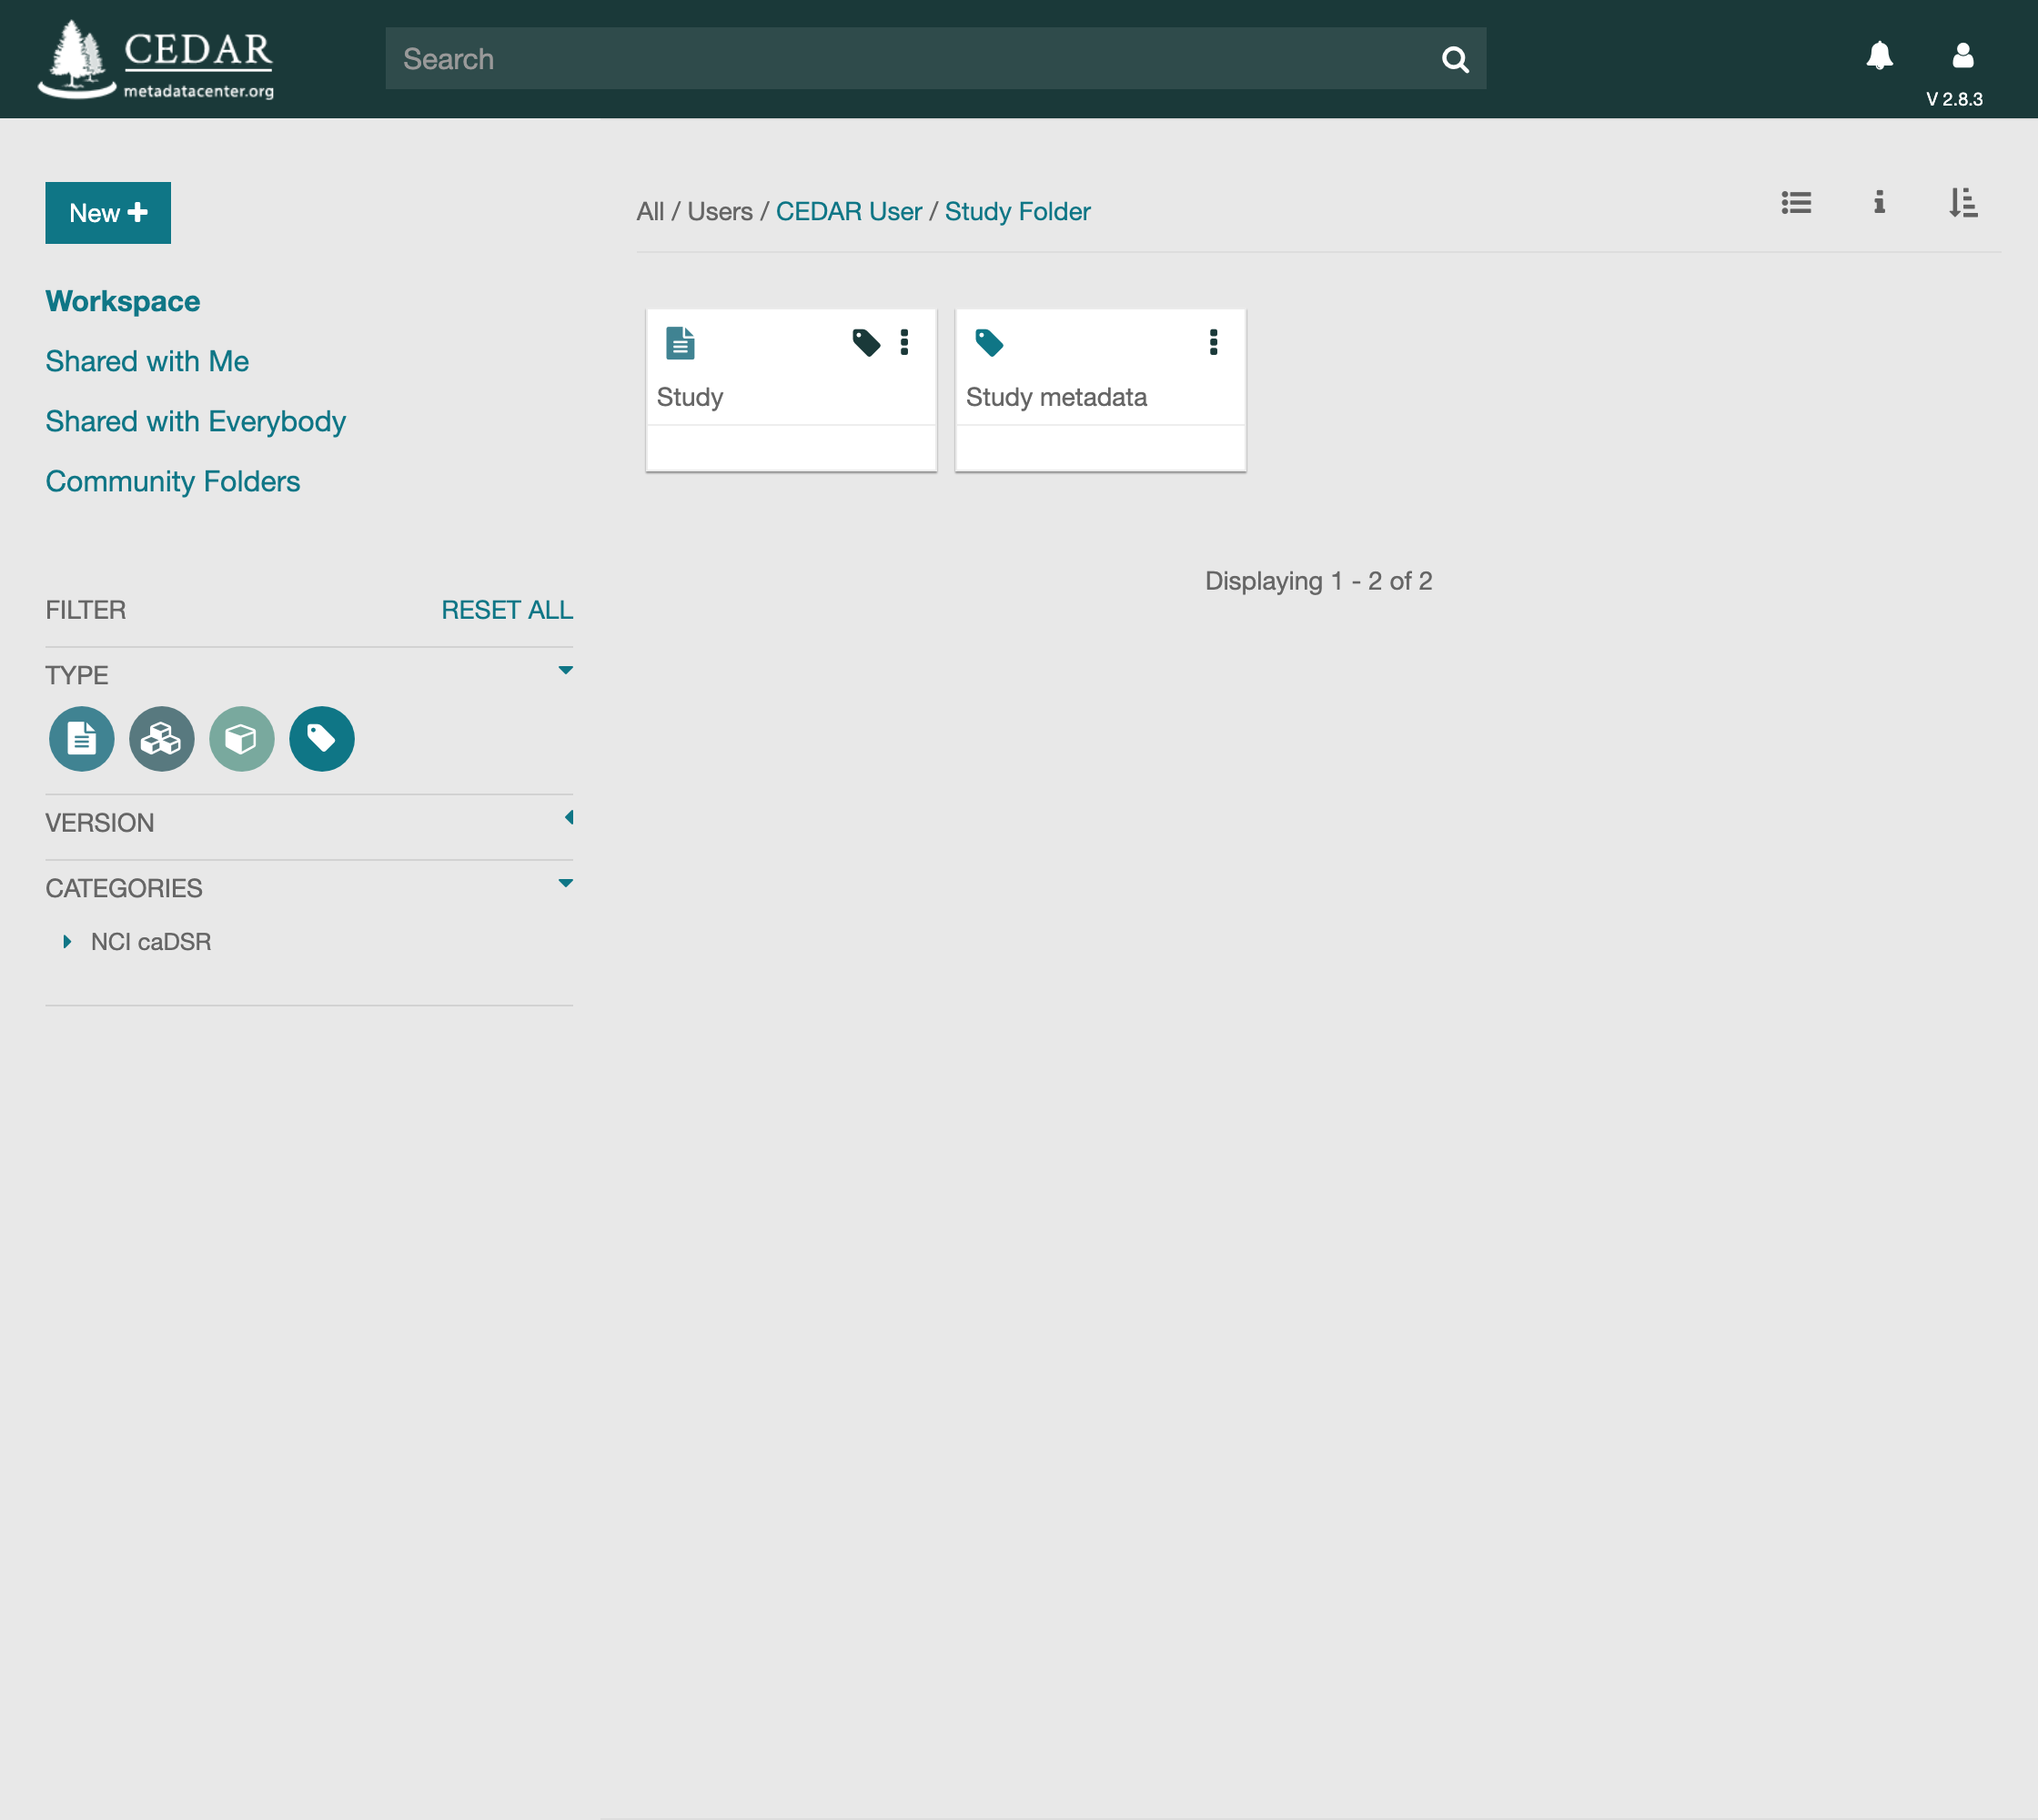
Click Save. Back in your folder, the new Study metadata instance sits next
to the Study template it was built from.
4. A Richer Template: Controlled Terms and External Authorities
Free text is easy to type but hard to compute over: "Stanford," "Stanford University," and "Stanford Univ." mean one thing to a person and three things to a machine. Instead of leaving values open, you can bind a field to a controlled terminology or an external authority, so every value is drawn from a shared, globally resolvable namespace. The instance then records both the human-readable label and the underlying identifier (IRI), so the metadata is unambiguous, interoperable, and machine-actionable.
In this section you'll build a richer Clinical Study template with three fields, each drawing on a controlled source: a Principal Investigator identified through ORCID, an Institution identified through ROR, and a Disease drawn from a disease ontology. The steps below create the template, add the fields, and apply the ontology constraint.
Create a second template (New → Template), name it Clinical Study, and
describe it as A richer study template using controlled terms and external
authorities.
The everyday text/number/date/email types sit on the palette directly; the rest live under ⋯. Click on the ⋯ to reveal the full set — including the authority-backed types you want: ORCID, ROR, and more.
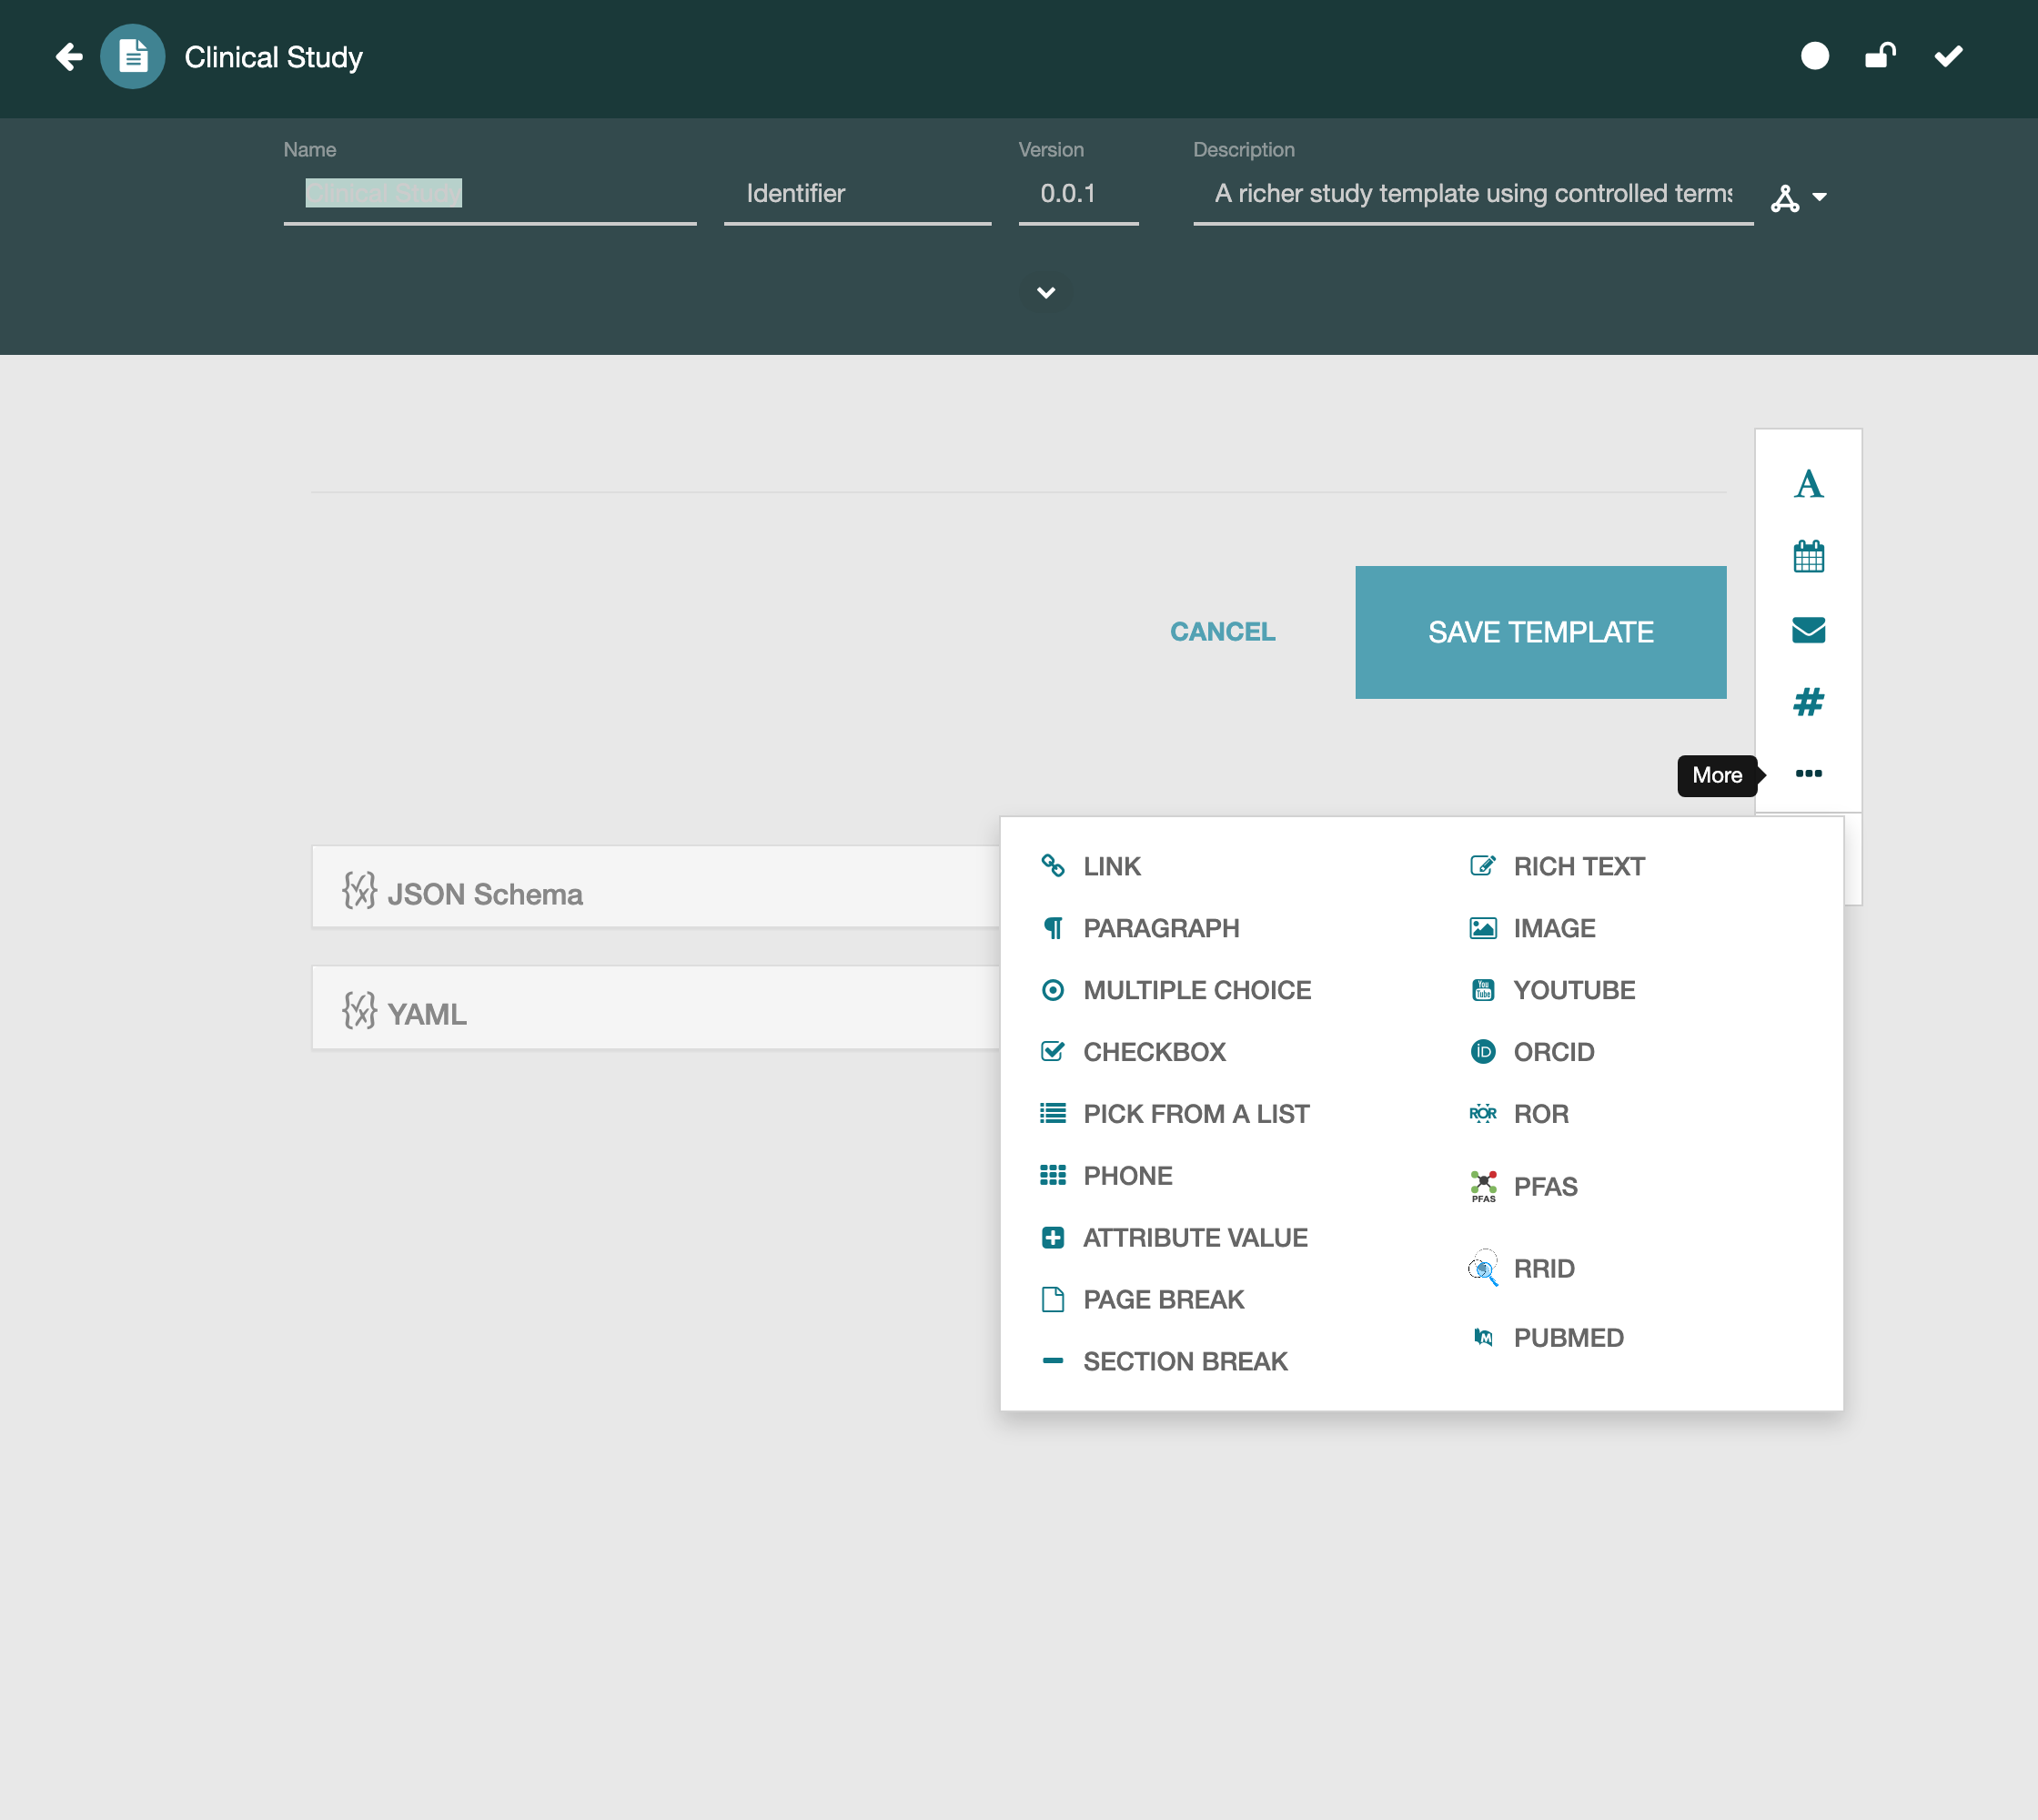
Add three fields:
- Principal Investigator — an ORCID field. Rather than a typed name, it looks people up in ORCID and stores their persistent researcher identifier.
- Institution — a ROR field, backed by the Research Organization Registry, which gives every research organization a stable identifier.
- Disease — a plain text field that you'll constrain to an ontology next.
Give it help text like
The disease studied, from the Human Disease Ontology.
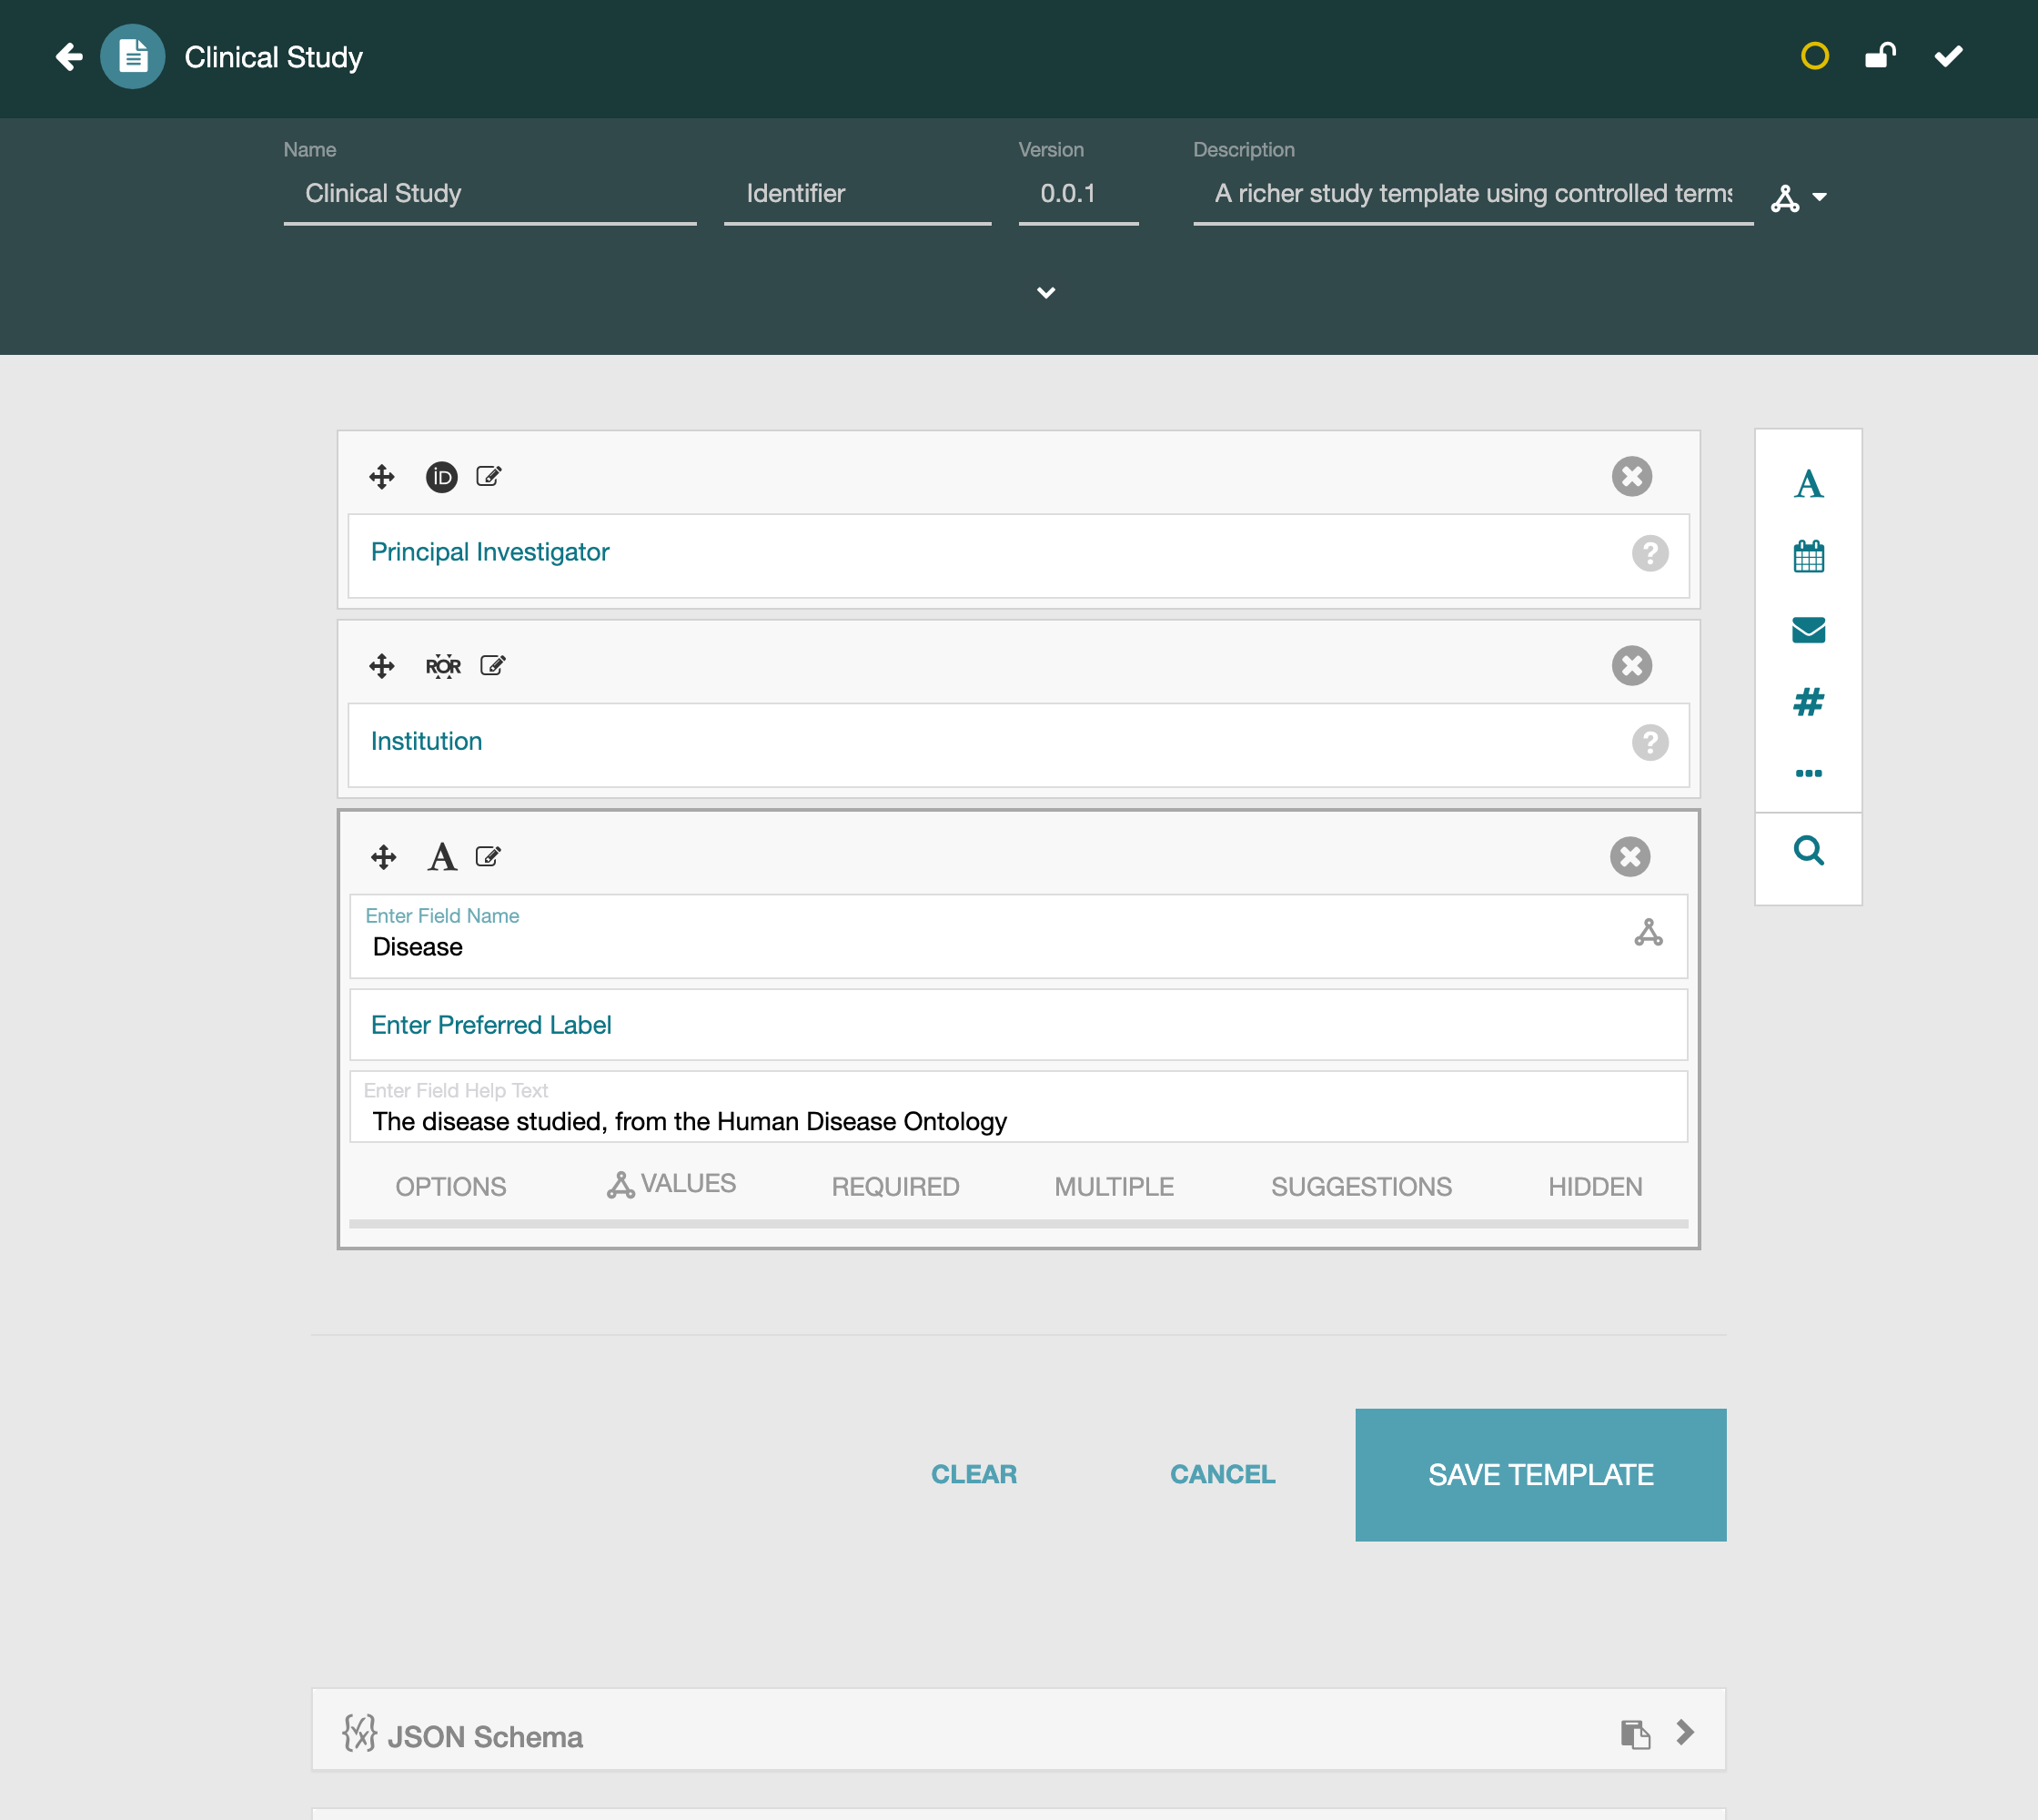
Now constrain Disease so its values must come from a real biomedical ontology rather than free text. With the Disease field's editor open, switch to its Values tab — this is where you declare where the field's allowed values come from.
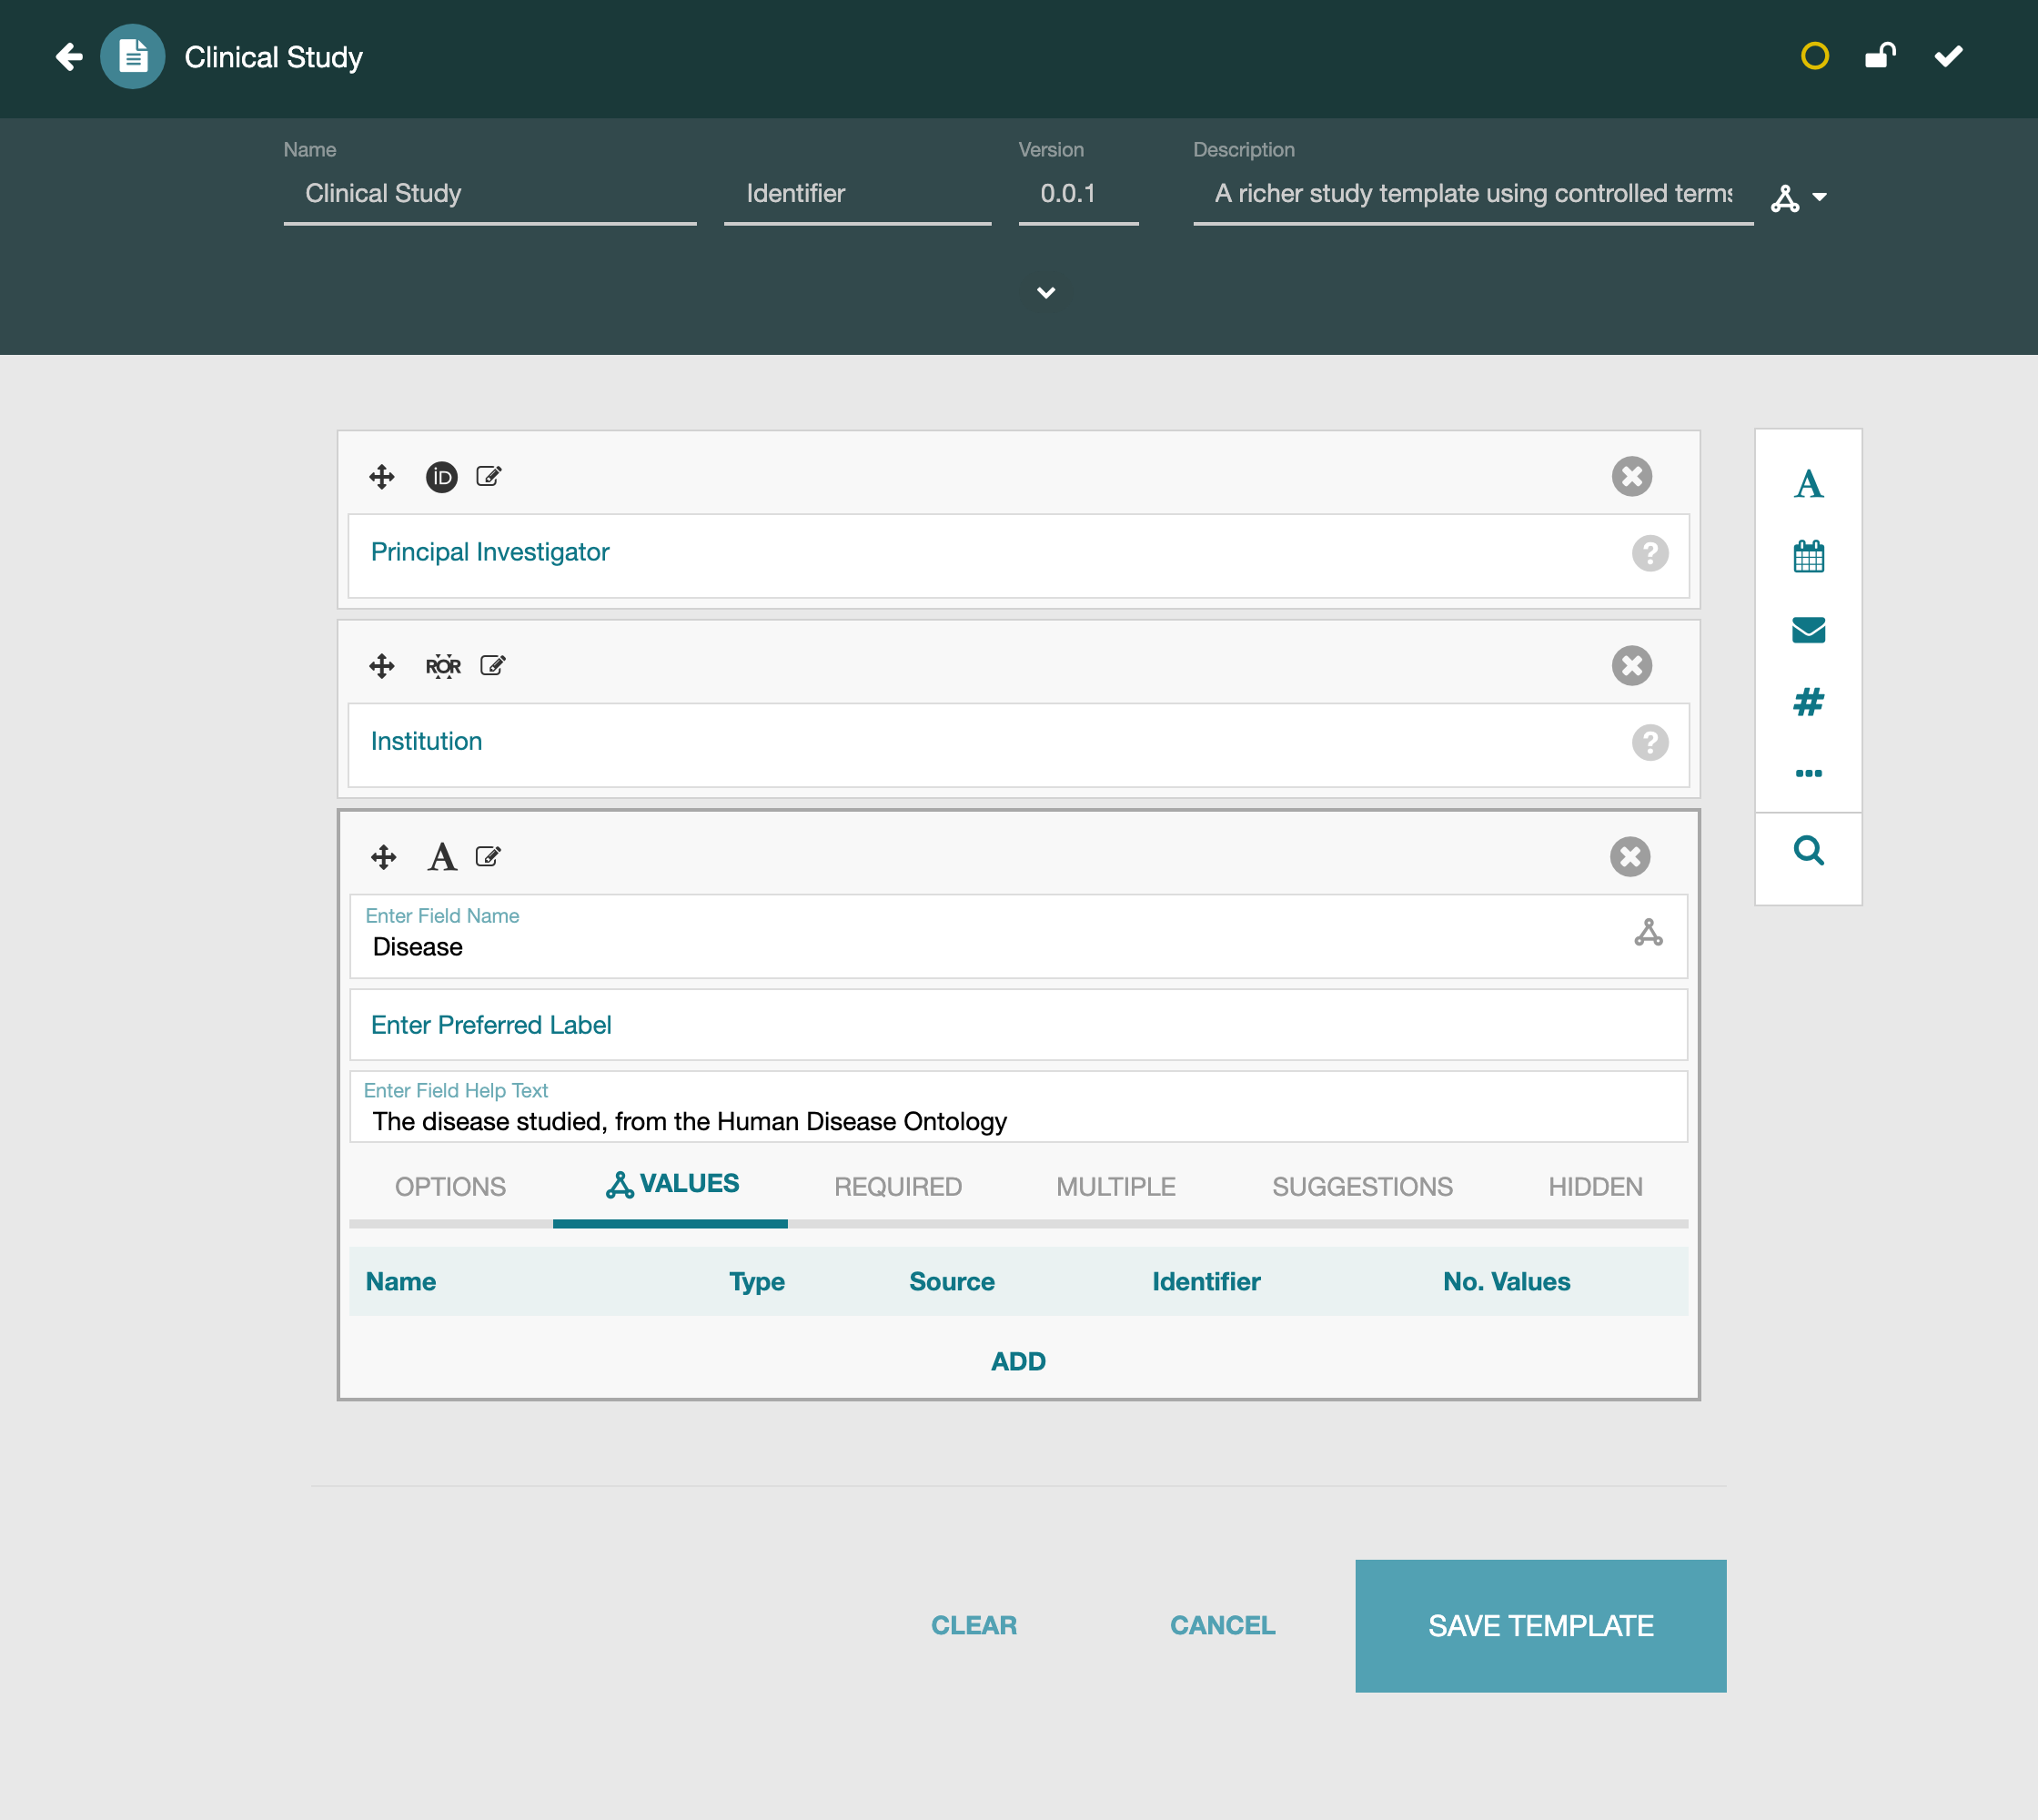
Click Add to open CEDAR's BioPortal term picker.
BioPortal is an open repository of nearly all the world's public biomedical ontologies and controlled terminologies; CEDAR reaches into it directly. Here you'll tie the Disease field to the Human Disease Ontology (DOID), a curated standard vocabulary of diseases, and restrict it to the ontology's disease branch. Every value entered will then be a real disease concept with a resolvable identifier, not free text.
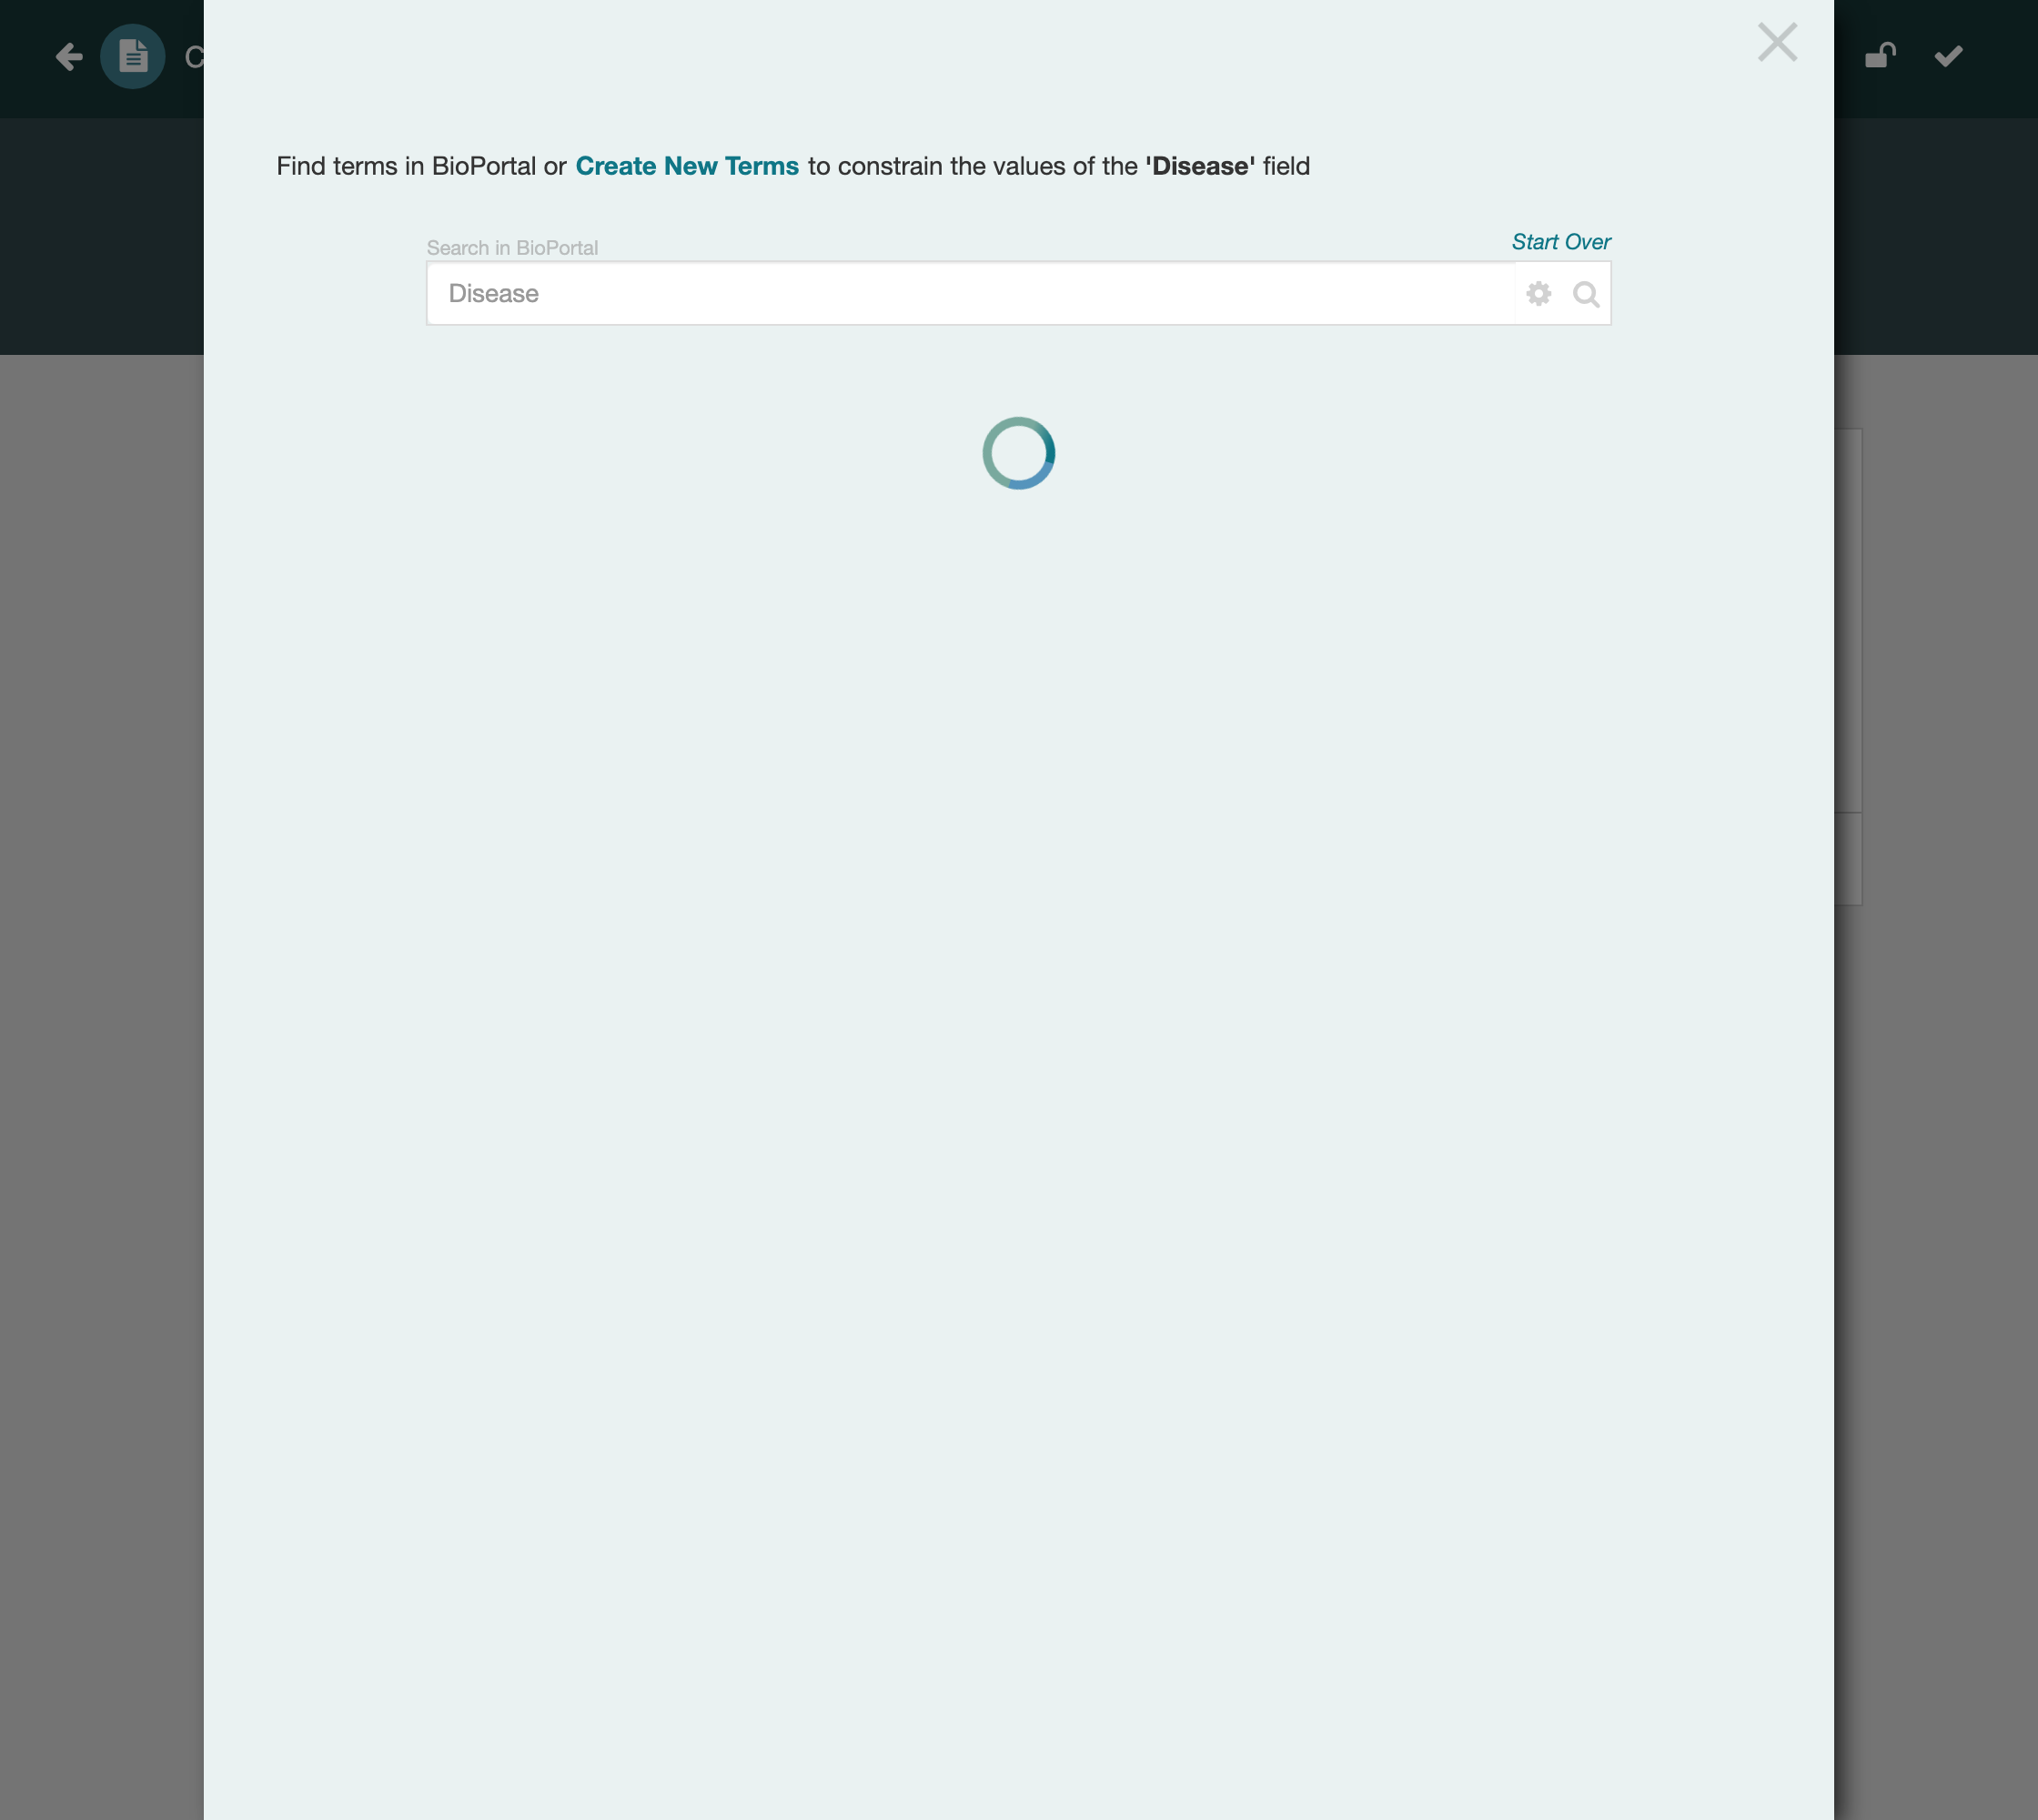
Open Advanced Search Options (the gear) and choose Search for an ontology
in BioPortal. Search for Human Disease Ontology; CEDAR finds Human Disease
Ontology (DOID).
Click on it to explore its class tree.
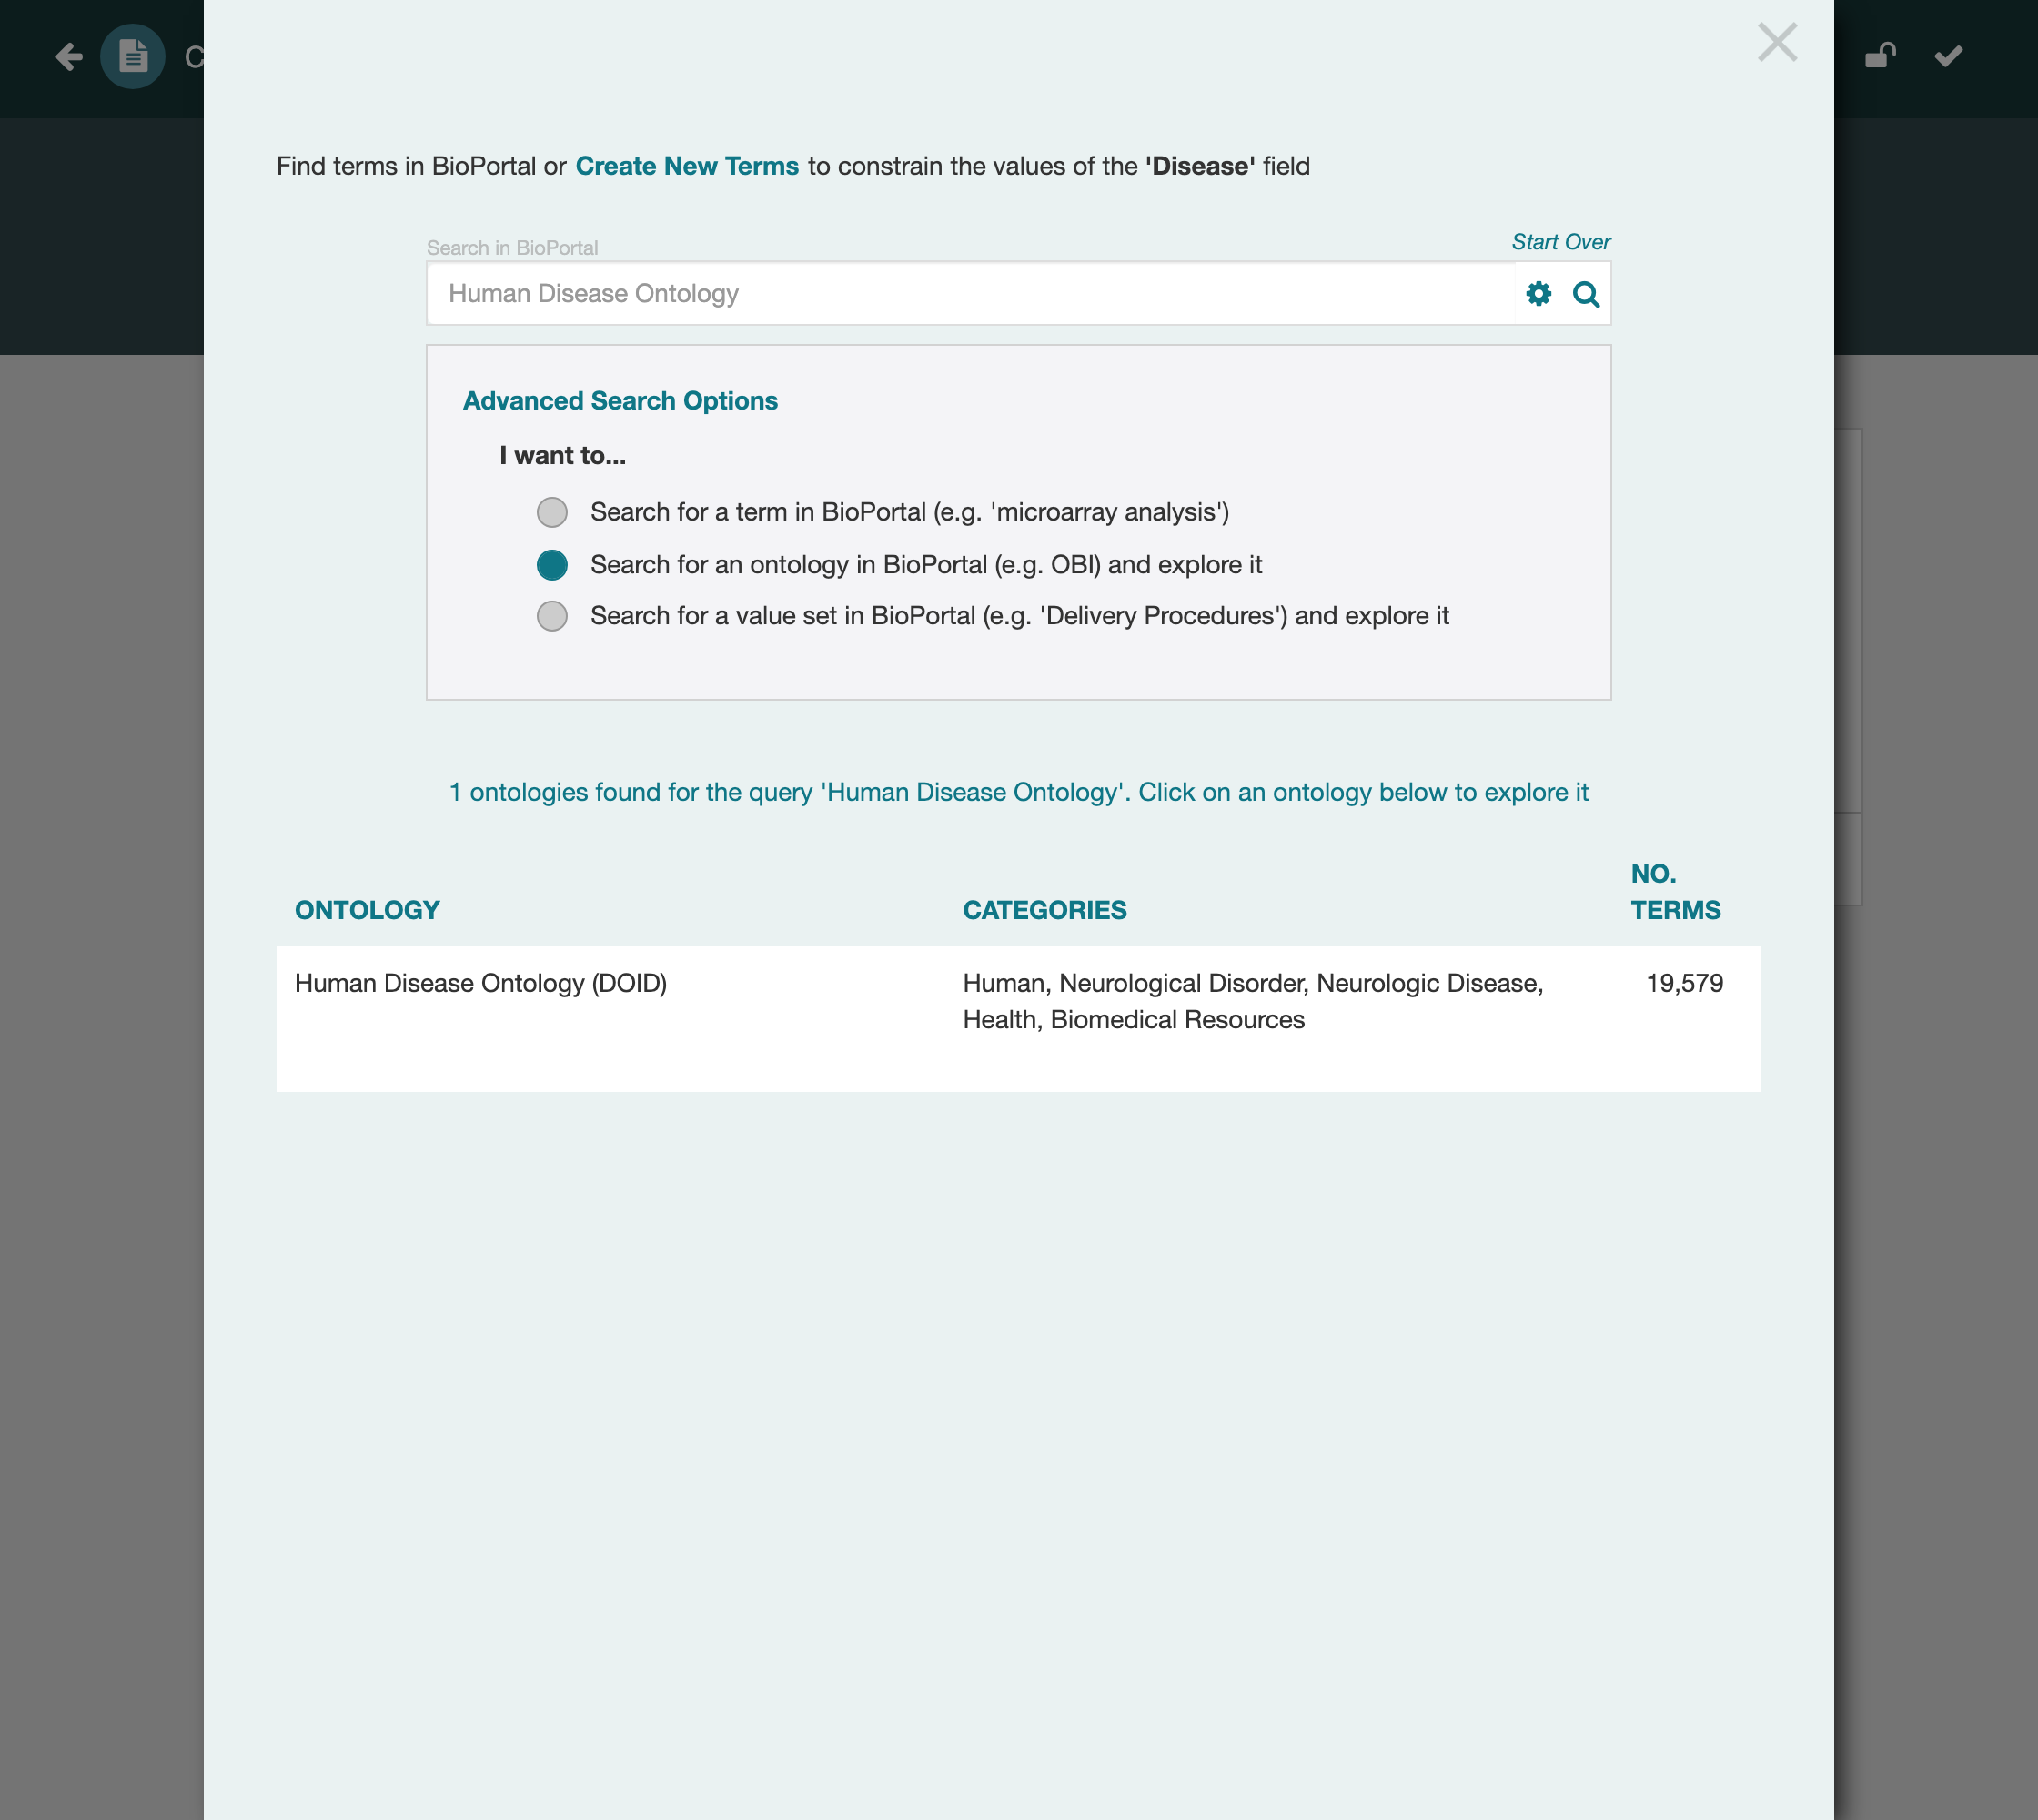
DOID's tree includes a few imported upper-level classes (Cell, Anatomy, ChEBI,
…) that aren't themselves diseases, so rather than bind the whole ontology you
constrain the field to just the disease branch. Select the Disease class
(DOID:4, the root of the disease hierarchy) — its Term Details appear on the
right — choose Branch, which allows that class and all of its descendants,
and click Add.
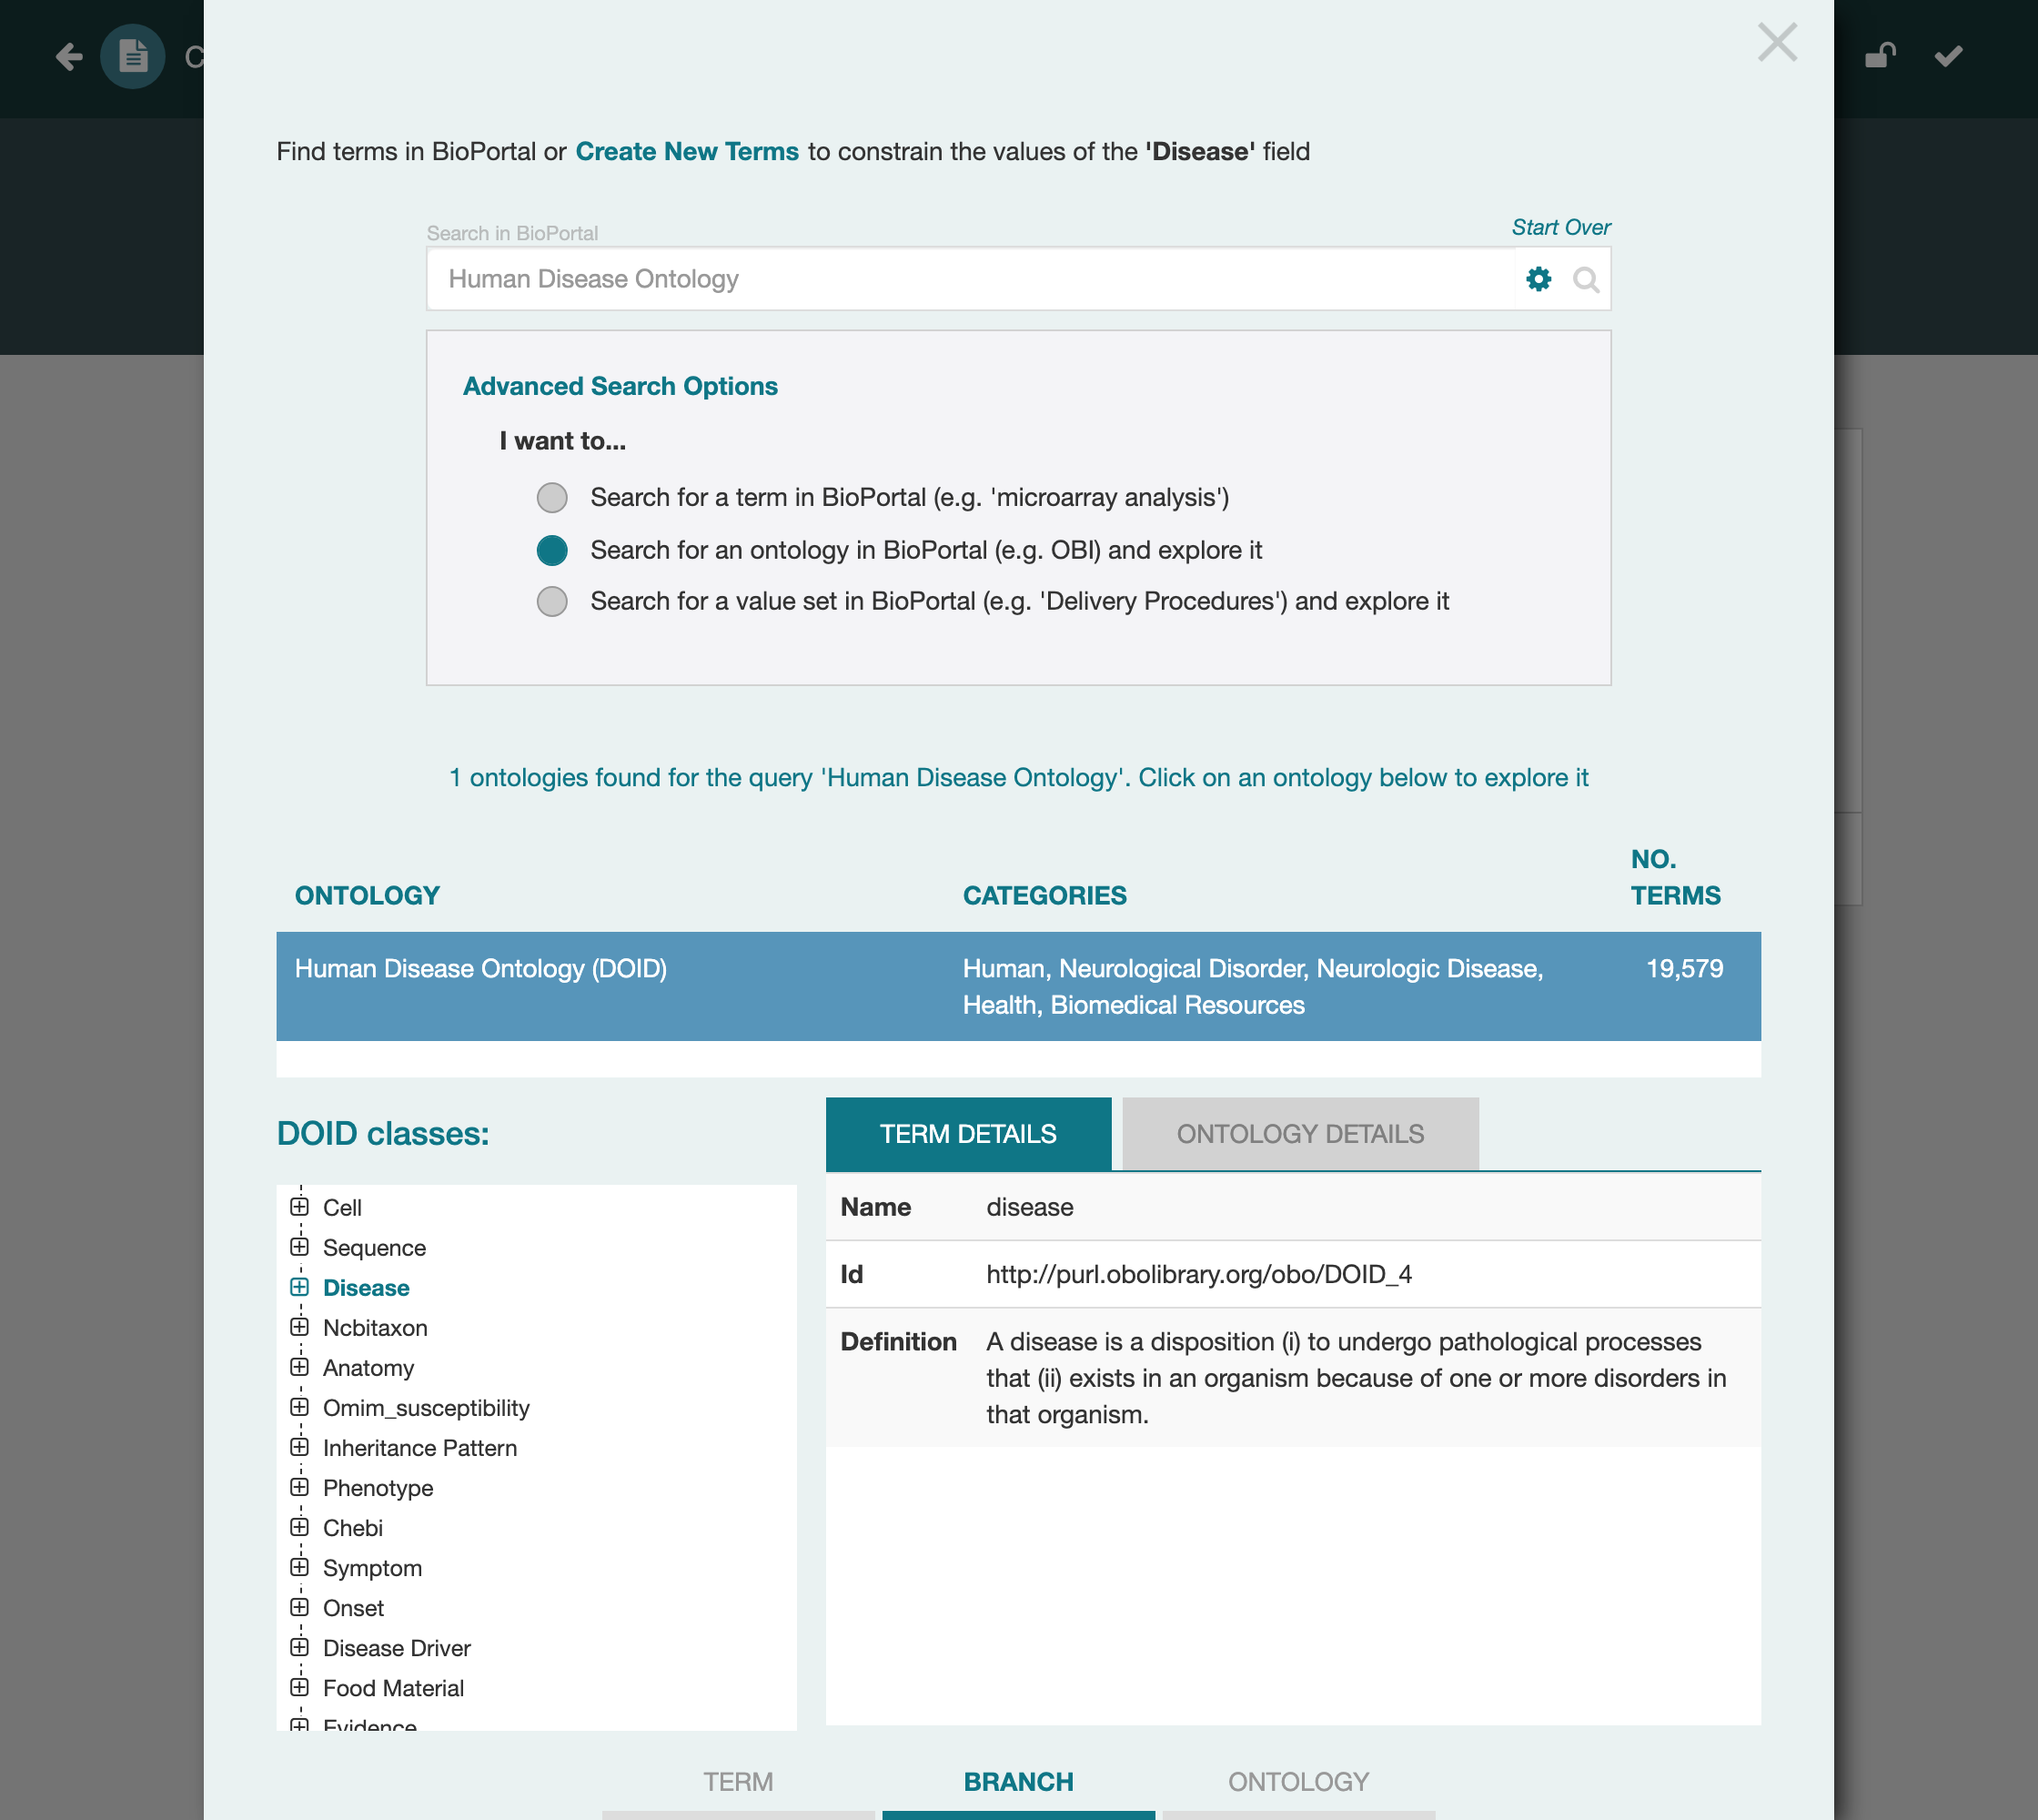
The Values tab now shows the field constrained to the disease Branch (source
DOID, identifier DOID_4). From here on, anyone filling in Disease can pick only
a term from within that branch — the constraint travels with the template.
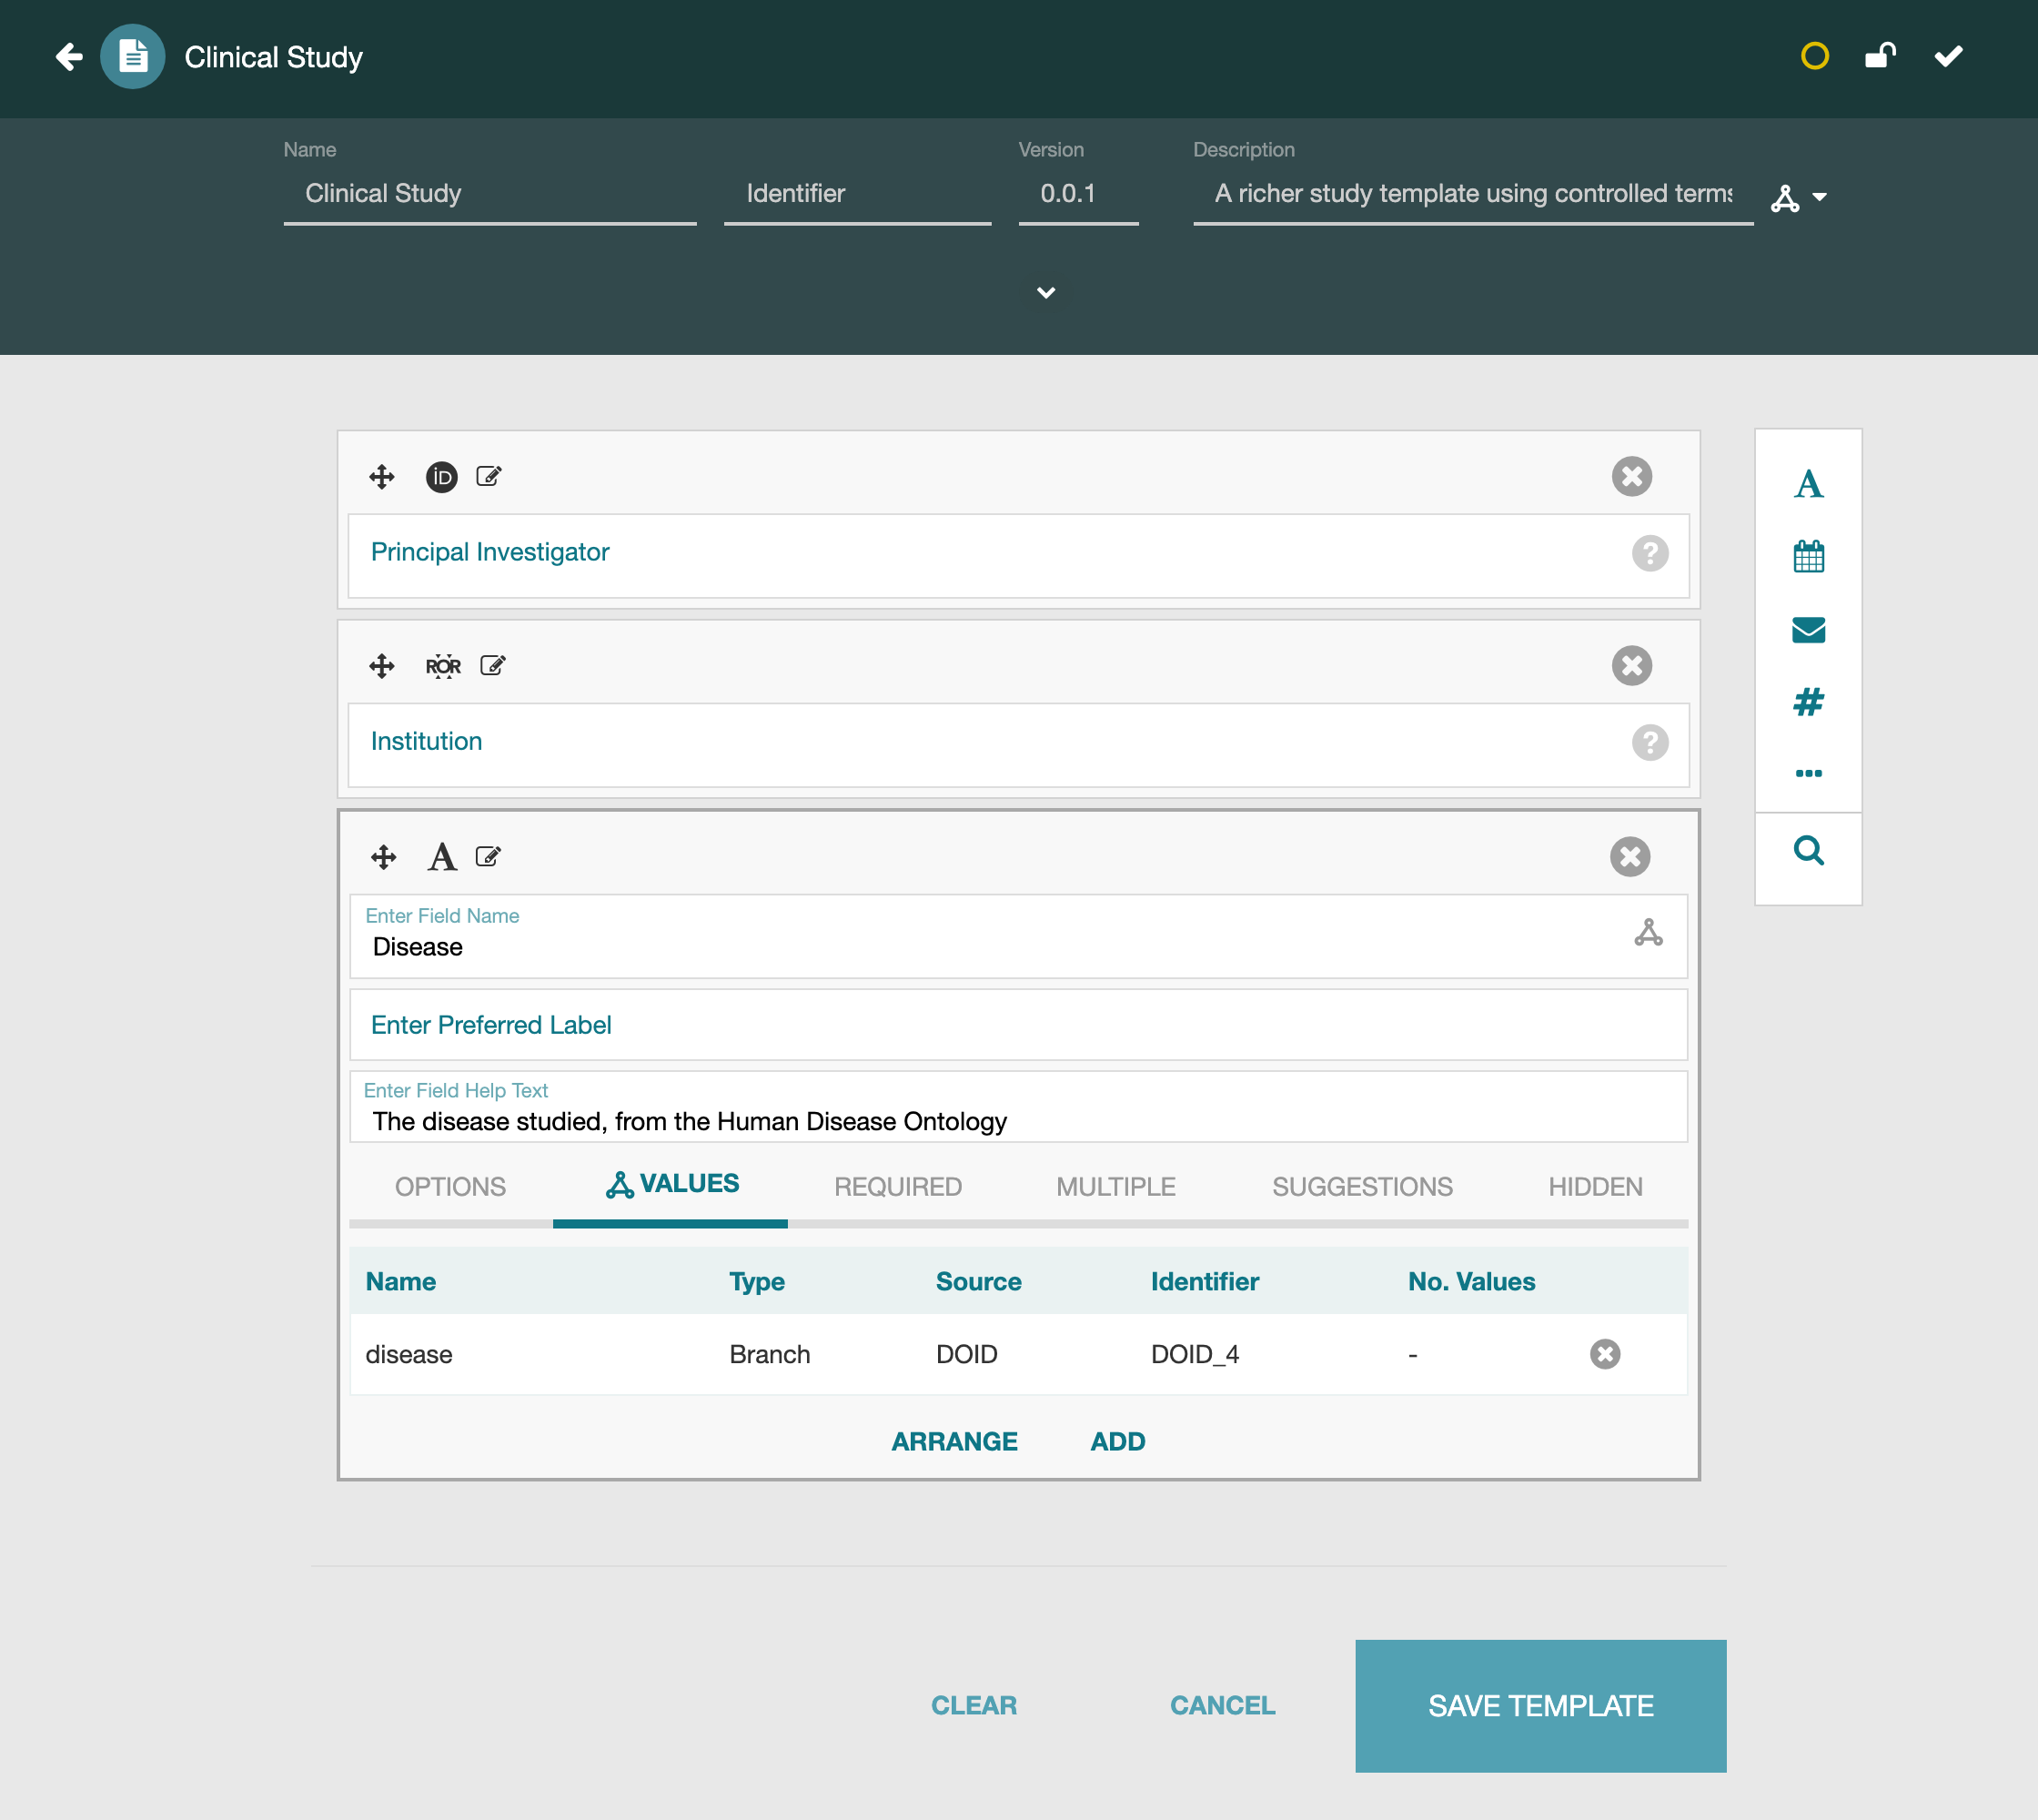
Click Save Template.
5. Fill Out the Rich Template
Now you'll fill out the Clinical Study template and see how the authority-backed
fields differ from plain text. Each looks its value up in an external source and
stores a resolvable identifier instead of whatever you typed.
Populate the template (⋮ → Populate) to begin.
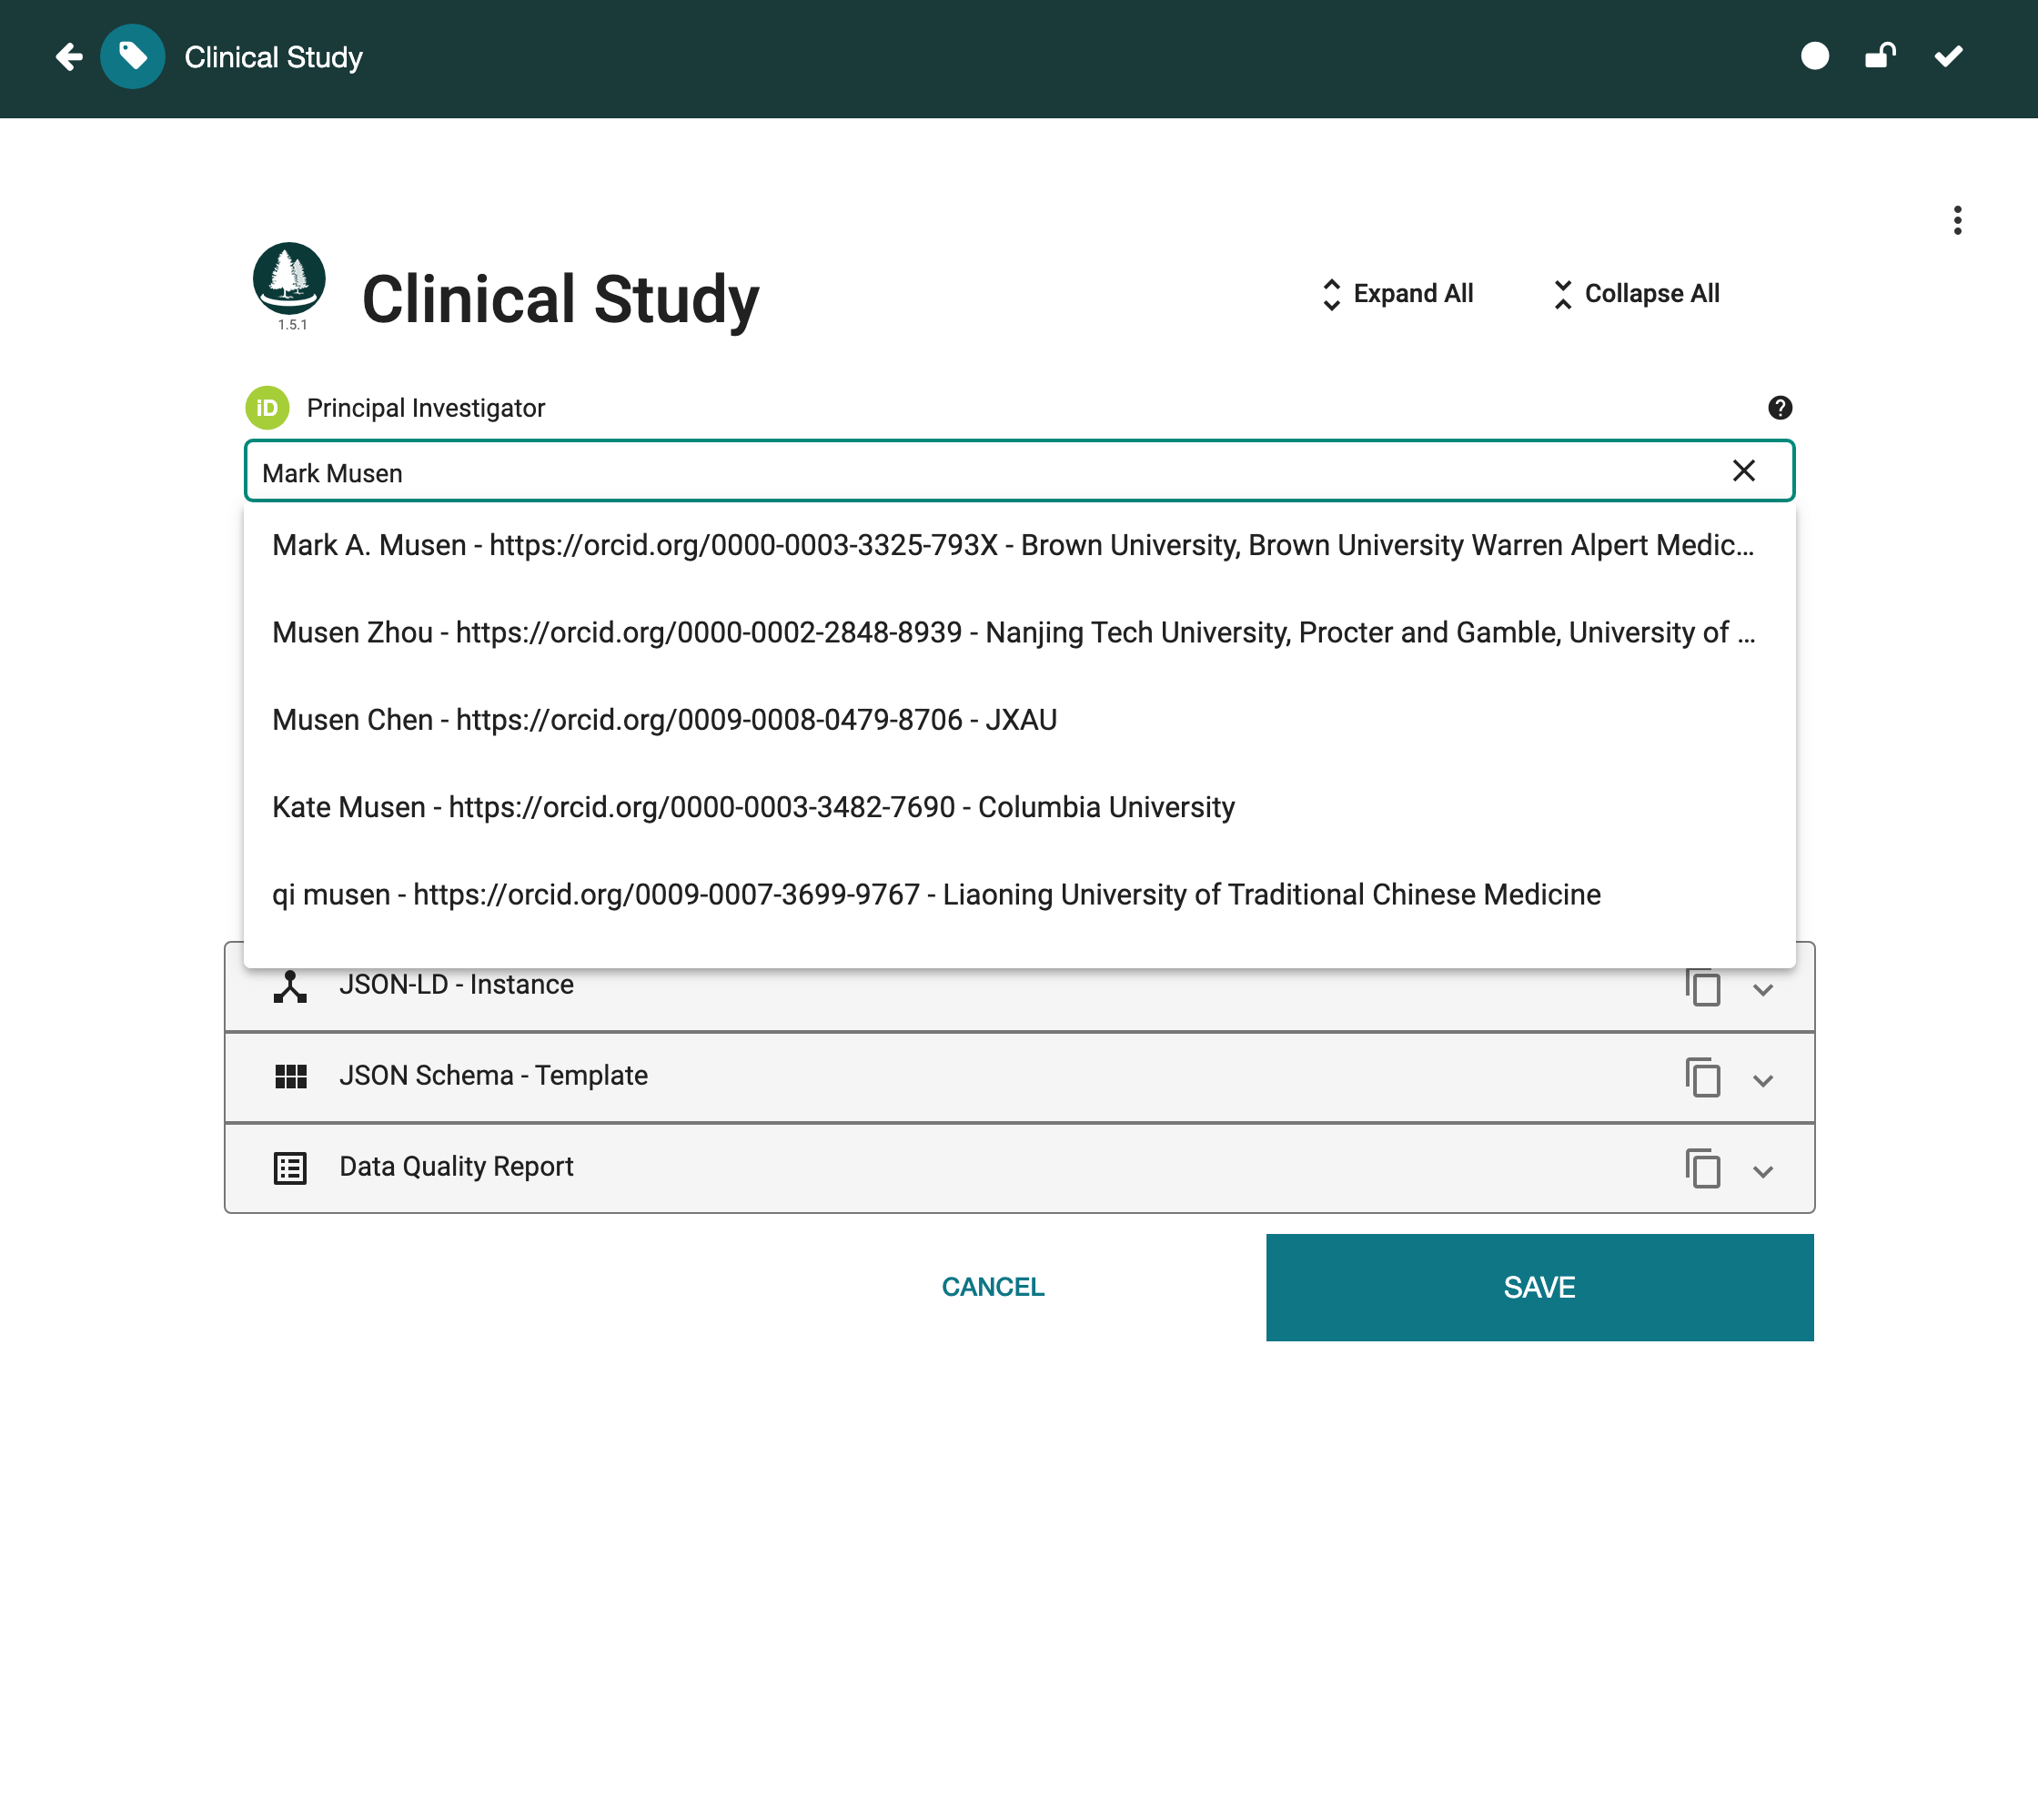
In Principal Investigator, start typing Mark Musen. The field searches
ORCID and offers matching researchers, each with their ORCID iD and affiliation.
Pick the right one and CEDAR stores the resolvable identifier, not just a name.
Institution works the same way against ROR — type Stanford University and
choose the match (https://ror.org/00f54p054).
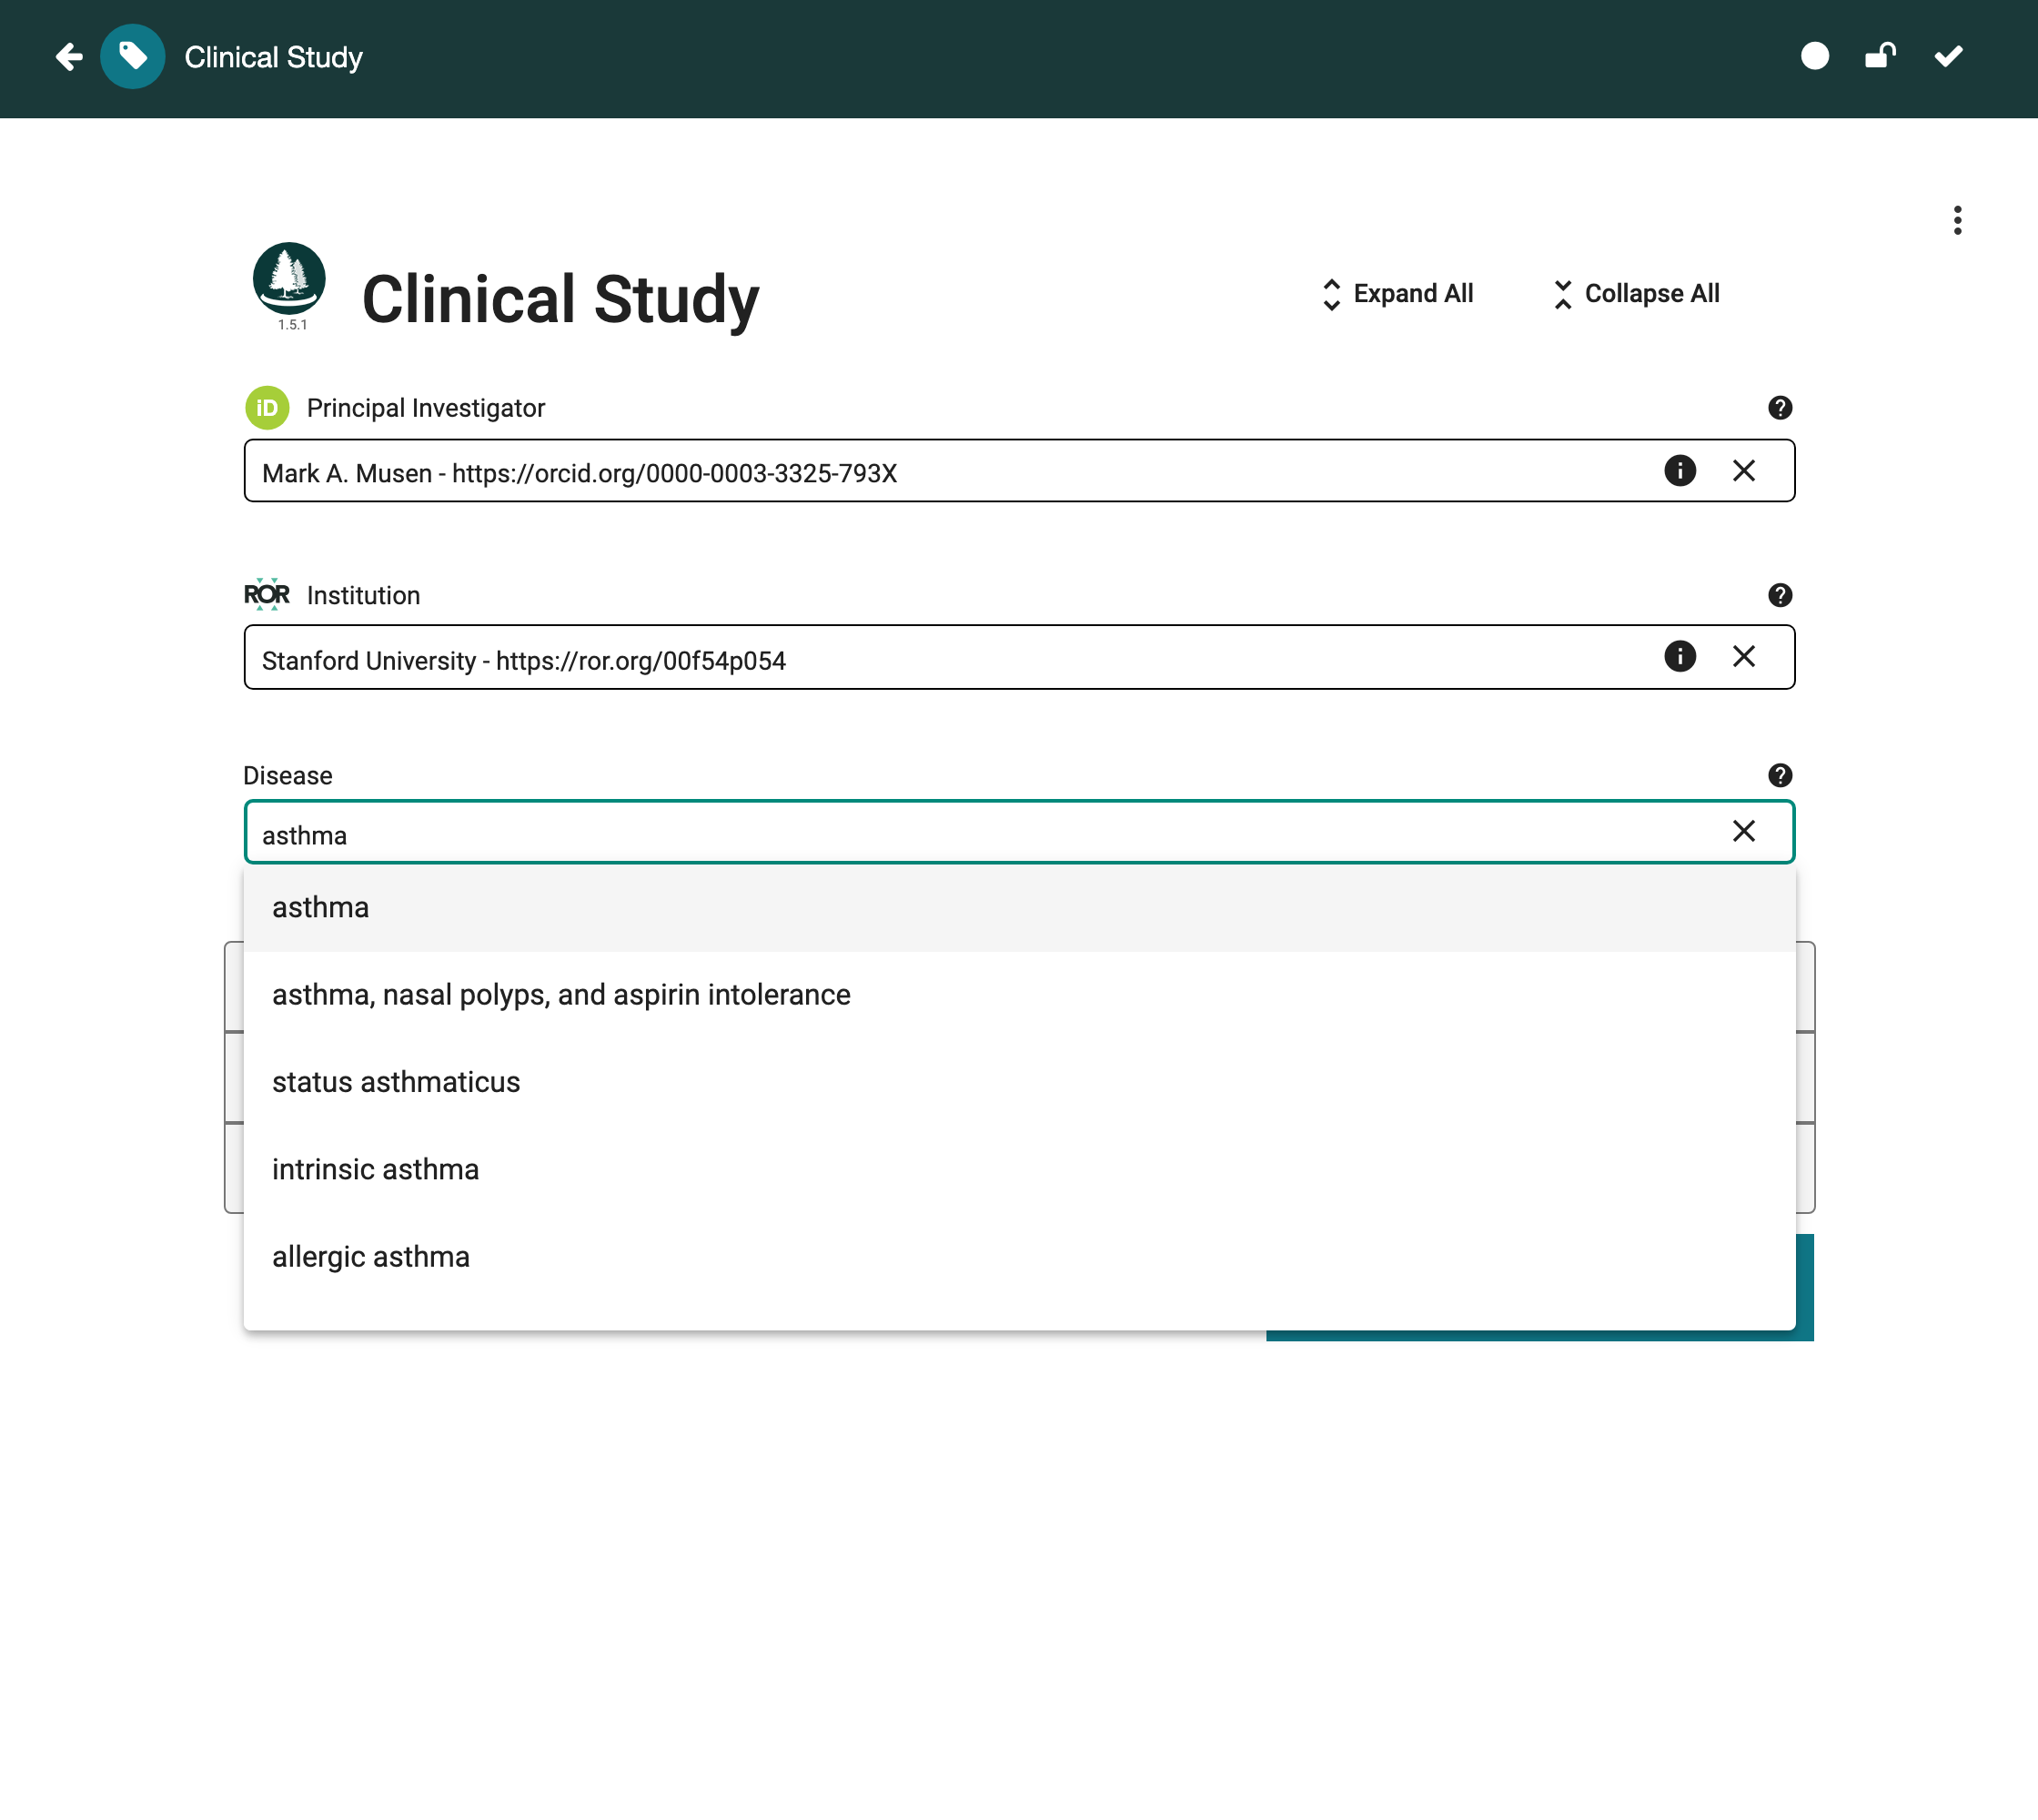
For Disease, start typing asthma. Because the field is constrained to the
DOID disease branch, the dropdown offers only real disease terms; you cannot
enter a value that isn't in that branch. This is where the template's constraint
pays off at data-entry time.
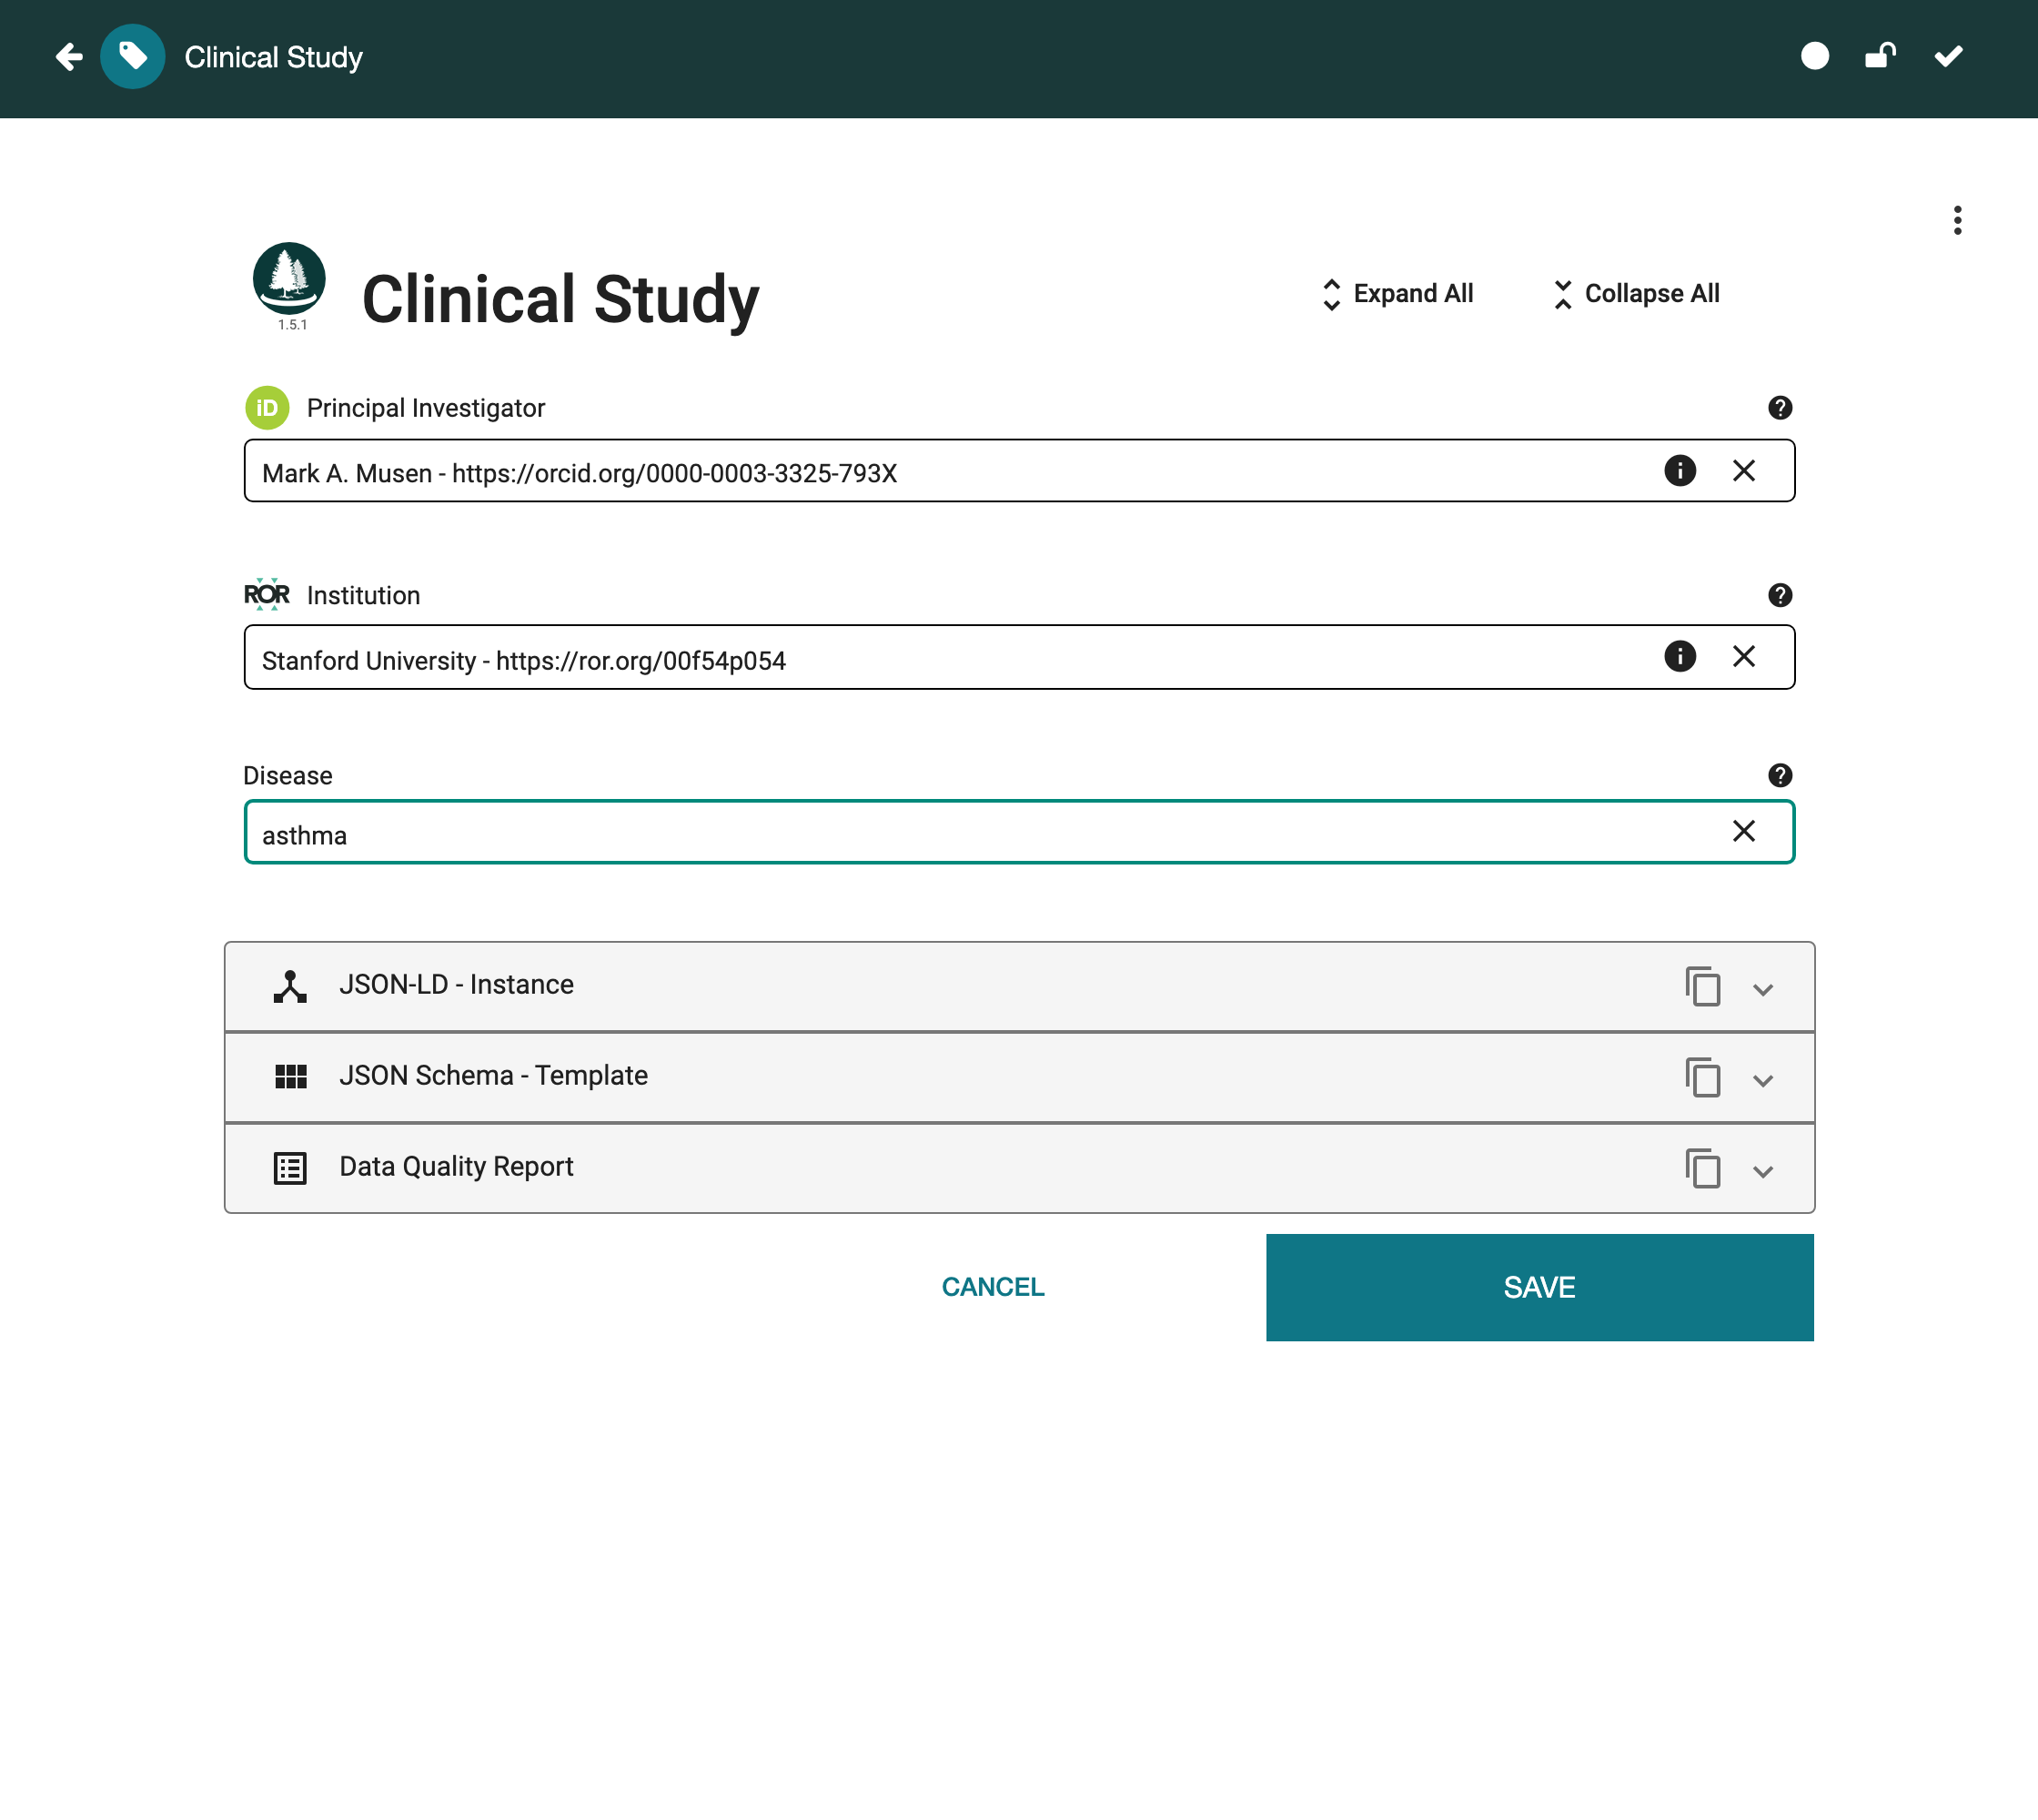
With all three fields filled, every value is a resolvable identifier rather than free text. Click Save.
6. Publish a Version
While you iterate, a template stays a mutable 0.0.1 draft. When it's ready
for others to build on, you publish an immutable version. Because CEDAR
templates are first-class, versioned knowledge artifacts, a published version
gives a community a fixed reference to standardize on — people can rely on it
while you keep evolving a new draft without disturbing them. (See
Artifact Versioning
in the CEDAR user guide for a description of the versioning model.)
Here you'll publish version 1.0.0 of your Clinical Study template.
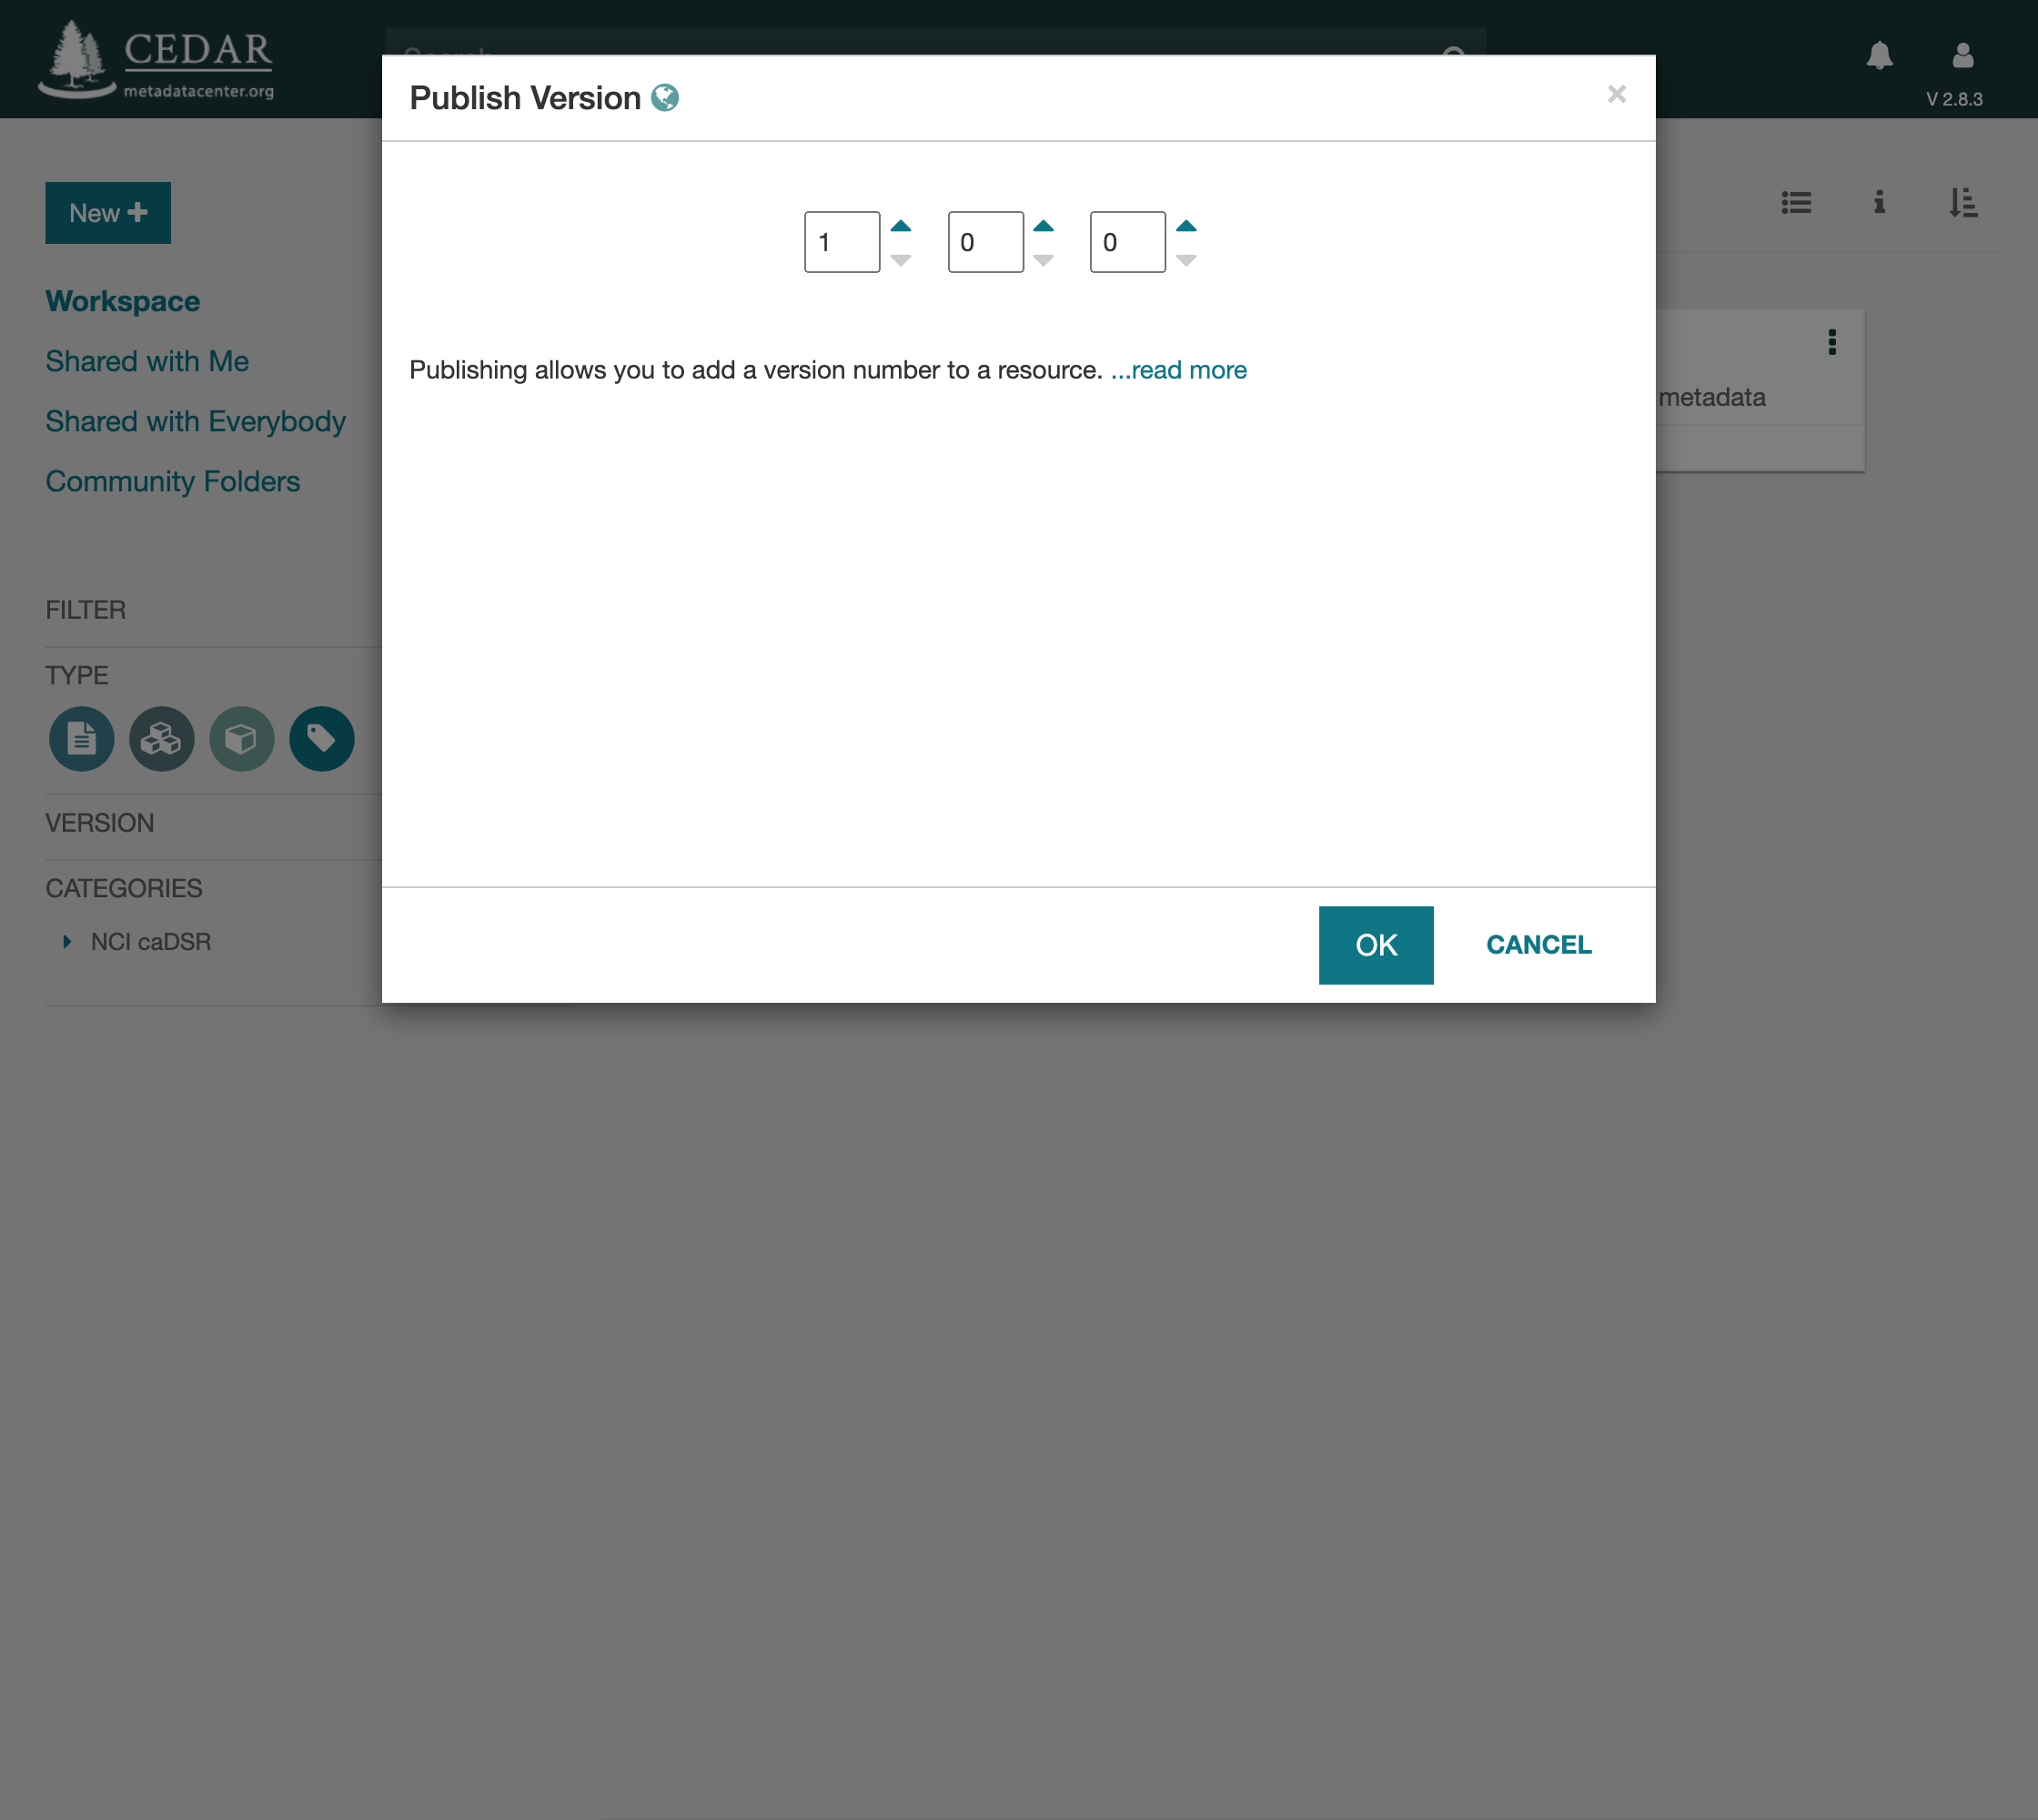
Open the ⋮ menu on the Clinical Study row and choose Publish version….
Set the version — 1 0 0 for 1.0.0 (major, minor, patch) — and click
OK.
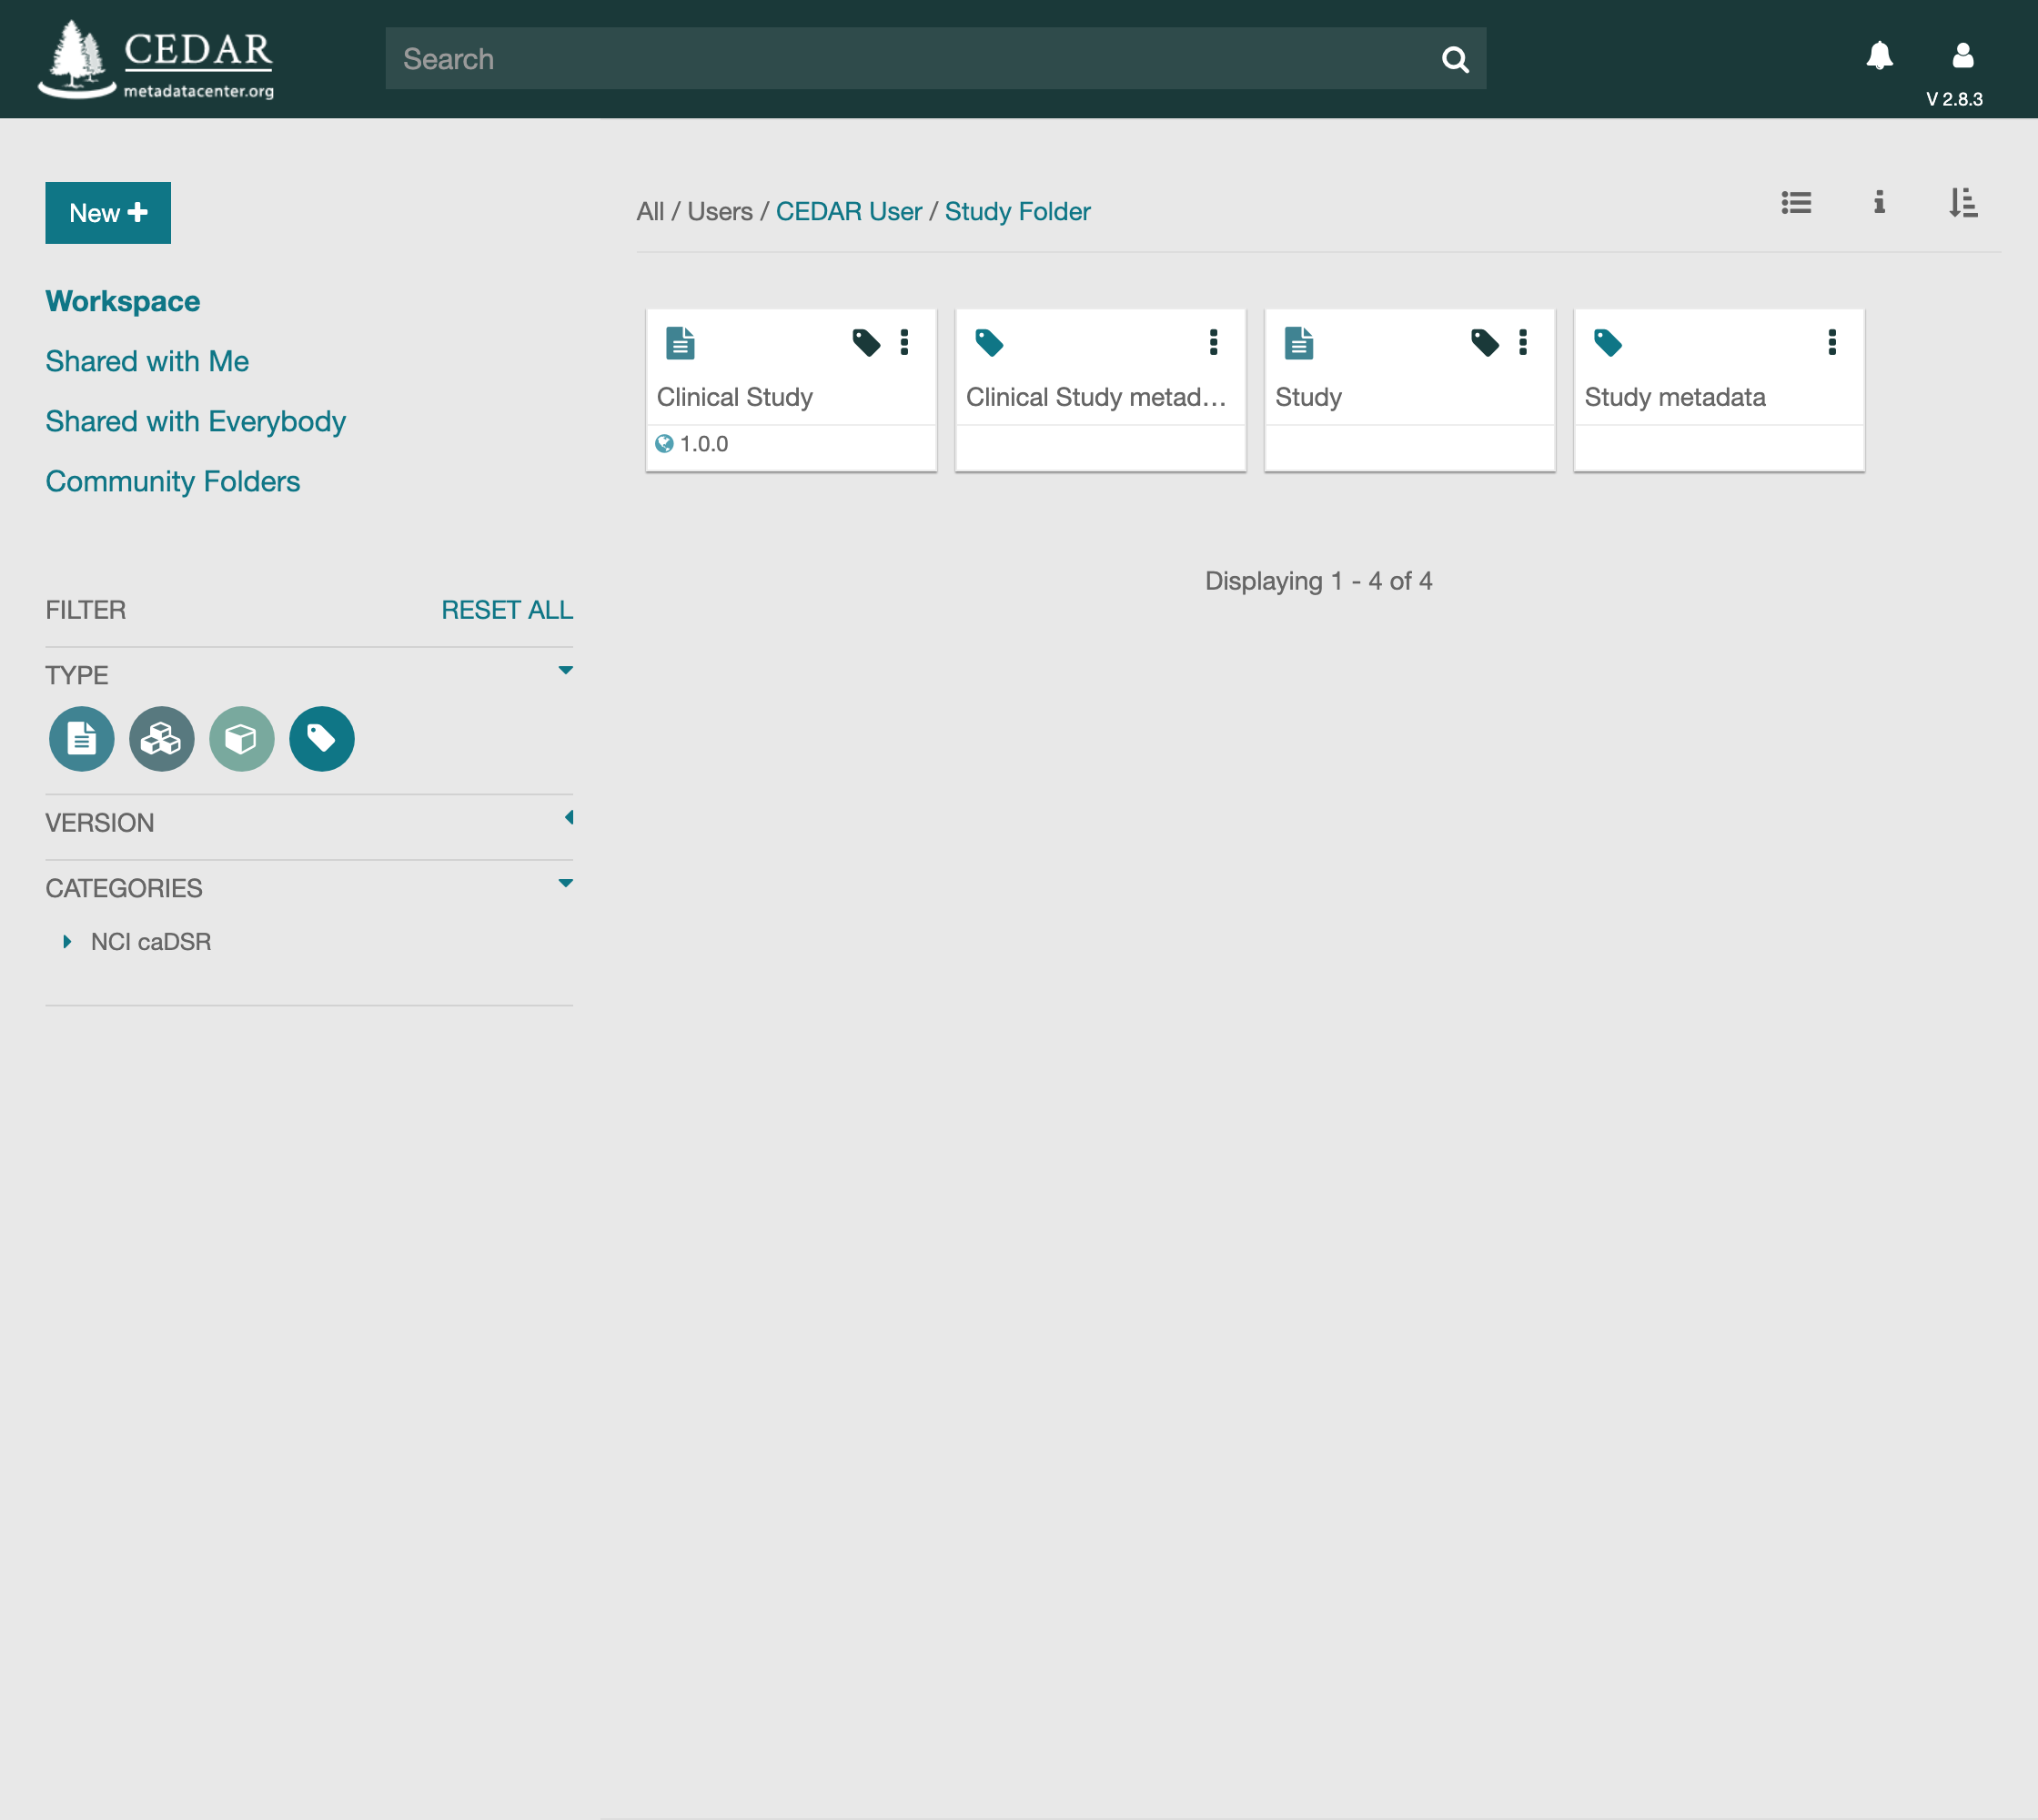
The row now carries a globe icon and its version number. A published version is frozen; further edits start a fresh draft, leaving the release intact.
7. Share It on the Web with OpenView
OpenView turns a CEDAR template into a read-only public web page that anyone can open with no CEDAR account required. It's the simplest way to point a collaborator, a reviewer, or a data repository at your work.
Here you'll make your published Clinical Study template public.
Open the ⋮ menu on the Clinical Study template and choose Enable
OpenView. The row gains a ↗ link; open it to view the public page.
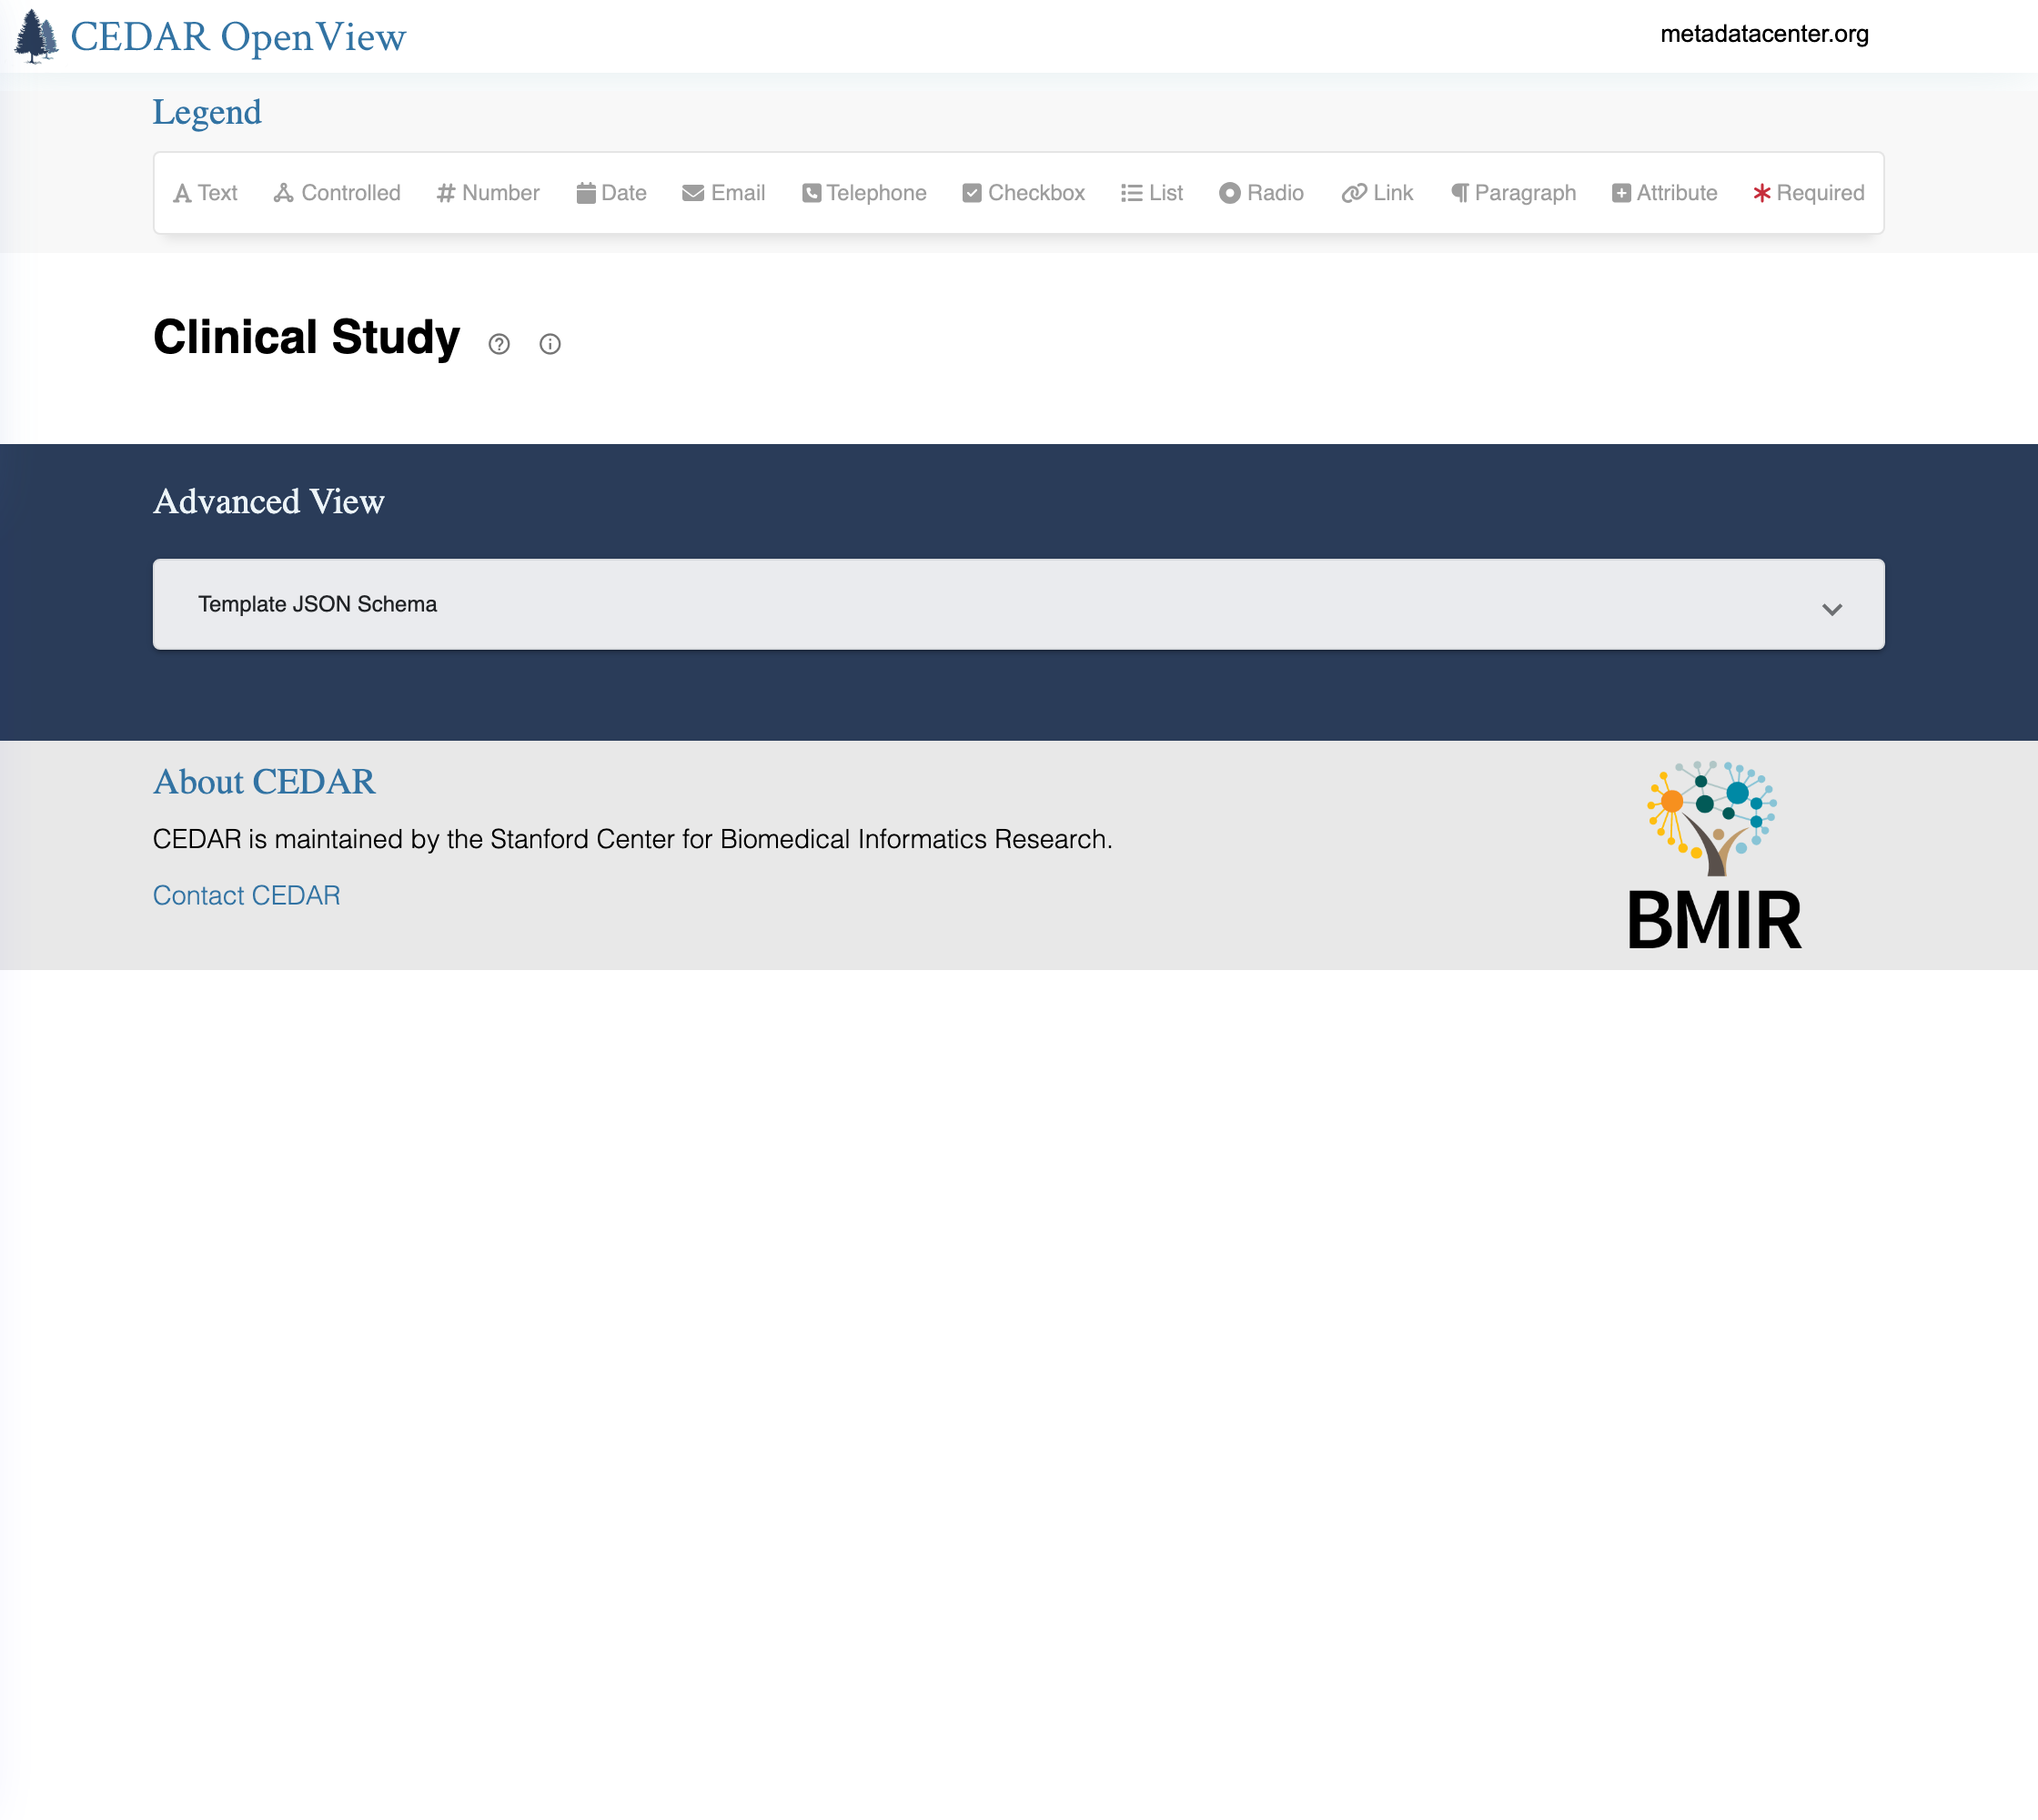
The page shows the template's name, a Legend of its field types, and an Advanced View that exposes the template's underlying JSON Schema. Anyone with the link can inspect exactly how the template is defined, with no account needed.
That's the full arc: you designed reporting guidelines as templates, captured standards-adherent metadata as instances, bound values to ontologies and external identifiers, published a versioned release, and shared the template on the open web. The same machinery scales well beyond this tutorial — CEDAR templates underpin metadata for large scientific consortia such as HuBMAP, and CEDAR's authoring tools can be embedded directly into data repositories like Dryad and the Open Science Framework so investigators can create standards-aligned metadata without leaving their normal workflow.
Further Reading
The ideas behind this tutorial are described in these papers:
- O'Connor MJ, Martínez-Romero M, Egyedi AL, Akdogan MU, Dorf MV, Musen MA. Author Once, Publish Everywhere: Portable Metadata Authoring with the CEDAR Embeddable Editor. Data Science Journal 25:2, 2026. doi:10.5334/dsj-2026-002
- Musen MA, O'Connor MJ, Hardi J, Martínez-Romero M. Knowledge Engineering for Open Science: Building and Deploying Knowledge Bases for Metadata Standards. AI Magazine, 2025. doi:10.1002/aaai.70048
- O'Connor MJ, Hardi J, Martínez-Romero M, et al. Ensuring Adherence to Standards in Experiment-Related Metadata Entered Via Spreadsheets. Scientific Data 12:265, 2025. doi:10.1038/s41597-025-04589-6
- Musen MA, O'Connor MJ, Schultes E, Martínez-Romero M, Hardi J, Graybeal J. Modeling community standards for metadata as templates makes data FAIR. Scientific Data 9:696, 2022. doi:10.1038/s41597-022-01815-3