Developer Install
A developer installation runs CEDAR from source on your Mac. Choose it when you want to change a backend service or frontend application, rebuild it locally, and see the result in a complete CEDAR system.
If you want to run CEDAR without changing its source, use the Docker Install instead. Docker starts published application images and requires much less host configuration.
How the Installation Works
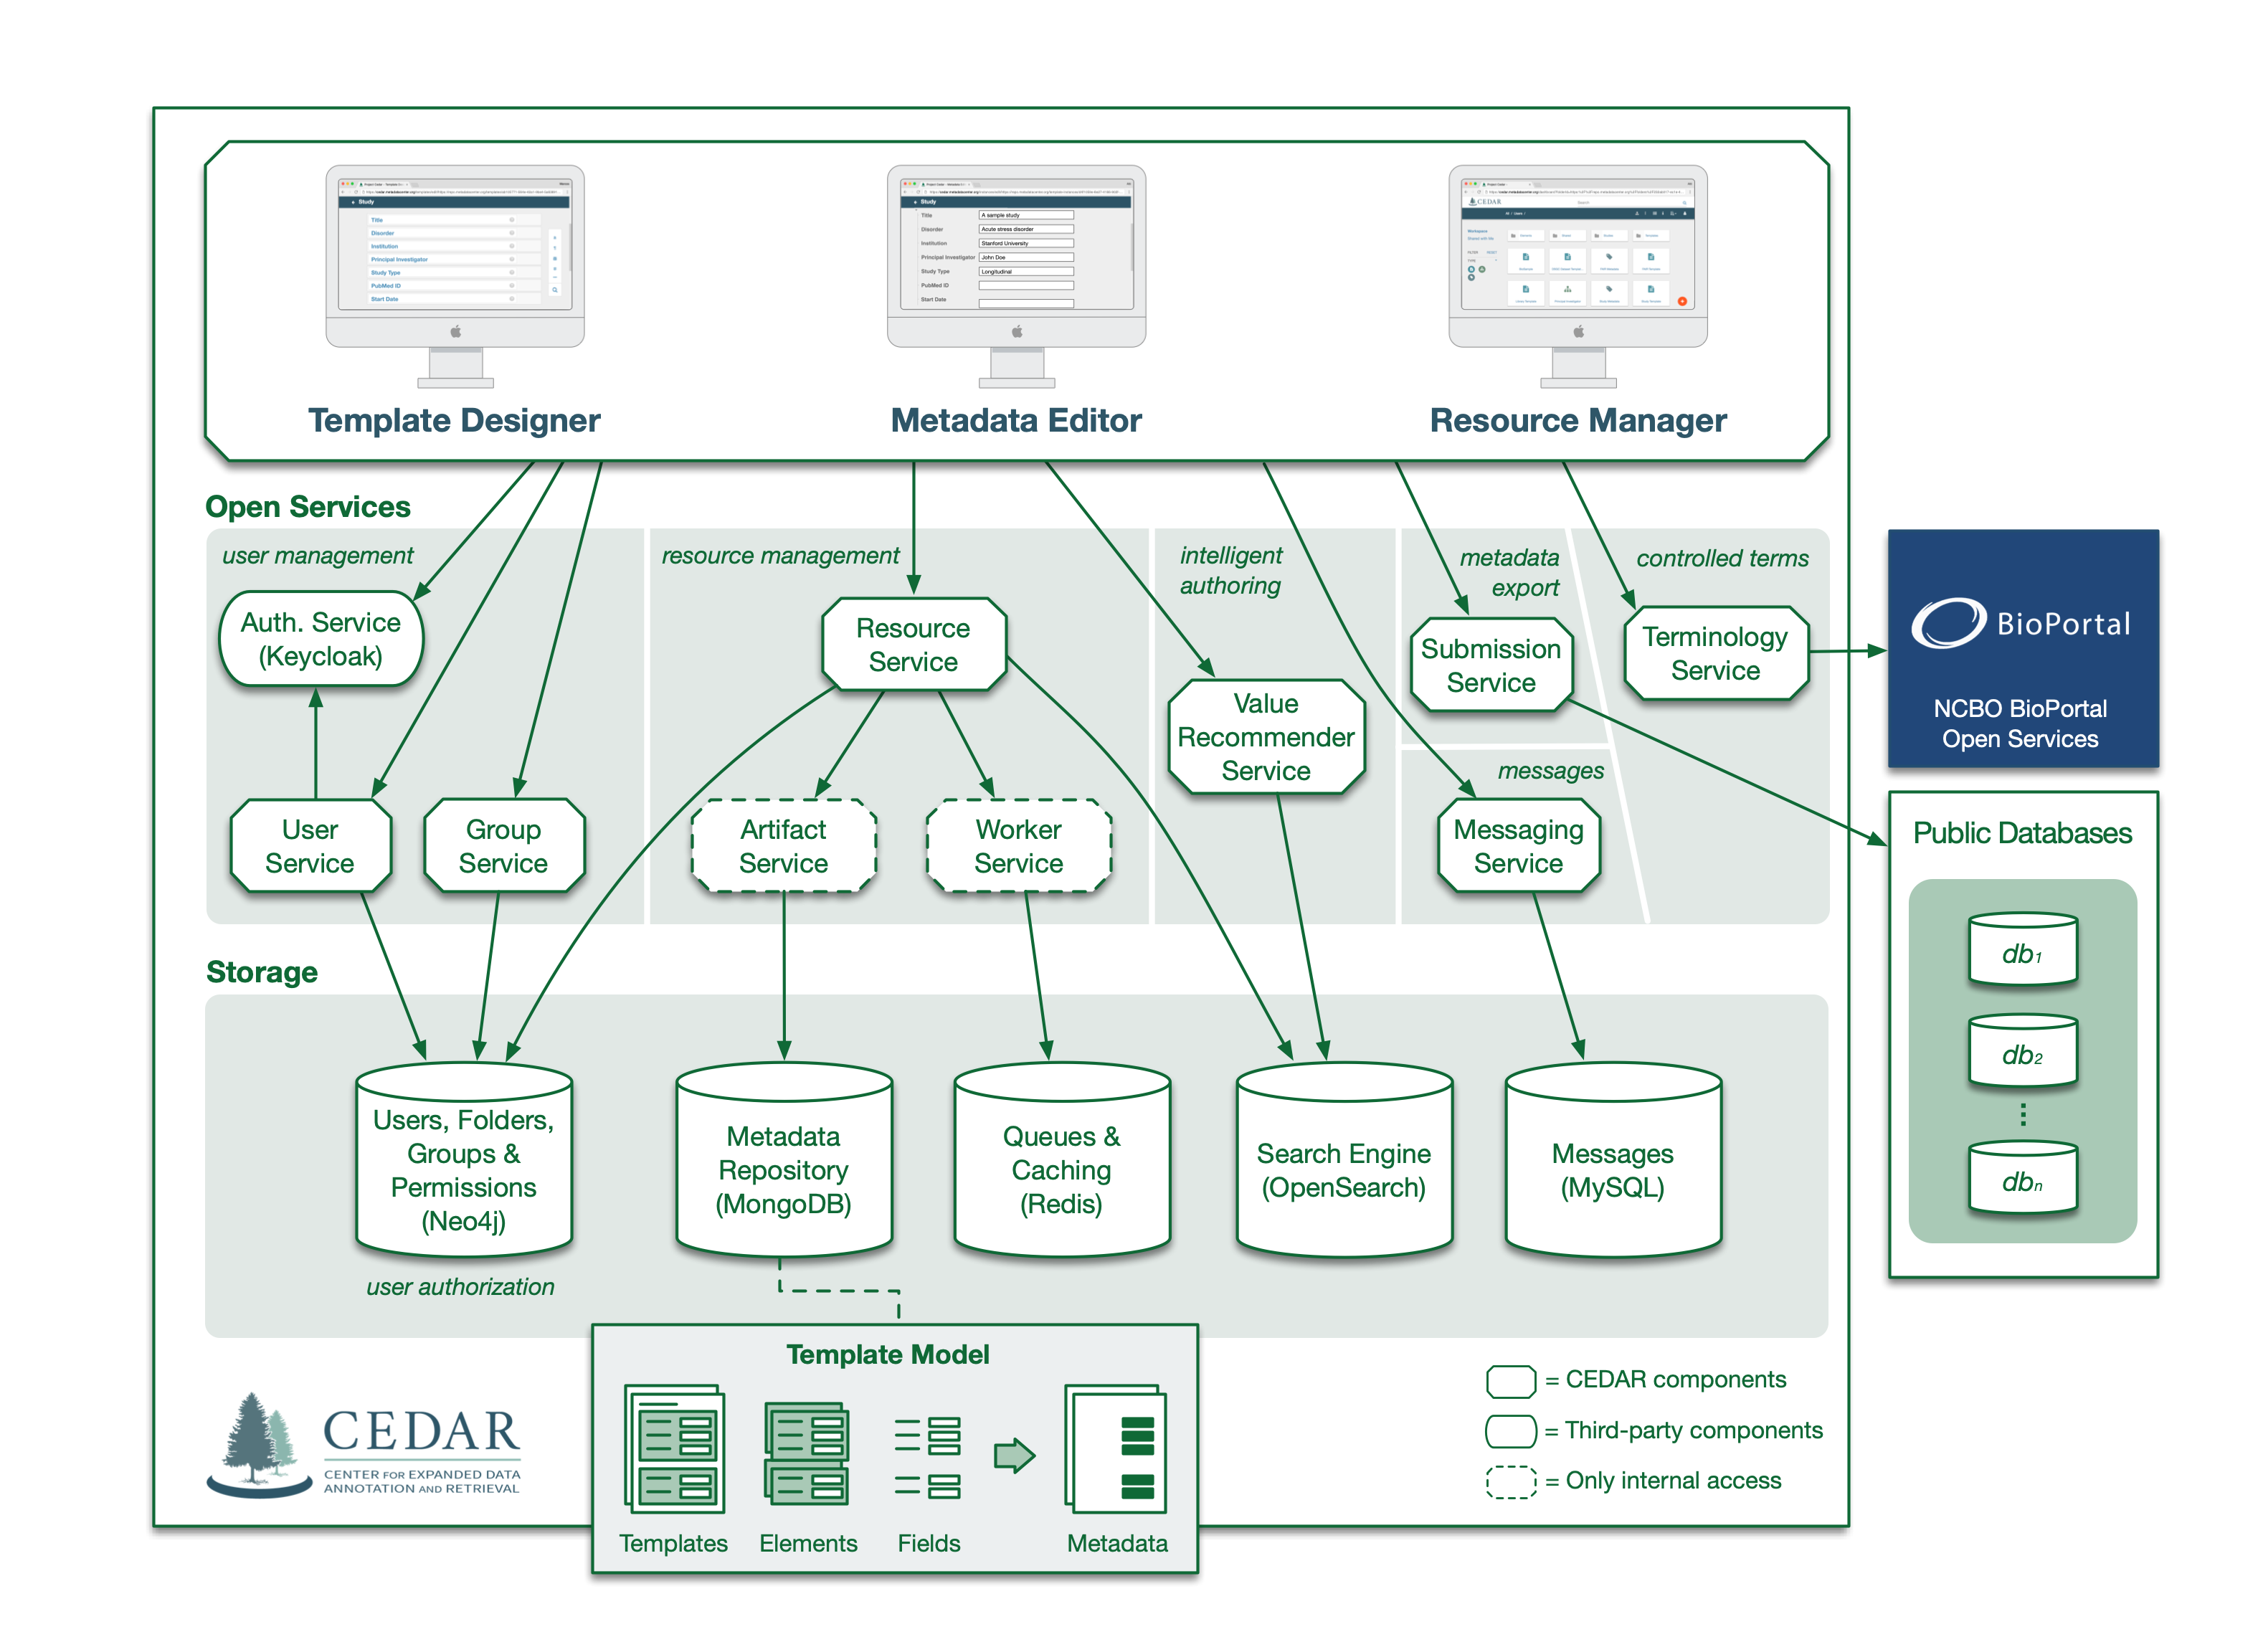
CEDAR combines browser applications, APIs, authentication, routing, and data services. A native installation runs these components as host processes while preserving the local names and secure URLs used by the complete application.
cedarcli provides one entry point for this work. It retrieves the source repositories, builds the
code in dependency order, selects the deployment mode, starts and stops CEDAR, and reports what is
running. It is a command-line tool, not a service that remains active beside the application.
This guide first prepares the host, then configures the local CEDAR environment, and finally builds and starts the application. Follow the pages in order for a first installation.
Install cedarcli
Choose a home for the source tree. The rest of this guide refers to it as CEDAR_HOME:
export CEDAR_HOME="$HOME/CEDAR"
mkdir -p "$CEDAR_HOME"
cd "$CEDAR_HOME"
Clone the CLI and give it its own Python environment:
git clone https://github.com/metadatacenter/cedar-cli
cd cedar-cli
git checkout develop
python3 -m venv .venv
source .venv/bin/activate
python -m pip install -r requirements.txt
The following alias makes cedarcli available in the current shell. Its wrapper activates the
Python environment automatically, so you do not need to activate it before every command.
alias cedarcli='source "$CEDAR_HOME/cedar-cli/cli.sh"'
Add the CEDAR_HOME export and the alias to your normal shell profile so that they are available in
new terminals.
Get the CEDAR Source
Use cedarcli to retrieve the complete development source tree and place every repository on the
development branch:
cd "$CEDAR_HOME"
cedarcli git clone all
cedarcli git checkout develop
cedarcli check repos
The final command confirms that the expected repositories are present. It does not build or start CEDAR.
Continue the Installation
Continue with Prepare the Development Mac. The next page installs the host toolchain, and the Configuration page creates the local profile and selects native mode. Mode selection is a safety boundary; it does not start CEDAR.
The remaining pages generate certificates, configure the native infrastructure, and bring up the backend and frontends. Once that one-time setup is complete, a normal rebuild and start looks like this:
cedarcli build all
cedarcli native start all
cedarcli native status
The cedarcli Manual explains the build workflow, deployment modes, selective starts and stops, and the supporting commands used during development.