Infrastructure Services
MongoDB
CEDAR uses MongoDB as the storage for the CEDAR artifacts: fields, elements, templates and metadata instances.
Install MongoBD
Please install MongoDB Community, version 5.0:
brew tap mongodb/brew
brew install mongodb-community@5.0
And pin this version:
brew pin mongodb-community@5.0
Important
Do not add MongoDB as a background service! We will have scripts in place which will start it when necessary.
Do not start MongoDB at this point!
Start MongoDB without access control
In order to have secure access to MongoDB, we will create a privileged user, a dedicated CEDAR user, and we will turn on access control.
First, we will create a power user. You will need to start MongoDB without access control from the command line.
Please replace the path below with the one applicable to your system:
$(brew --prefix)/Cellar/mongodb-community@5.0/5.0.<patch_version>/bin/mongod \
  --port 27017 \
  --dbpath $(brew --prefix)/var/mongodb
Create privileged user
Once mongoDB is started, in a different terminal connect to it:
$(brew --prefix)/Cellar/mongodb-community@5.0/5.0.<patch_version>/bin/mongo
In this new terminal use the admin collection and create a privileged user:
use admin

db.createUser(
  {
    user: "mongoRootUser",
    pwd: "changeme",
    roles: [ { role: "root", db: "admin" } ]
  }
)

exit
Close this terminal, and stop the running MongoDB by pressing Ctrl + C.
Start MongoDB with access control
startmongo
Create CEDAR application user
Connect to MongoDB with the previously created user:
$(brew --prefix)/Cellar/mongodb-community@5.0/5.0.<patch_version>/bin/mongo \
  --port 27017 \
  --username "mongoRootUser" \
  --password "changeme" \
  --authenticationDatabase "admin"
Create the user:
use cedar

db.createUser(
  {
   user: "cedarMongoUser",
   pwd: "changeme",
   roles: [ "readWrite"]
  })

exit
Restart MongoDB
stopmongo
startmongo
Check MongoDB status
cedarcli status
You should see the following line in the output:
│ MongoDB │ ✅ │ 27017 │ │
OpenSearch
CEDAR uses OpenSearch to make search for artifacts possible.
Install OpenSearch
Please install OpenSearch, version 2.18:
brew install opensearch
And pin this version:
brew pin opensearch
Important
Do not add OpenSearch as a background service! We will have scripts in place which will start it when necessary.
Do not start OpenSearch at this point!
Configure OpenSearch
vi $(brew --prefix)/etc/opensearch/opensearch.yml
Around line #17, change the cluster name configuration:
cluster.name: opensearch_cedar
Start OpenSearch
startsearch
Check OpenSearch status
cedarcli status
You should see the following lines in the output:
│ OpenSearch-REST        │ ✅     │ 9200  │               │
│ OpenSearch-Transport   │ ✅     │ 9300  │               │
MySql
CEDAR uses MySql as the backend for Keycloak as well as storage for messages and logs.
Install MySql
Please install MySql, version 9.1.0:
brew install mysql
And pin this version:
brew pin mysql
Important
Do not add MySql as a background service! We will have scripts in place which will start it when necessary.
Start MySql
startmysql
Check MySql status
cedarcli status
You should see the following line in the output:
│ MySQL │ ✅ │ 3306 │ │
Secure MySql server
$(brew --prefix)/Cellar/mysql/9.1.<minor_version>/bin/mysql_secure_installation
If you get a 'Column count' error, you will need to run the following command first:
sudo $(brew --prefix)/Cellar/mysql/8.0.<minor_version>/bin/mysql_upgrade
Respond to the questions as follows:
| Question | Answer |
|---|---|
| Would you like to setup VALIDATE PASSWORD plugin? | N |
| New password: | changeme |
| Re-enter new password: | changeme |
| Remove anonymous users? | Y |
| Disallow root login remotely? | Y |
| Remove test database and access to it? | Y |
| Reload privilege tables now? | Y |
Create CEDAR application users
Connect to the running MySql server
$(brew --prefix)/Cellar/mysql/9.1.<minor_version>/bin/mysql -uroot -p
Execute the below three groups of statements in order to create MySql databases and corresponding users for the different components of CEDAR:
CREATE DATABASE IF NOT EXISTS `cedar_keycloak`;
CREATE USER 'cedarMySQLKeycloakUser'@'localhost' IDENTIFIED BY 'changeme';
GRANT ALL PRIVILEGES ON cedar_keycloak.* TO 'cedarMySQLKeycloakUser'@'localhost';
CREATE DATABASE IF NOT EXISTS `cedar_messaging`;
CREATE USER 'cedarMySQLMessagingUser'@'localhost' IDENTIFIED BY 'changeme';
GRANT ALL PRIVILEGES ON cedar_messaging.* TO 'cedarMySQLMessagingUser'@'localhost';
CREATE DATABASE IF NOT EXISTS `cedar_log`;
CREATE USER 'cedarMySQLLogUser'@'localhost' IDENTIFIED BY 'changeme';
GRANT ALL PRIVILEGES ON cedar_log.* TO 'cedarMySQLLogUser'@'localhost';
FLUSH PRIVILEGES;
quit
Redis
CEDAR uses Redis to implement a message queue for communication between components of the system.
Install Redis
Please install Redis, version 7.2:
brew install redis@7.2
And pin this version:
brew pin redis@7.2
Important
Do not add Redis as a background service! We will have scripts in place which will start it when necessary.
Start Redis
startredis
Check Redis status
cedarcli status
You should see the following line in the output:
│ Redis-persistent │ ✅ │ 6379 │ │
Neo4j
CEDAR uses Neo4j as storage for the following artifacts of CEDAR:
- users
- groups
- categories
- permissions
Install Neo4j
Please install Neo4j Community Edition, version 5.4.0:
Important
Do not install Neo4j from a binary. We want to allow usage of APOC which will be possible if we install Neo4j from a zip.
Download the package from the distribution site:
gocedar
wget https://dist.neo4j.org/neo4j-community-5.26.0-unix.tar.gz
# or
wget https://dist.neo4j.org/neo4j-community-5.26.0-windows.zip
Once the package is downloaded, unpack it and rename it:
tar -xvf neo4j-community-5.26.0-unix.tar.gz
mv neo4j-community-5.26.0 neo4j
Important
Do not start Neo4j yet. We need to set the initial password first.
Enable APOC procedures
Move apoc-5.26.0-core.jar from labs to plugins:
mv $CEDAR_HOME/neo4j/labs/apoc-5.26.0-core.jar $CEDAR_HOME/neo4j/plugins/.
Edit the config, and enable the procedures:
vi $CEDAR_HOME/neo4j/conf/neo4j.conf
dbms.security.procedures.unrestricted=algo.*,apoc.*
Set password for the neo4j user
Neo4j server uses a default username, 'neo4j'. We will change the password for this user before we start the server.
Execute the following:
${CEDAR_NEO4J_HOME}/bin/neo4j-admin dbms set-initial-password changeme
Start Neo4j
startneo
Check Neo4j status
cedarcli status
You should see the following line in the output:
│ Neo4j │ ✅ │ 7474 │ │
Check the connection
Connect to the Administrative UI of Neo4j.
Using your browser open: http://localhost:7474/
You will see a page resembling the image below:
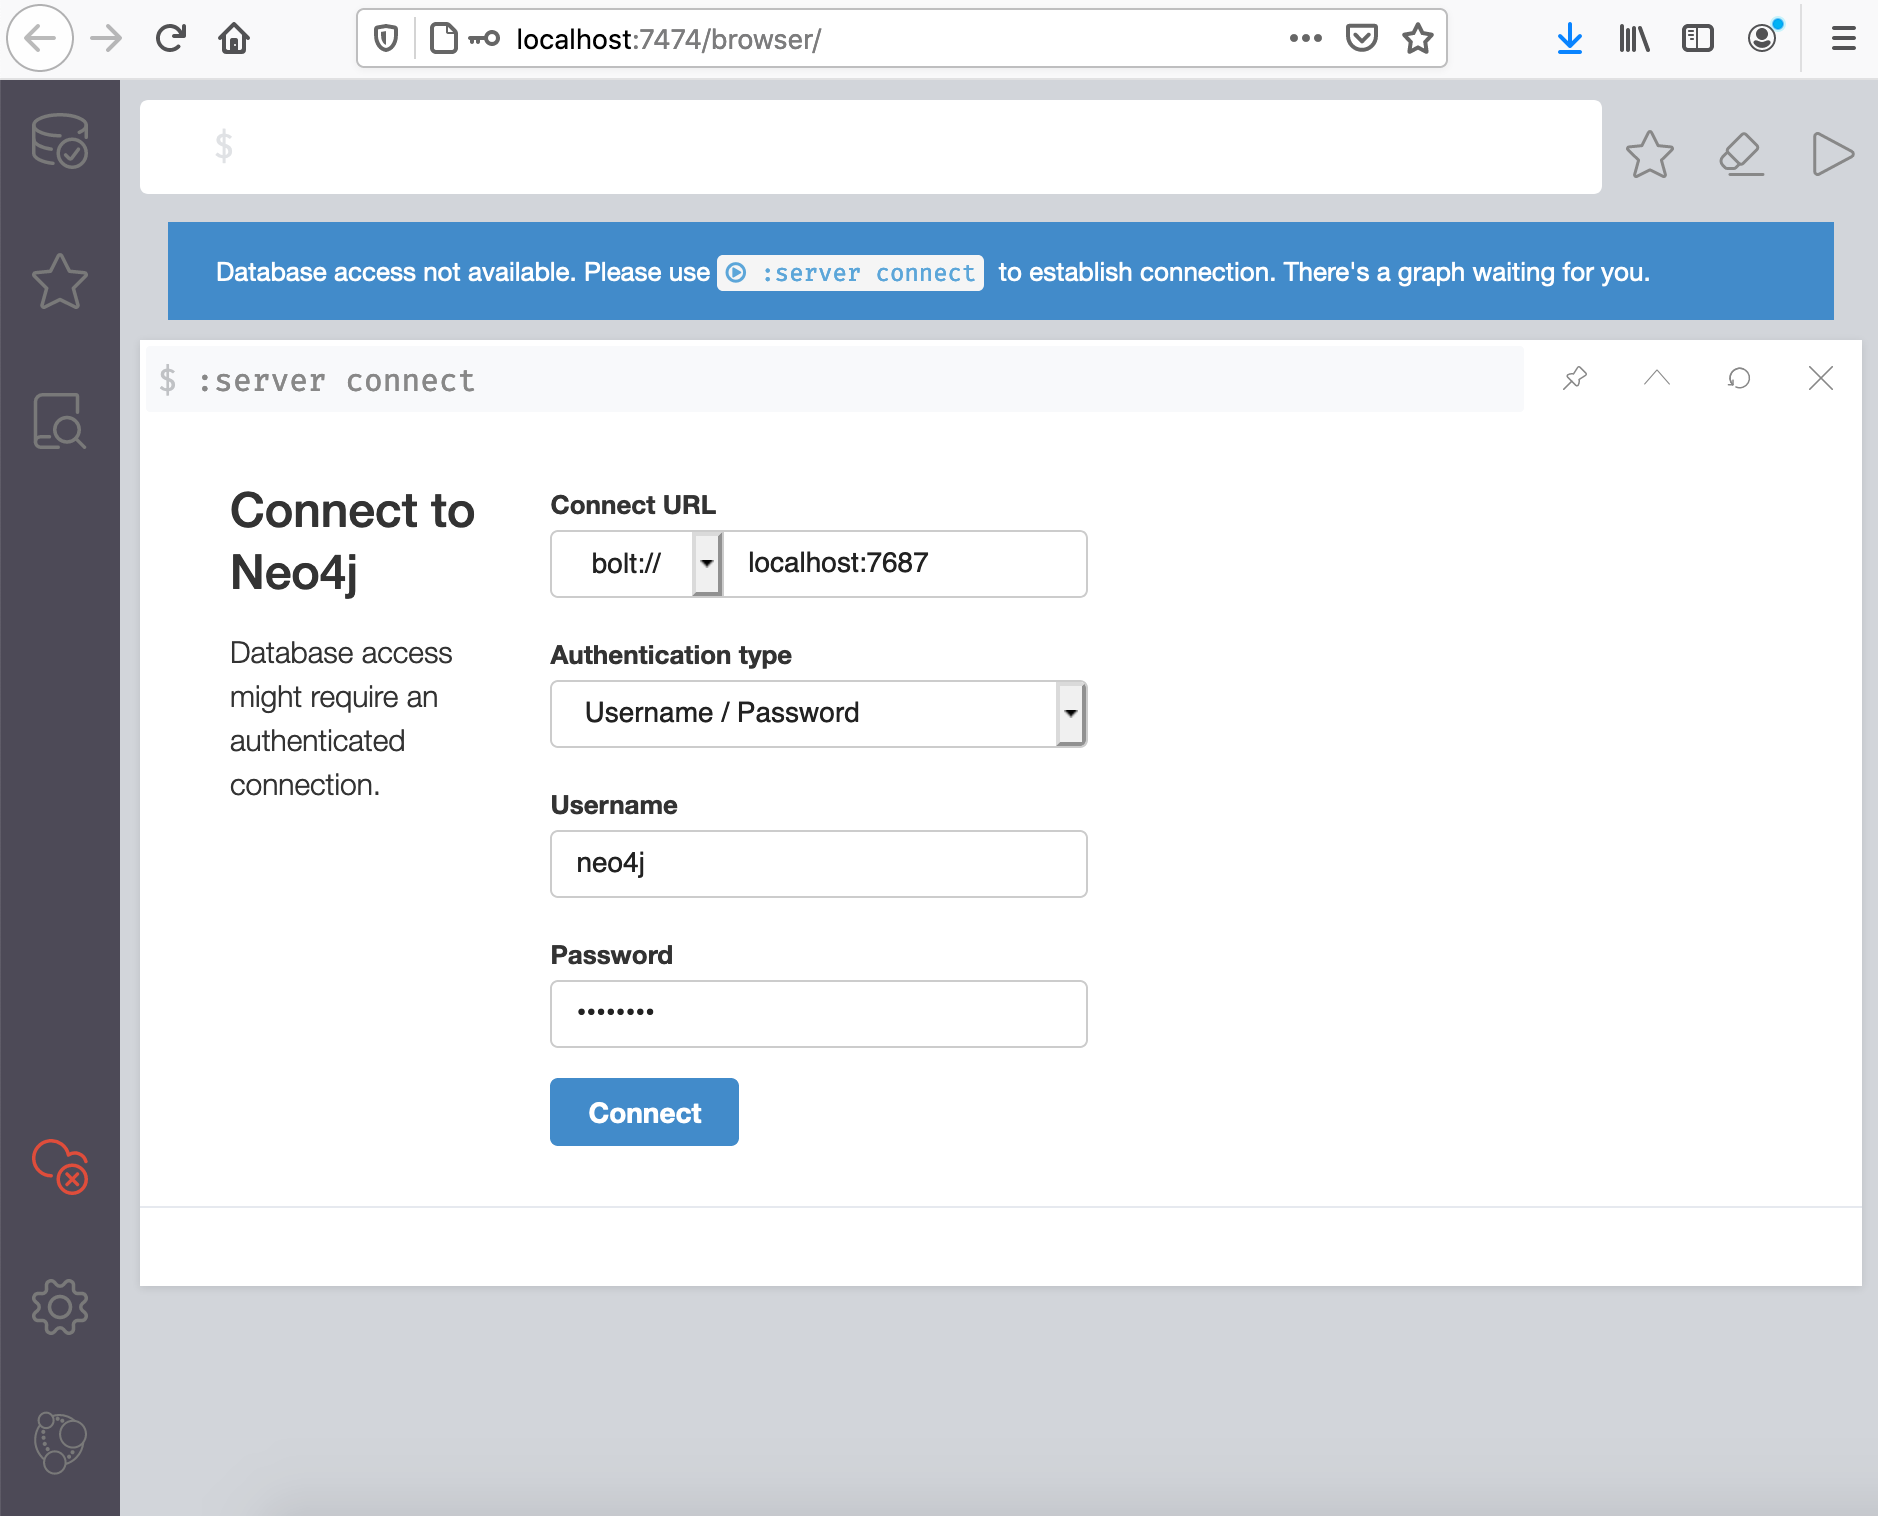
Please fill in the form according to these values:
| Question | Answer |
|---|---|
| Connect URL | bolt://localhost:7687 |
| Authentication type: | Username / Password |
| Username: | neo4j |
| Password | changeme |
You should be able to log in to the system.
Troubleshooting
Default password
If by mistake you started neo4j before changing the initial password, the password for user neo4j will be set to neo4j
Log in with this default password. You will be prompted to change it. Change it to changeme.
Change password
If at any time you decide to change the password for the neo4j user, log in to the admin UI, and type
:server change-password
into the top console line, as seen on this picture:
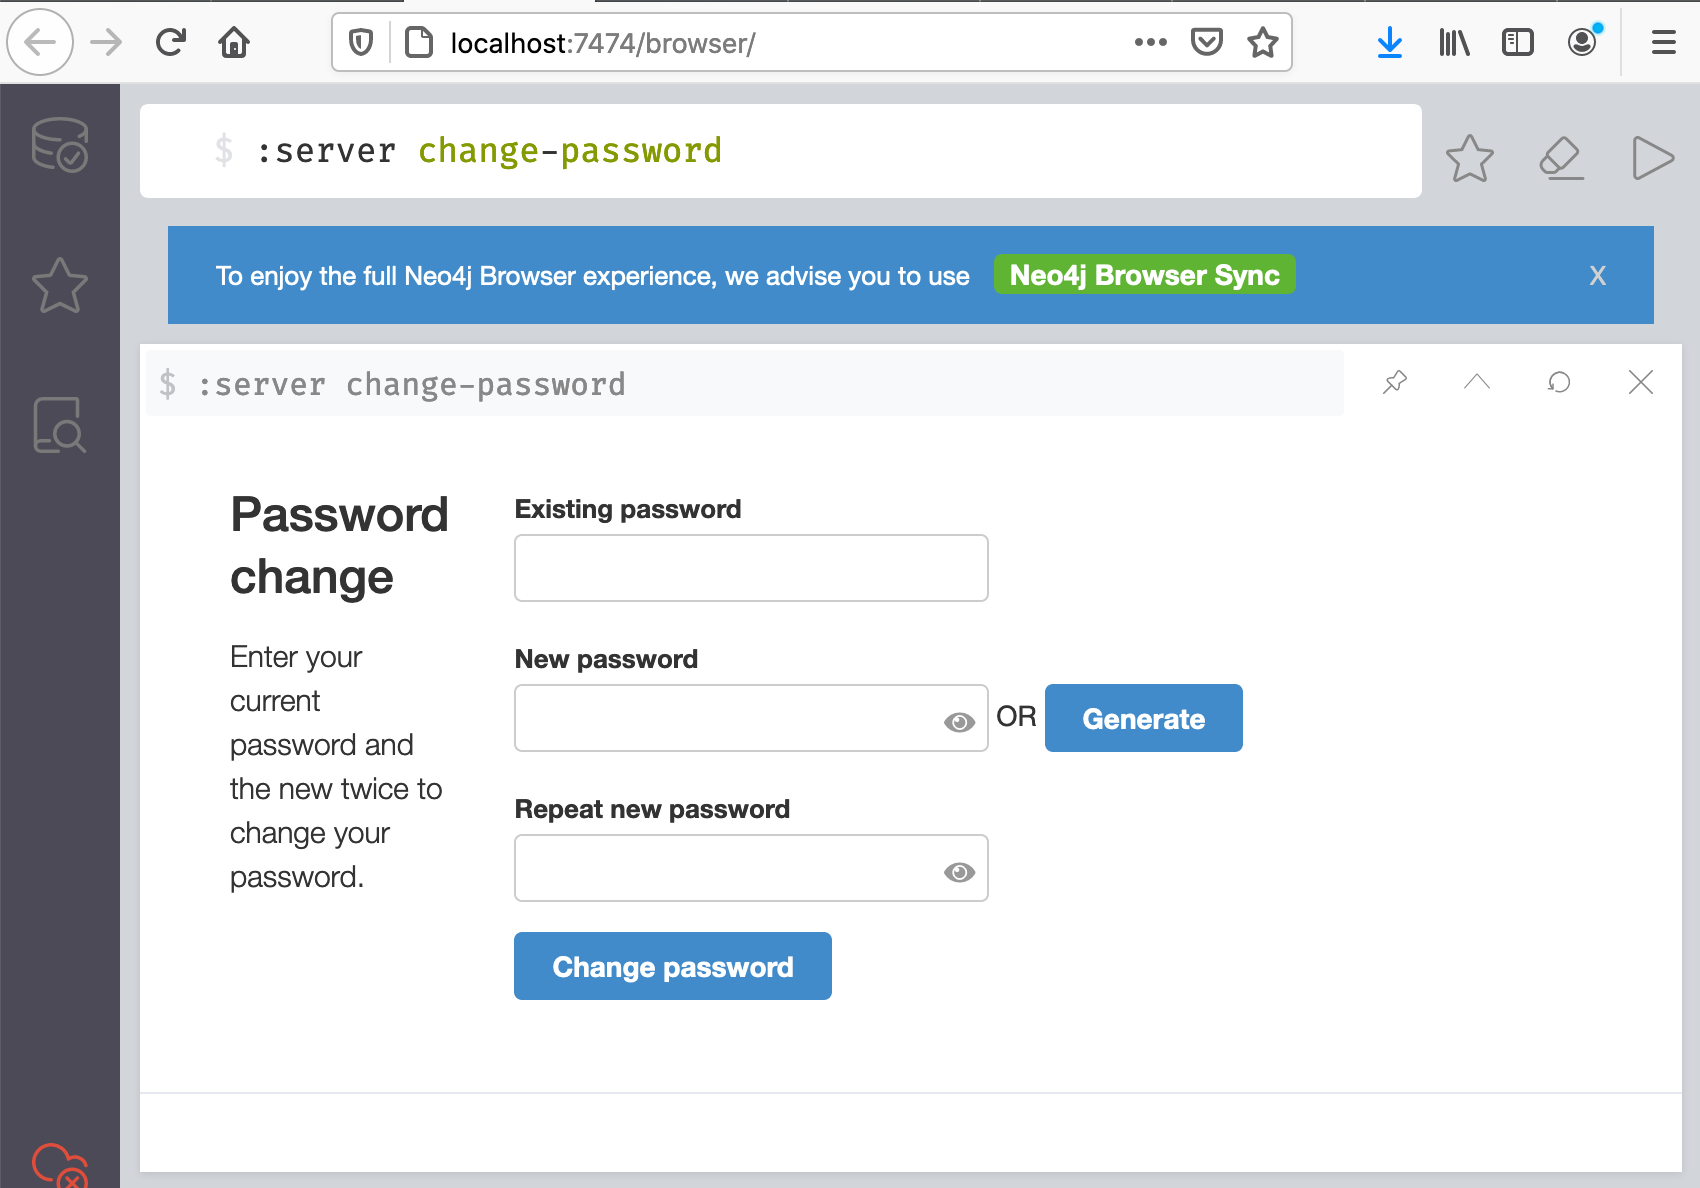
You will be able to change your password.
Keycloak
Overview
Keycloak plays a central role in the CEDAR infrastructure, as it provides the authentication for the frontend. It also allows social login, in integration with other Authentication Providers.
Once set up, the developer can 'forget' about Keycloak, it will just silently work.
However, setting it up properly is somewhat more complicated than the other components of the infrastructure.
Download Keycloak
We will download and unpack the Keycloak distribution.
Download Keycloak
Please install Keycloak, version 22.0.5:
Download the package from the distribution site:
gocedar
wget https://github.com/keycloak/keycloak/releases/download/22.0.5/keycloak-22.0.5.tar.gz
Alternative download
Alternatively, you could download Keycloak using your browser, navigating to https://www.keycloak.org/archive/downloads-22.0.5.html.
Please save the archive into CEDAR_HOME if you choose this method/
Unpack and rename Keycloak Directory
Once the package is downloaded, unpack it and rename it:
tar -xvf keycloak-22.0.5.tar.gz
mv keycloak-22.0.5 keycloak
rm keycloak-22.0.5.tar.gz
Install Keycloak event listener
The CEDAR system needs to be notified every time when a login request is performed against the Keycloak authentication module.
In order to accomplish this, we have an event listener in place.
This even lister part of the CEDAR code base, and can be found in the cedar-keycloak-event-listener repo.
You will need to install this event listener under Keycloak
Ideally this event listener should be updated all the times when a CEDAR build is performed. However, if there are no changes in the CEDAR codebase which will have an effect on the event listener, it is ok not to update the event listener.
Deploy the event listener JAR
The following command will copy the event listener into it's proper location:
cedarcli dev copy-keycloak-listener
You can execute this command from any location. This command copies the event listener JAR cedar-keycloak-event-listener.jar from $CEDAR_HOME/cedar-keycloak-event-listener/target/ to ${CEDAR_KEYCLOAK_HOME}/providers/.
Deploy event listener
Please deploy the event listener every time a change in its code is performed.
Also please deploy it after each CEDAR release update.
Install CEDAR Keycloak theme
Keycloak lets user customize the registeration and login experience by allowing the default theme to be overridden.
The CEDAR Keycloak theme can be found in the ${CEDAR_HOME}/cedar-development/os-mirror/development-macos/CEDAR_HOME/keycloak/themes/cedar-03/ directory.
Copy the theme files
mkdir ${CEDAR_KEYCLOAK_HOME}/themes/cedar-03/
cp -r ${CEDAR_HOME}/cedar-development/os-mirror/development-macos/CEDAR_HOME/keycloak/themes/cedar-03/* \
  ${CEDAR_KEYCLOAK_HOME}/themes/cedar-03/
Configure Keycloak
In order for Keycloak to use MySQL database, use right certificates and host name, please copy the pre-packaged config file over the existing one:
mv ${CEDAR_KEYCLOAK_HOME}/conf/keycloak.conf ${CEDAR_KEYCLOAK_HOME}/conf/keycloak.conf.original
cp ${CEDAR_HOME}/cedar-development/os-mirror/development-macos/CEDAR_HOME/keycloak/conf/keycloak.conf ${CEDAR_KEYCLOAK_HOME}/conf/.
Apply the changes
Run:
${CEDAR_KEYCLOAK_HOME}/bin/kc.sh build
Set up CEDAR realm
Keycloak groups the settings and users of an organization under realms.
Setting up a realm is not trivial, so instead of guiding the user through the UI of Keycloak, we created a CEDAR realm that can be imported into Keycloak easily.
The CEDAR Keycloak realm can be found in the ${CEDAR_HOME}/cedar-util/keycloak/realm/ directory.
Import CEDAR realm
You will need the MySql server running for this step. Check if it is already available using cedarcli status:
startmysql
cedarcli status
Importing a realm is done by starting Keycloak in the import mode
cd ${CEDAR_HOME}/cedar-development/os-mirror/development-macos/CEDAR_HOME/keycloak/
${CEDAR_KEYCLOAK_HOME}/bin/kc.sh \
  import \
  --file keycloak-realm.CEDAR.development.2023-07-05.json
Please monitor the log output for anomalies. Not that this importation process can take several minutes so please wait until it has finished.
Once the logs stopped, you should see the following line:
YYYY-mm-dd HH:MM:SS,SSS INFO [io.quarkus] (main) Keycloak stopped in X.XXXs
Start Keycloak in regular mode
You can start Keycloak from now on by executing:
startkk
Check Keycloak status
cedarcli status
You should see the following line in the output:
│ Keycloak │ ✅ │ 8080 │ │
Stop Keycloak
If you need to stop Keycloak, do that by:
killkk
The script starts with kill to emphasize that actually the process is killed.
Export CEDAR realm
Export CEDAR realm
If at any moment you need to back up your realm, and you do not wish or cannot perform a full database export, you can export the realm as a JSON file.
This file will contain your realm settings, your users, roles and credentials.
It will not contain any logs or historical data.
To export the file, you will need to stop Keycloak, export the data, and then start it again.
killkk
${CEDAR_KEYCLOAK_HOME}/bin/kc.sh export \
  --realm CEDAR \
  --users realm_file \
  --file ${CEDAR_HOME}/keycloak-realm.CEDAR.development.<YOUR-DATE-HERE>.json
startkk
Nginx
Overview
Nginx acts as a reverse proxy in front of all CEDAR microservices, frontends, and Keycloak.
As such, each request to CEDAR arrives to nginx on the standard 443 https port.
Based on the subdomain in the request, nginx will forward the request to one of the components.
Nginx talks on plain http with all the microservices and the frontends.
Nginx connects to Keycloak using https.
List of services behind nginx
This table summarizes the services that are proxied by nginx.
The microservices are ordered in increasing port number order, which shows the evolution of CEDAR.
The frontend is delivered differently during development than on production.
List of services
The table is provided for better understanding of the infrastructure, it is not required for the installation process.
| Subdomain / repo name |
Service type | Upstream / content on dev |
Upstream / content on prod |
Repo on dev / prod |
|---|---|---|---|---|
| . | Redirect | nginx redirect |
nginx redirect |
N/A |
| cedar | Frontend | gulp on 4200 |
nginx directory access |
cedar-template-editor |
| openview | Frontend | ng serve on 4220 |
nginx directory access |
cedar-openview / cedar-opernview-dist |
| content | Content distribution | ng serve on 4240 |
nginx directory access |
cedar-content-distribution |
| monitoring | Frontend | ng serve on 4300 |
nginx directory access |
cedar-monitoring/cedar-monitoring-dist |
| artifacts | Frontend | ng serve on 4320 |
nginx directory access |
cedar-artifacts/cedar-artifacts-dist |
| bridging | Frontend | ng serve on 4340 |
nginx directory access |
cedar-bridging/cedar-bridging-dist |
| auth | Keycloak | 8443 | 8443 | N/A |
| artifact | Microservice | java on 9001 | cedar-artifact-server | |
| repo | Microservice | java on 9002 | cedar-repo-server | |
| schema | Microservice | java on 9003 | cedar-schema-server | |
| terminology | Microservice | java on 9004 | cedar-terminology-server | |
| user | Microservice | java on 9005 | cedar-user-server | |
| valuerecommender | Microservice | java on 9006 | cedar-valuerecommender-server | |
| resource | Microservice | java on 9007 | cedar-resource-server | |
| impex | Microservice | java on 9008 | cedar-impex-server | |
| group | Microservice | java on 9009 | cedar-group-server | |
| submission | Microservice | java on 9010 | cedar-submission-server | |
| worker | Microservice | java on 9011 | cedar-worker-server | |
| messaging | Microservice | java on 9012 | cedar-messaging-server | |
| open | Microservice | java on 9013 | cedar-openview-server | |
| monitor | Microservice | java on 9014 | cedar-monitor-server | |
| bridge | Microservice | java on 9015 | cedar-bridge-server |
Install Nginx
Please install Nginx, version 1.27.3:
brew install nginx
Important
Do not add nginx as a background service! We will have scripts in place which will start it when necessary.
Do not start nginx at this point!
Configure nginx
Configuring nginx for CEDAR would involve a huge amount of editing.
Because of this, we provide ready-made config files that you will need to put in the
proper place, and link them under the main nginx configuration.
nginx
Once configured, nginx will work without any further intervention.
However, it will be useful to understand what it actually does for CEDAR.
nginx config
The way of configuring nginx for CEDAR could be regarded as not totally aligning with the nginx-way (custom directory holding the configs).
However, we decided to go this way for the readability and maintainability.
Copy config files and SSL certificates
cp -R ${CEDAR_DEVELOP_HOME}/os-mirror/development-macos/opt/homebrew/etc/nginx/ \
  $(brew --prefix)/etc/nginx/
Replace user home folder if needed
Important
Please observe, that the nginx config files do not contain any variable interpolation.
This is due to nginx intentionally not supporting this easily.
If for some reason your CEDAR_HOME is not /Users/cedar-dev/CEDAR/, please replace this value in all the config files with the proper value from your system.
cd $(brew --prefix)/etc/nginx/cedar/
find . -type f -name '*.conf' -exec sed -i '' s/cedar-dev/YOUR_HOME_FOLDER_NAME_HERE/g {} +
Start nginx
You can start nginx with our dedicated alias.
User password required
Since nginx listens on a low port (lower than 1024), it requires your password to start up.
You need necessary privileges to start a listener on a low port.
If the current user was created as Administrator on a Mac, that would be enough.
Starting nginx without user password
Entering the user's password in every new shell window could be a disturbance.
You can circumvent this if you add the scripts that startnginx and stopnginx uses to the sudoers.
Edit the sudoers file:
sudo visudo -f /etc/sudoers.d/cedar-dev
Add this line to the file:
cedar-dev ALL=(ALL) NOPASSWD: /Users/cedar-dev/CEDAR/cedar-development/bin/util/services-osx/startnginx.sh,/Users/cedar-dev/CEDAR/cedar-development/bin/util/services-osx/stopnginx.sh
Quicker version - username and CEDAR_HOME
The above assumes that your username is cedar-dev and CEDAR is installed under /Users/cedar-dev/CEDAR/ (value of ${CEDAR_HOME})
If that is not true, change the values in the above command and text
Alternatively you can execute:
echo `whoami` 'ALL=(ALL) NOPASSWD:' ${CEDAR_HOME}/cedar-development/bin/util/services-osx/startnginx.sh,${CEDAR_HOME}/cedar-development/bin/util/services-osx/stopnginx.sh
and add the content to the file opened after:
sudo visudo -f /etc/sudoers.d/cedar-dev
Allow nginx to read CEDAR_HOME
Nginx will serve static content aside of acting as a reverse proxy. In order to achieve this, it will need read privileges for the full path of the CEDAR_HOME.
Please execute the following command to allow it to read your home directory:
chmod o+x /Users/cedar-dev/
Please replace cedar-dev with your own username if you are using a different one!
Start nginx
startnginx
Check nginx status
cedarcli status
You should see the following line in the output:
│ NGINX │ ✅ │ 80 │ │
Set up CEDAR Keycloak administrator
In order to administer Keycloak, you will need to set up an administrator user.
This is a global system-wide Keycloak administrator. It is different than the cedar-admin user that you will use to administer CEDAR resources.
Start Keycloak
startkk
Access the Administration Console
In your browser navigate to: http://localhost:8080/.
Create administrator user
In the form enter the following values:
| Question | Answer |
|---|---|
| Username: | administrator |
| New password: | changeme |
| Re-enter new password: | changeme |
Submit the form.
After the user is created, click on the "Administration Console >" link, and log in with your user.
Stop Keycloak
killkk
Starting the infrastructure services
Start the services
startinfra
Check status
cedarcli status
You should see all the services in the Infrastructure (2nd) block in Running (✅) status.
If this is not the case, stop the infrastructure services using one of these ways:
- with the
stopinfracommand from another console - with a single Ctrl + C form the active console.
Then please try running them again. If this does not help, please analyze the output for indications of what went wrong.
Stop infrastructure services
stopinfra